I wanted to bring a peculiar issue to your attention that I encountered while performing a large mailbox migration from Google Workspace to Microsoft 365. As you know, meticulous planning is crucial for these migrations, and I ensured that everything was set up perfectly. I designed my plan carefully, created an XML file, and enabled the Set-Mailbox -ELCProcessingDisabled:$true for each user’s mailbox. Given that I was dealing with a particularly large mailbox of around 200 GB, I split the batches into separate XML and CSV files per mailbox to speed up the synchronization process.
However, I ran into a persistent error with a specific user’s Archive mailbox. The status would remain in provisioning and eventually fail, displaying the error:
Error: MigrationProvisioningPermanentException: MailboxLocations: Cannot parse the following: SubstrateExtension. –> MailboxLocations: Cannot parse the following: SubstrateExtension.
This error indicates an issue with parsing the SubstrateExtension mailbox type during the migration, which can occur when moving data from Google Workspace to Microsoft 365 or during other mailbox provisioning tasks.
Despite following the recommended steps from various forums, I couldn’t resolve the issue. Then, an idea struck me, reminding me of my earlier days with Exchange starting from version 5.5. I decided to return to basics, decoding the error line by line and referring back to the Microsoft article on migrating large mailboxes from Google or other IMAP sources to Microsoft 365 Exchange.
I discovered that the Archive mailbox couldn’t locate the mailbox, leading to the provisioning failure. To address this, I ran the command Get-MailboxLocation -User joannav@contoso.com to find the MailboxGuid. Since the primary mailbox had synchronized correctly, I created a new XML file with only the Archive Mailbox, using the GUID-of-Existing-Mailbox instead of MainArchive. This adjustment allowed the syncing to start without any issues.
I wanted to share this experience with you in case you encounter a similar problem. Sometimes, going back to the basics and understanding the root of the error can provide the solution.
Migrating from Google Workspace to Microsoft 365 can be a daunting task, especially when dealing with mailboxes over 100 GB. This guide provides an in-depth look at the challenges and solutions for a successful migration, catering to both normal and large mailboxes.
Assessment and Planning
Before initiating the migration, it’s crucial to carry out a thorough assessment of your current Google Workspace environment. Identify the number of users, mailbox sizes, and any potential issues that might arise. Planning should include:
Identifying key stakeholders
Defining the migration timeline
Determining the migration method
Allocating resources and roles
You can migrate the following functionalities from Google Workspace to Microsoft 365 or Office 365:
Mail & Rules Calendar Contacts
You can migrate batches of users from Google Workspace to Microsoft 365 or Office 365, allowing a migration project to be done in stages. This migration requires that you provision all of your users who will be migrated as mail-enabled users outside of the migration process. You must specify a list of users to migrate for each batch.
All procedures in this article assume that your Microsoft 365 or Office 365 domain is verified and that your TXT records have been set up. For more information, see Set up your domain (host-specific instructions).
Select your method of migration
You can migrate from Google Workspace using any of the following methods:
Automated – through the Exchange admin center
Manual – through the Exchange admin center
PowerShell
Migration limitations
Important Microsoft’s data migration tool is currently unaware of tools enforcing messaging records management (MRM) or archival policies. Because of this, any messages that are deleted or moved to archive by these policies will result in the migration process flagging these items as “missing”. The result is perceived data loss rather than actual data loss, which makes it much harder to identify actual data loss during any content verification checks. Therefore, Microsoft strongly recommends disabling all MRM and archival policies before attempting any data migration to mailboxes.
Note The largest single email message that can be migrated is based on the transport configuration for your configuration. The default limit is 35 MB. To increase this limit, see Office 365 now supports larger email messages.
Throughput limitations for contacts and calendars completely depend on the quota restrictions for your tenant’s service account on the Google Workspace side.
Other migration limitations are described in the following table:
Data type
Limitations
Mail
Vacation settings, Automatic reply settings
Meeting rooms
Room bookings won’t be migrated
Calendar
Shared calendars and event colors won’t be migrated
Contacts
A maximum of three email addresses per contact are migrated over
Contacts
Gmail tags, contact URLs, and custom tags won’t be migrated
Google Workspace migration prerequisites in Exchange Online
The following procedures must be performed (in the order mentioned) before you start the process of Google Workspace migration:
Create a subdomain for mail routing to Microsoft 365 or Office 365
Create a subdomain for mail routing to your Google Workspace domain
Provision users in Microsoft 365 or Office 365
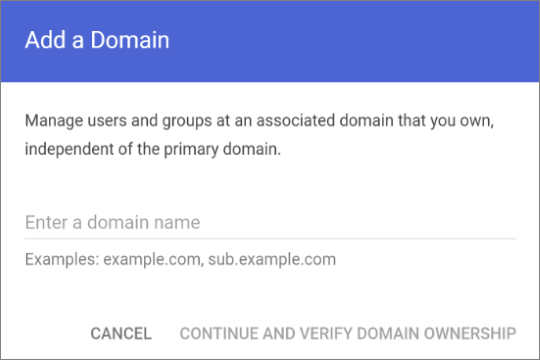
Create a subdomain for mail routing to Microsoft 365
Note The option Add a domain won’t be available if using the legacy free edition of G Suite.
Enter the domain that you’ll use for routing mails to Microsoft 365 or Office 365, select User alias domain, and then select ADD DOMAIN & START VERIFICATION. A subdomain of your primary domain is recommended (for example, “m365mail.domain.com”, when “domain.com” is your primary domain) so that it will be automatically verified. If another domain (such as “domain.onmicrosoft.com”) is set, Google will send emails to each individual address with a link to verify the permission to route mail. Migration won’t complete until the verification is completed.
Note If you see an error GmailForwardingAddressRequiresVerificationException has occurred during the batch, skip this step of creating a subdomain for forwarding emails from the gmail side.
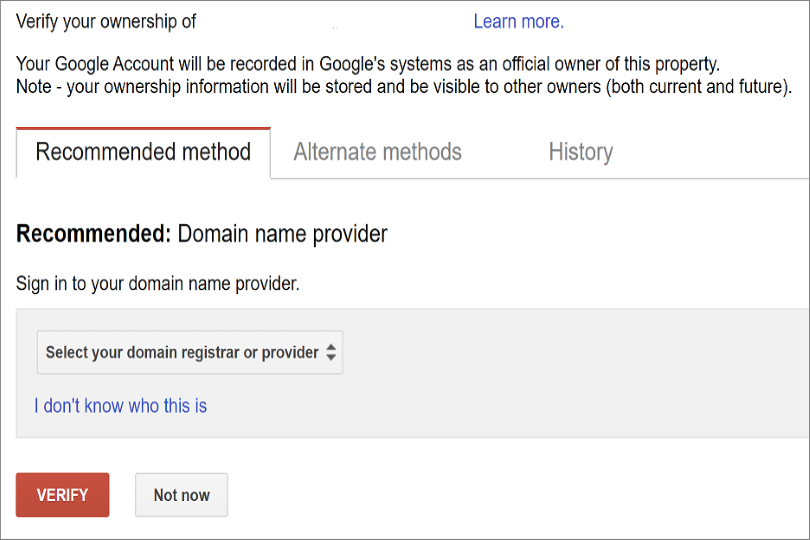
Follow any subsequent steps that are then required to verify your domain till the status is shown as Active. If you chose a subdomain of your primary domain (created in step 3), your new domain may have been verified automatically.
Sign in to your DNS provider and update your DNS records so that you have an MX record at the domain you created (in step 3), pointing to Microsoft 365 or Office 365. Ensure that this domain (created in step 3) is an accepted domain in Microsoft 365 or Office 365. Follow the instructions in Add a domain to Microsoft 365 to add the Microsoft 365 or Office 365 routing domain (“m365mail.domain.com”) to your organization and to configure DNS to route mail to Microsoft 365 or Office 365.
Note The migration process won’t be able to complete if an unverified routing domain is used. Choosing the built-in “tenantname.onmicrosoft.com” domain for routing mail to Office 365 instead of a subdomain of the primary Google Workspace domain occasionally causes issues that Microsoft is not able to assist with, besides causing Microsoft to recommend that the user manually verify the forwarding address or contact Google support.
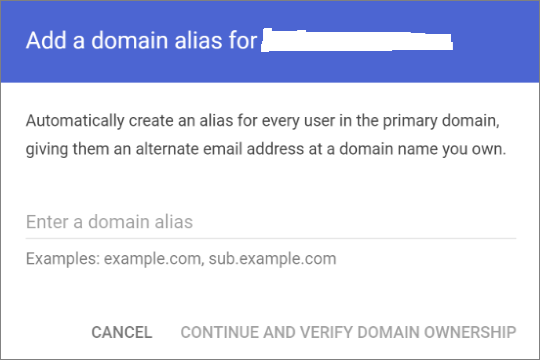
Create a subdomain for mail routing to your Google Workspace domain
Enter the domain that you’ll use for routing mails to Google Workspace, select User alias domain, and then select ADD DOMAIN & START VERIFICATION. A subdomain of your primary domain is recommended (for example, “gsuite.domain.com”, when “domain.com” is your primary domain) so that it will be automatically verified.
Follow any subsequent steps that are then required to verify your domain till your domain’s status is shown as Active. If you chose a subdomain of your primary domain (created in step 3), your new domain may have been verified automatically.
Note It may take up to 24 hours for Google to propagate this setting to all the users in your organization.
Important If you are using non-default Transport settings in your Microsoft 365 or Office 365 organization, you should check whether the mail flow will work from Office 365 to Google Workspace. Ensure that either your default Remote Domain (“*”) has Automatic Forwarding enabled, or that there is a new Remote Domain for your Google Workspace routing domain (for example, “gsuite.domain.com“) that has Automatic Forwarding enabled.
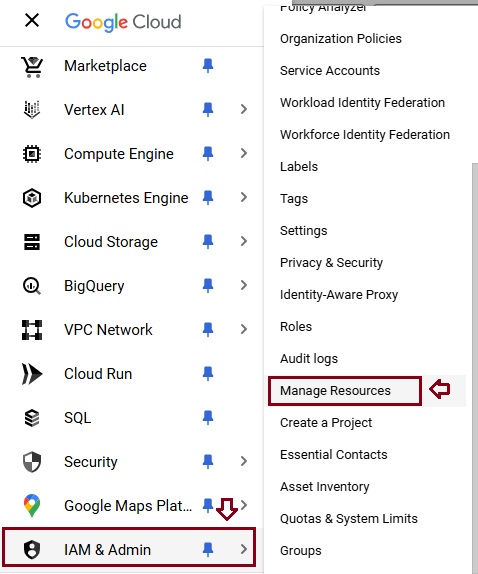
Check Google Cloud platform permissions
An automated scenario requires the Google Migration administrator to be able to perform the following steps in the Google admin console:
Create a Google Workspace project.
Create a Google Workspace service account in the project.
Create a service key.
Enable all APIs – Gmail, Calendar, and Contacts.
The Google Migration administrator needs the following permissions to complete these steps:
resourcemanager.projects.create
iam.ServiceAccounts.create
The most secure way to achieve completion of these four steps is to assign the following roles to the Google Migration administrator:
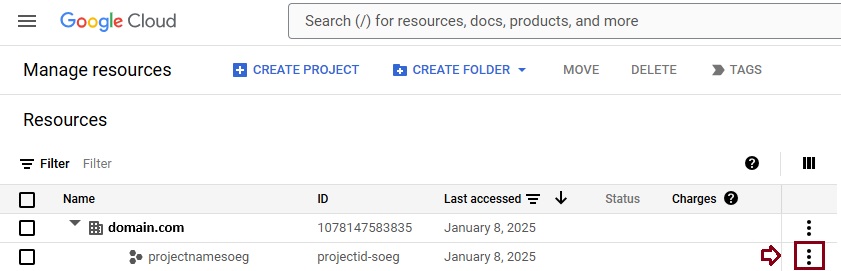
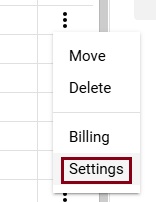
Select the appropriate resource and in the right-hand pane under the Permissions tab, select Add Principal.
Enter your Google Migration administrator credentials, enter Project Creator in the filter, and select Project Creator. Select Add Another Role, enter Create Service Accounts in the filter, and select Create Service Accounts. Select Save.
Note It might take up to 15 minutes to propagate role assignment changes across the globe.
Provision users in Microsoft 365. Once your Google Workspace environment has been properly configured, you can complete your migration in the Exchange admin center or through the Exchange Online PowerShell. Before proceeding with either method, ensure that Mail Users have been provisioned for every user in the organization who will be migrated (either now or eventually). If any users aren’t provisioned, provision them using the instructions in Manage mail users.
Very Important Note Microsoft recommend that the Default MRM Policy and Archive policies be disabled for these users until their migration has been completed. When such features remain enabled during migration, there is a chance that some messages will end up being considered “missing” during the content verification process.
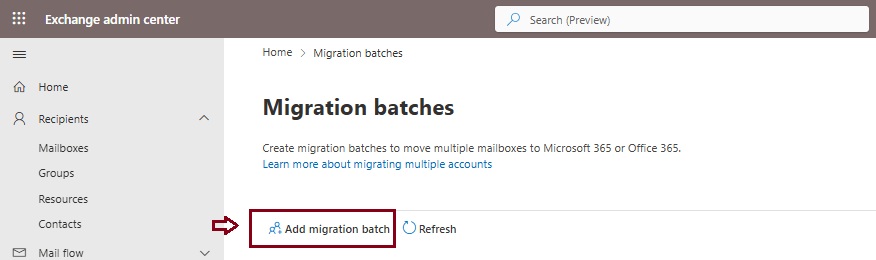
Start an automated Google Workspace migration batch in EAC
Give migration batch a unique name: Enter a unique name.
Select the mailbox migration path: Verify that Migration to Exchange Online is selected.
When you’re finished, click Next.
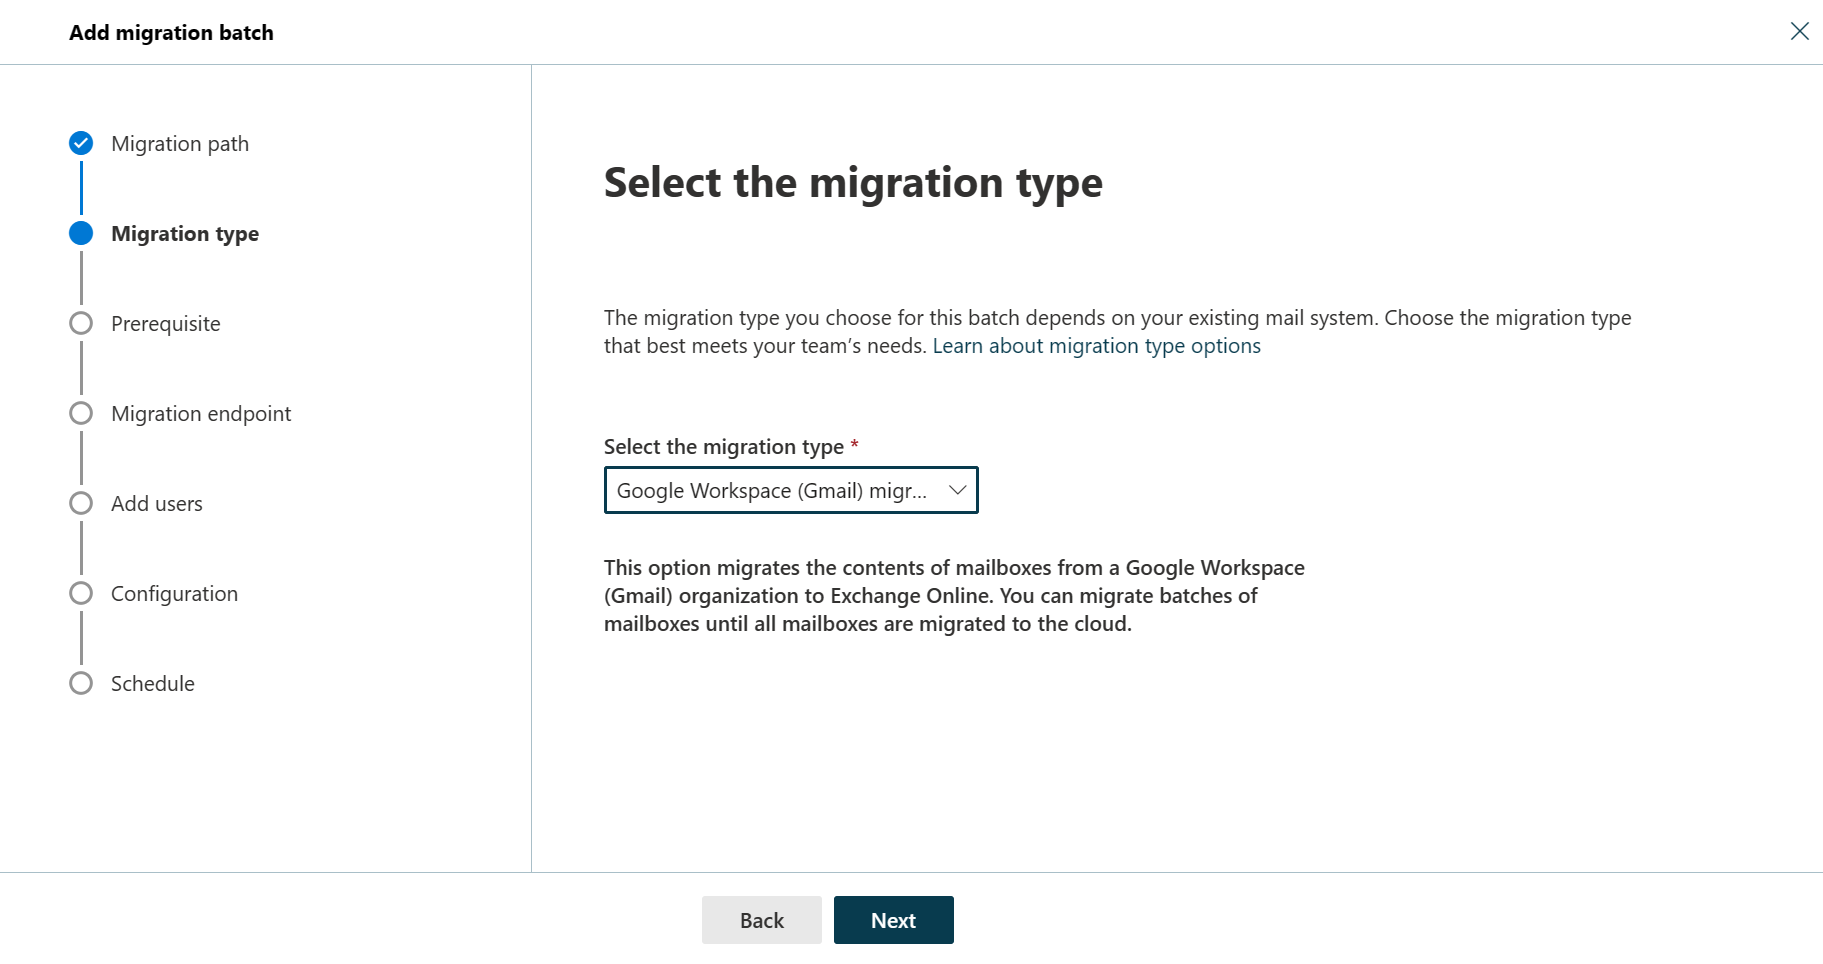
On the Select the migration type page, select Google Workspace (Gmail) migration as migration type, and click Next.
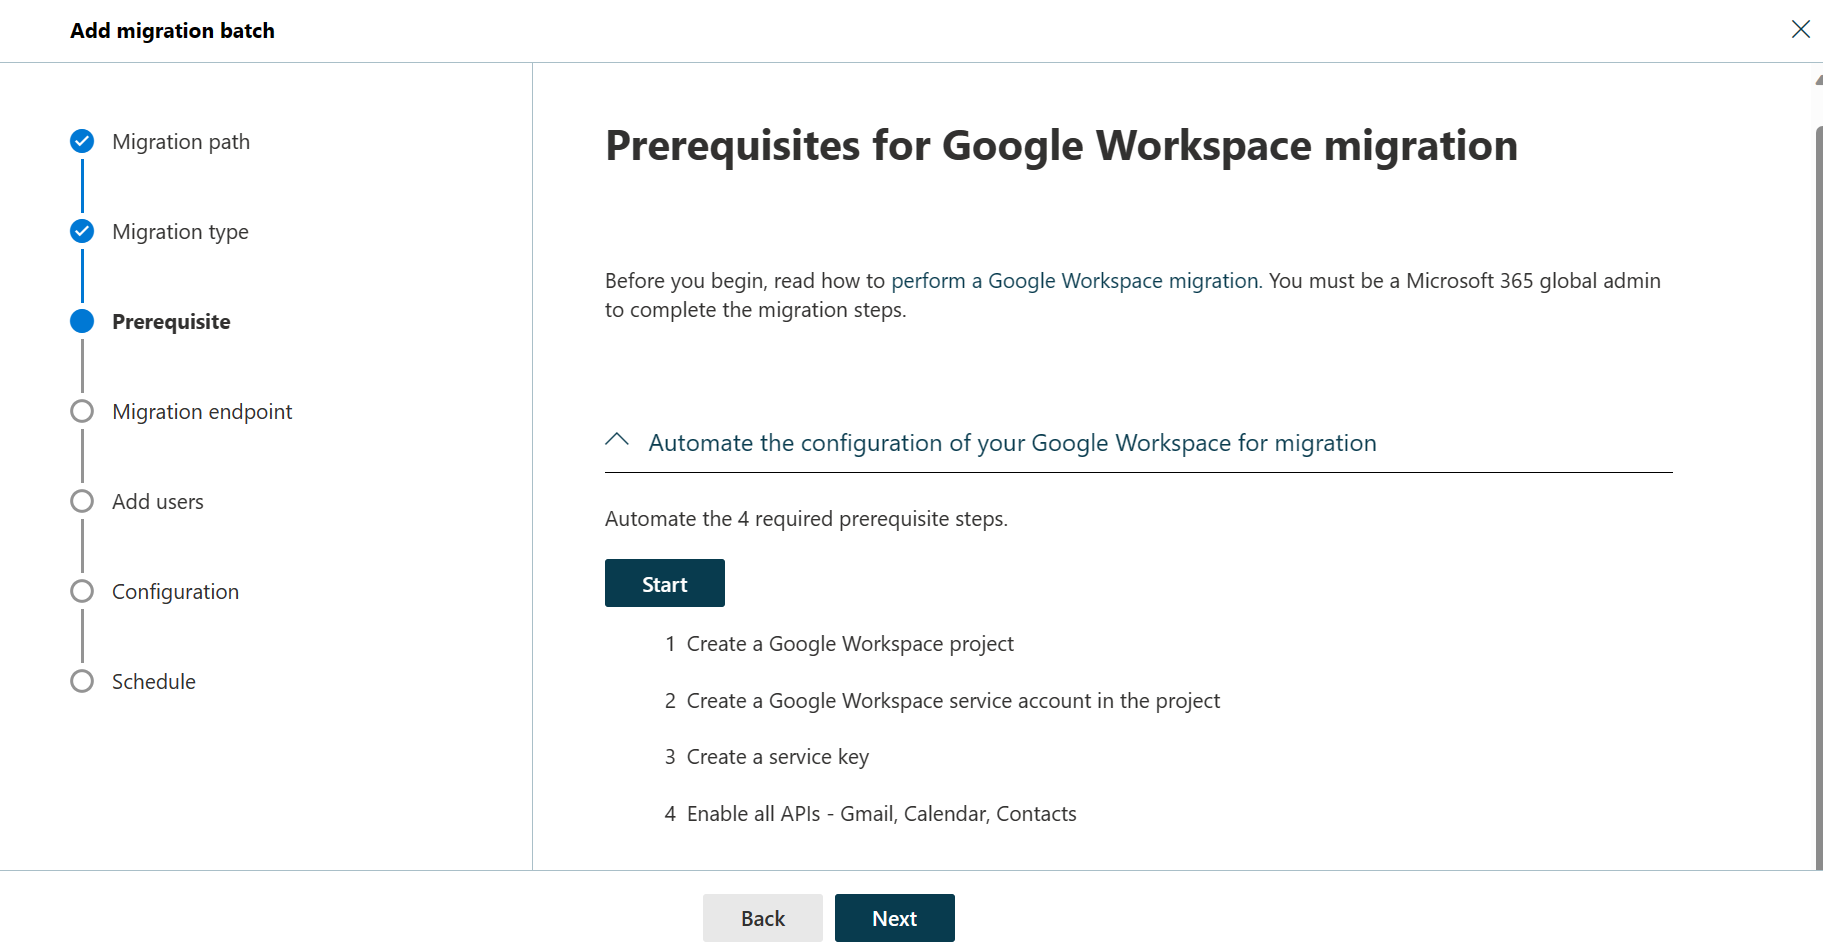
The Prerequisites for Google Workspace migration page appears.
Verify that the Automate the configuration of your Google Workspace for migration section is expanded, and then select Start in that section to automate the four required prerequisite steps.
In the Google sign-in page that appears, sign in to your Google account to validate your APIs.
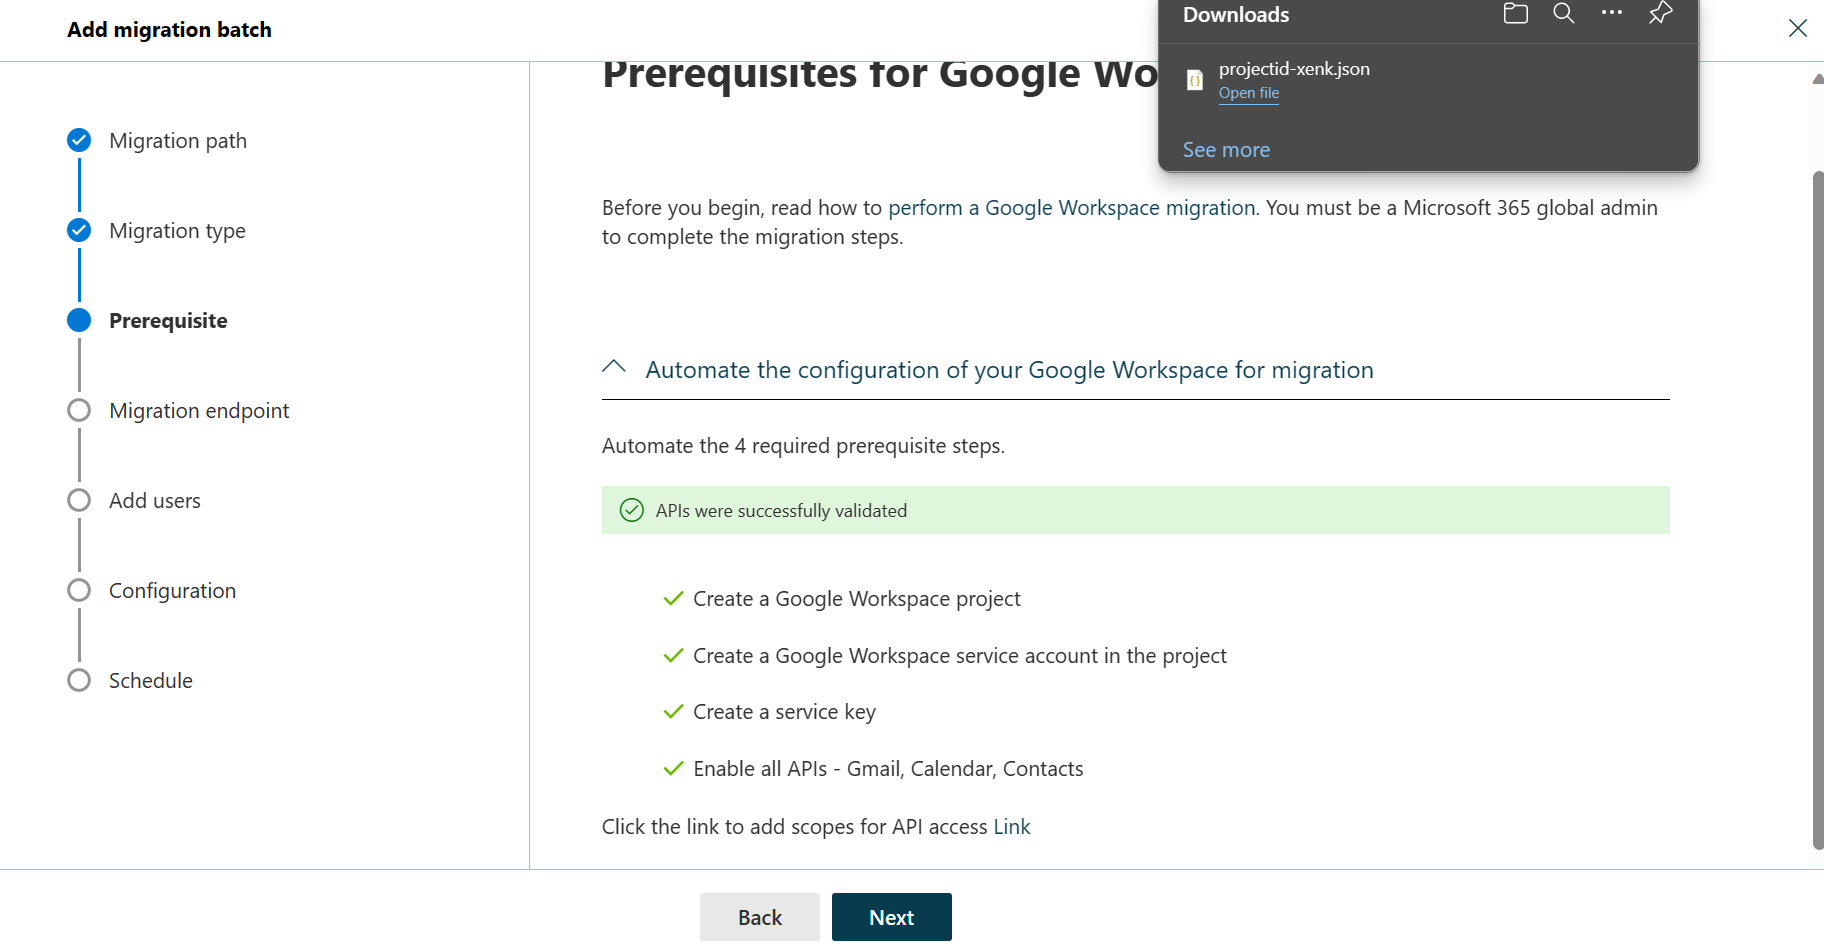
Once the APIs are successfully validated, the following things happen:
A JSON file (projectid-*.json) is downloaded to your local system.
The link to add the ClientID and the Scope is provided. The ClientID and Scope are also listed for your reference.
Select the API access link. You’ll be redirected to Google Admin API Controls page.
Select Add new. Copy the ClientID and Scope from the EAC, paste it here, and then select Authorize.
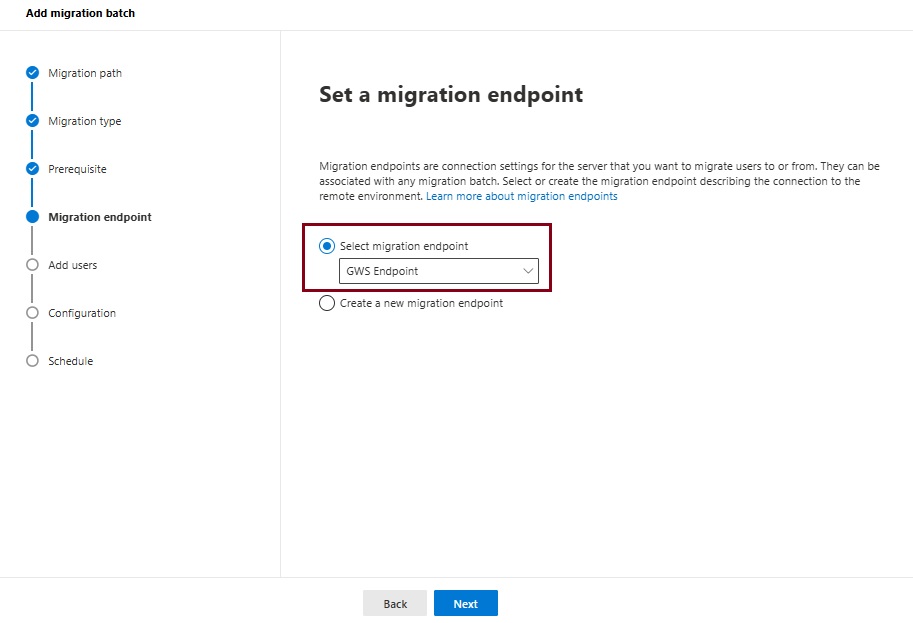
Once the four prerequisites-related steps are completed, select Next. The Set a migration endpoint page appears.
Select one of the following options:
Select the migration endpoint: Select an existing migration endpoint from the drop-down list.
Create a new migration endpoint: Select this option if you’re a first-time user.
Note To migrate Gmail mailboxes successfully, Microsoft 365 or Office 365 needs to connect and communicate with Gmail. To do this connection-communication, Microsoft 365 or Office 365 uses a migration endpoint. Migration endpoint is a technical term that describes the settings that are used to create the connection so you can migrate the mailboxes.
If you’ve selected Create a new migration endpoint, do the following steps:
On the General Information page, configure the following settings:
Migration Endpoint Name: Enter a value.
Maximum concurrent migrations: Leave the default value 20 or change the value as required.
Maximum concurrent incremental syncs: Leave the default value 10 or change the value as required. When you’re finished, select Next.
On the Gmail migration configuration page, configure the following settings:
Email address: Enter the email address that you use to sign in to the Google Workspace.
JSON key: Select Import JSON. In the dialog box that appears, find and select the downloaded JSON file, and then select Open. Once the endpoint is successfully created, it will be listed in the Select migration endpoint drop-down list.
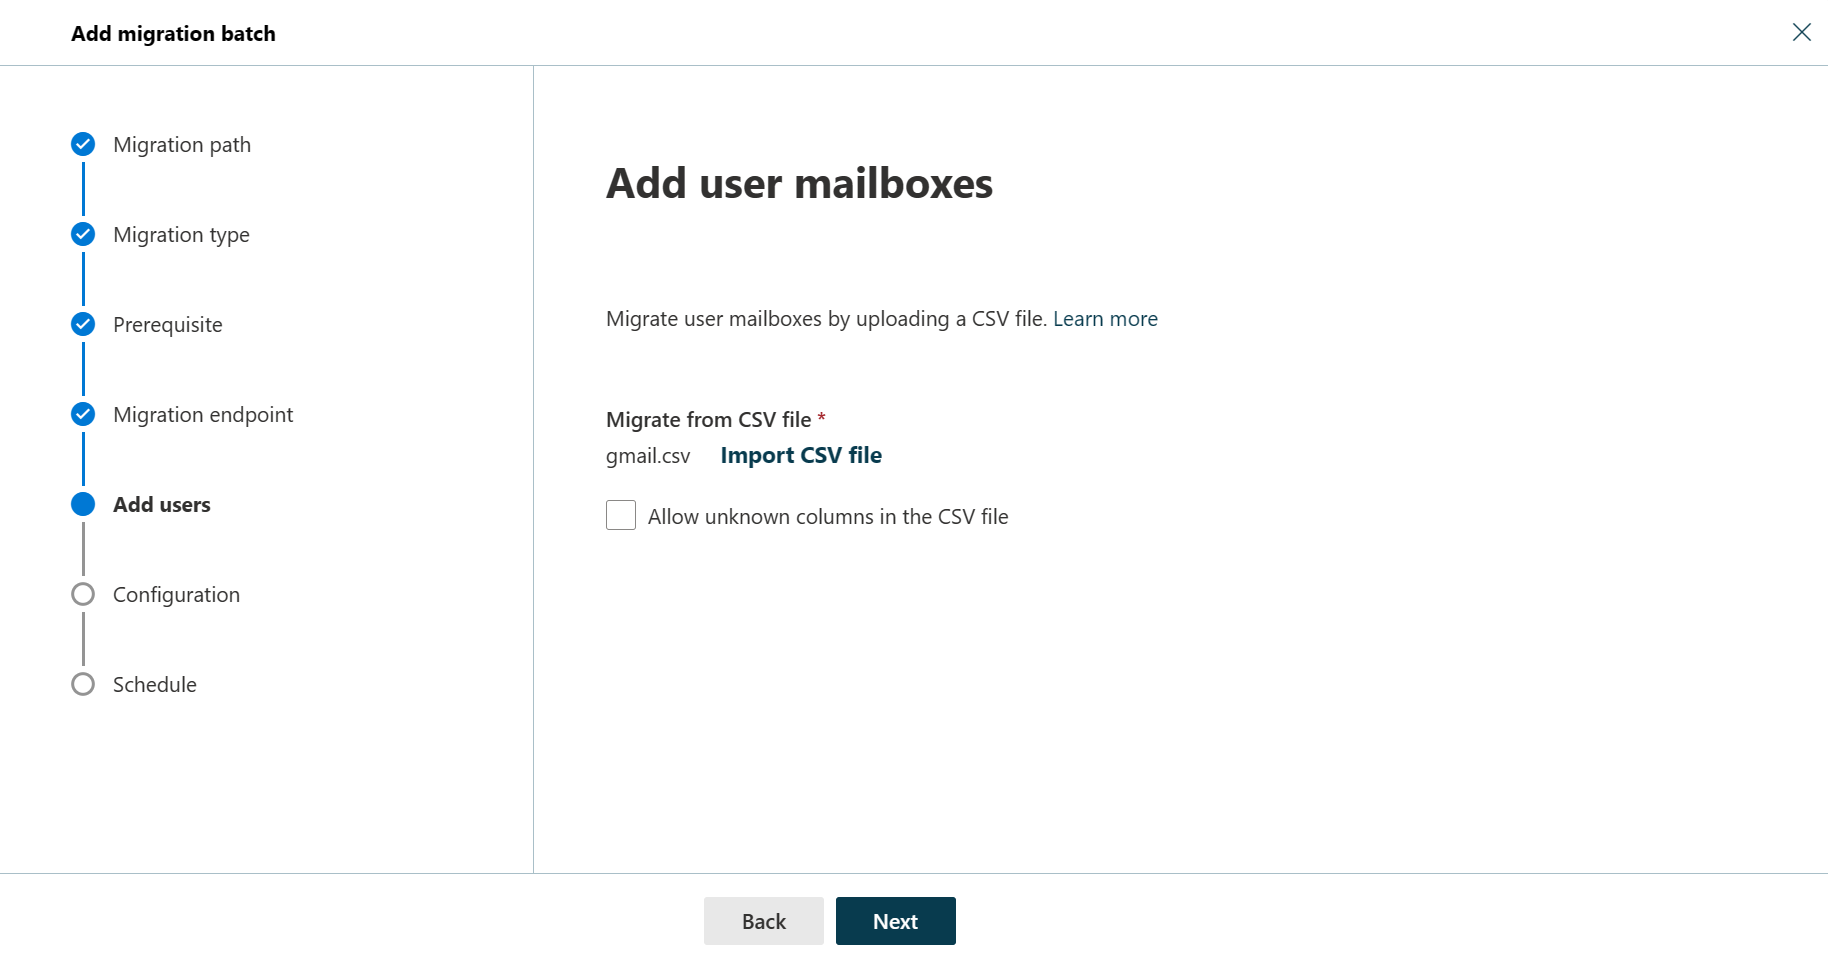
Select the endpoint from the drop-down list, and select Next. The Add user mailboxes page appears.
Select Import CSV file and navigate to the folder where you’ve saved the CSV file.
If you haven’t already saved or created the CSV file, create a CSV file containing the set of names of the users you want to migrate. You’ll need its filename below. The allowed headers are:
EmailAddress (required): Contains the primary email address for an existing Microsoft 365 or Office 365 mailbox.
Username (optional). Contains the Gmail primary email address, if it differs from EmailAddress.
CSV Format
EmailAddress will@domain.com user123@domain.com
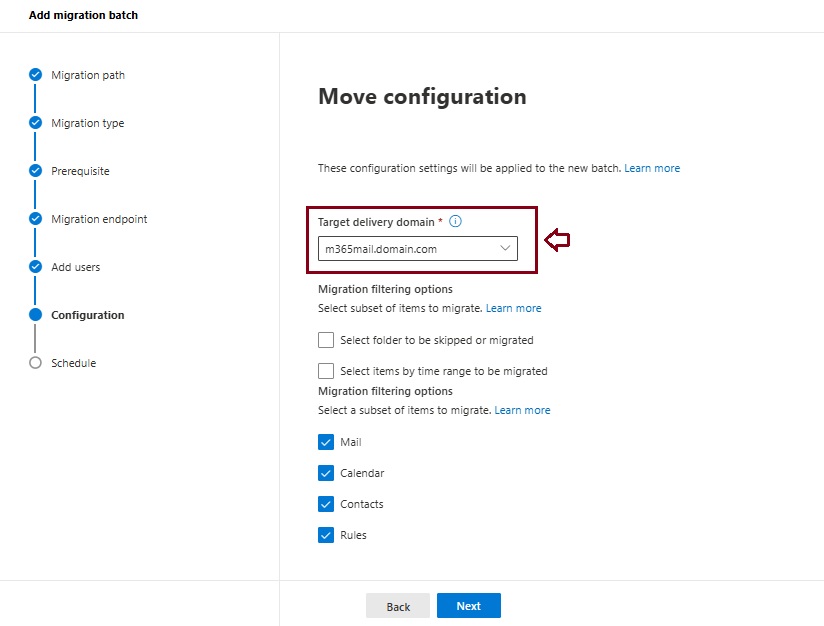
When you’re finished, click Next. The Move configuration page appears.
From the Target delivery domain drop-down list, select the target delivery domain (the subdomain) that was created as part of fulfilling the Google Workspace migration prerequisites in Exchange Online, and click Next.
Note The target delivery domain (the subdomain) you select in this step can be either an existing one or the one that you’ve created in Google Workspace migration prerequisites in Exchange Online (eg. M365mail.domain.com).
If you don’t see the target delivery domain that you want to select in the Target delivery domain drop-down list, you can manually enter the name of the target delivery domain in the text box.
The text box in which you manually enter the name of the target delivery domain is Target delivery domain. That is, the text box is effectively the Target delivery domain drop-down list, which is taking the role of a text box when you manually enter text into it.
Filtering options have been introduced for the migration of Google Workspace to Microsoft 365 or Office 365. For more information on these filtering options.
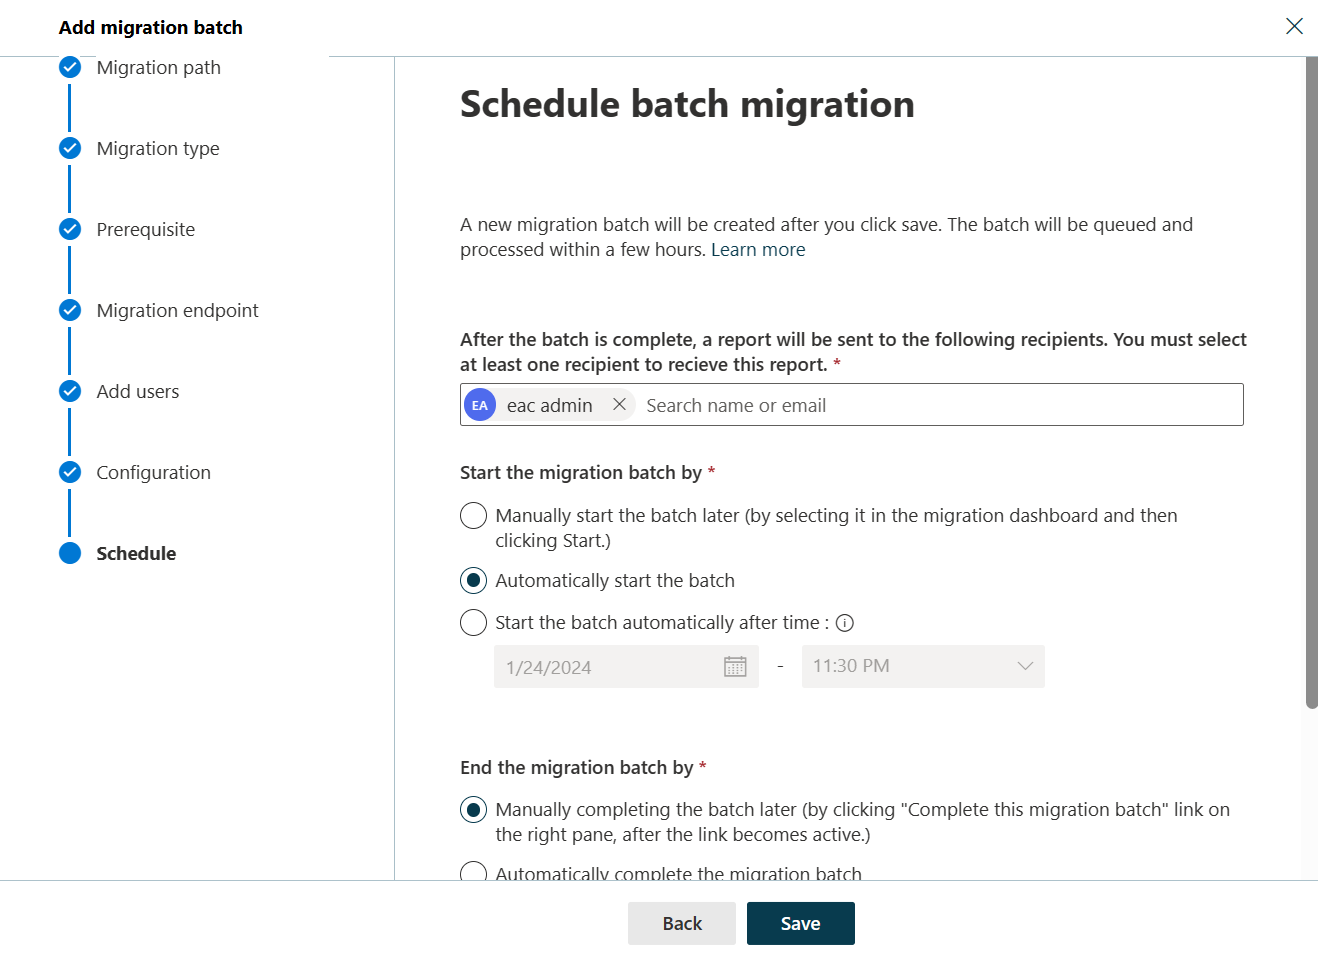
On the Schedule batch migration page, verify all the details, click Save, and then click Done.
Once the batch status changes from Syncing to Synced, you need to complete the batch.
In Part II we will describe how to handle the large mailboxes (>100 GB) and the challenges we will face. Stay tuned 😊