I’m truly honored to be speaking at the AI Cloud & Modern Workplace Conference 2026 as a Microsoft MVP in M365 Copilot & Exchange, and to share insights on one of the topics I’m most passionate about:
🎤 Session:“Your Data. Your Control. Your Copilot.” 📅 14 February 2026 🕙 10:00 AM (UTC+2)
📝 Session Description: This session brings together everything I deeply believe in:
Zero Trust as the backbone of AI safety
Purview‑driven compliance
Responsible Copilot adoption
Empowering users without compromising security
Making complex topics accessible and practical
I’m grateful for the warm welcome, the recognition, and the opportunity to contribute to a community I truly care about — a community that values inclusion, innovation, and meaningful collaboration.
Looking forward to connecting with everyone on February 14th and sharing practical guidance on how organizations can move forward confidently in this new AI era. 🚀🔐🤖
Microsoft 365 will offer a policy to add visual or audio watermarks to AI-generated or altered video and audio content, available via Cloud Policy by February 2026. This enhances transparency but does not apply to images, which users can watermark through privacy settings separately.
To help provide additional transparency about what content has been generated or altered by using AI in Microsoft 365, Microsoft is providing you with a policy setting that visually designates when content, such as video or audio content, is generated or altered by using AI. This policy setting controls your organization’s option to add a visual or audio watermark to video and audio content that your users generate or alter by using AI in Microsoft 365.
To turn on watermarks for video and audio content that your users generate or alter by using AI in Microsoft 365, you need to use the “Include a watermark when content from Microsoft 365 is generated or altered by AI” policy. This policy is available only in Cloud Policy service for Microsoft 365.
Note: Watermarks are not turned on unless you set the policy to Enabled. Your organization is always responsible for following the Microsoft Enterprise AI Services Code of Conduct, including not generating or sharing deceptive AI content.
This change is associated with Microsoft 365 Roadmap ID: 547831.
When this will happen
General Availability (Worldwide): We anticipate that this policy will be available in Cloud Policy by the second half of February 2026.
How this will affect your organization
Who is affected
Users that generate or alter video and audio content by using AI in Microsoft 365
What will happen
If you set the “Include a watermark when content from Microsoft 365 is generated or altered by AI” policy to Enabled in Cloud Policy, a visual or audio watermark is added to video and audio content that is generated or altered by using AI in Microsoft 365. Here are two examples:
A visual watermark is added to a video generated with Clipchamp.
An audio watermark is added to an audio overview generated by Copilot from a Word document.
Notes:
This policy doesn’t affect images generated or altered by using AI in Microsoft 365.
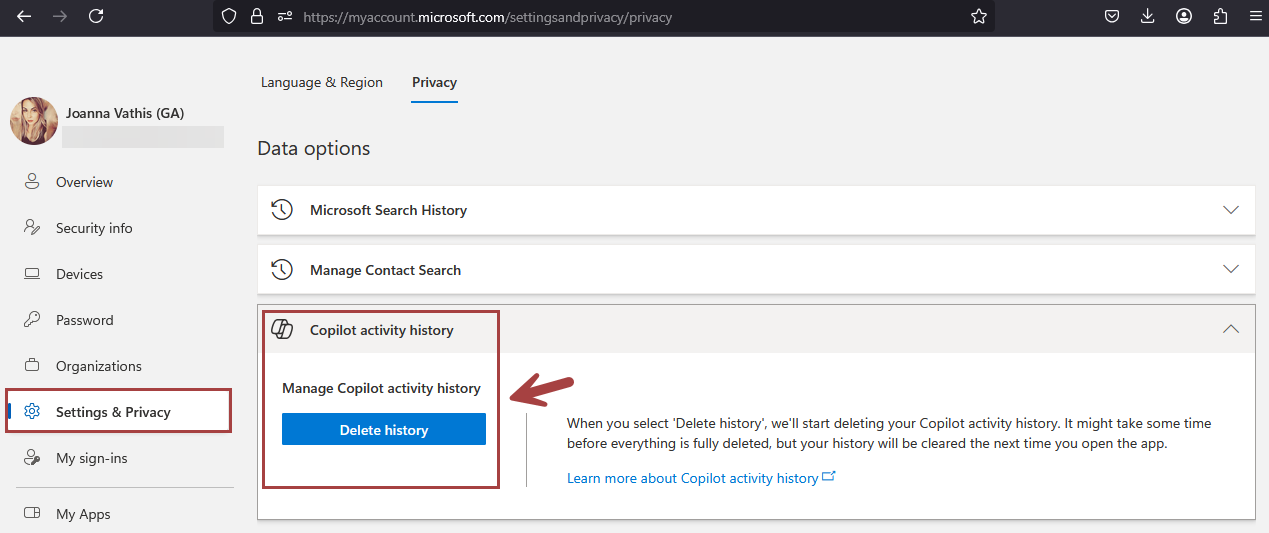
Instead, your users will be able to turn on watermarks for images by going to Settings & Privacy > Privacy at https://myaccount.microsoft.com. We anticipate this capability will be available in the second half of February 2026.
What you need to do to prepare
Review the information in the following article: Add watermarks to content generated or altered by using AI in Microsoft 365. If you decide to set the “Include a watermark when content from Microsoft 365 is generated or altered by AI” policy to Enabled, inform your users that a visual or audio watermark will be added to video and audio content that they generate or alter by using AI in Microsoft 365.
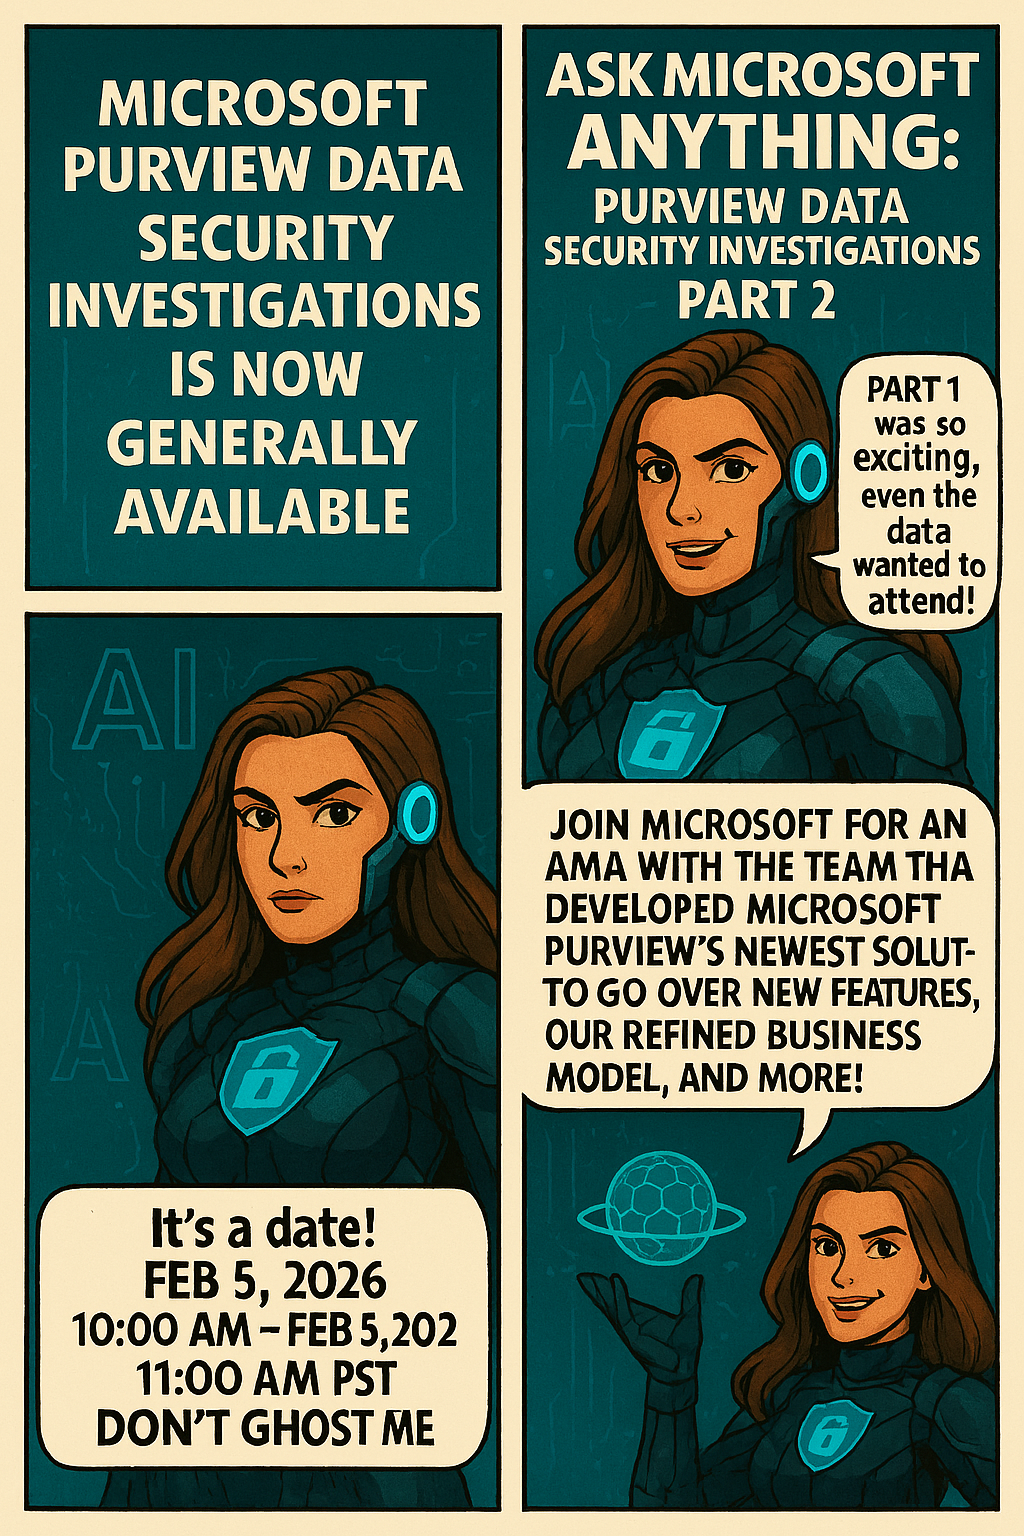
Microsoft Purview Data Security Investigations is officially GA, and to mark the moment, Microsoft is hosting an Ask Microsoft Anything (AMA) – Part 2 with the team behind the solution.
This session will dive into:
🔍 New capabilities in Data Security Investigations
🧠 How investigations are evolving to meet modern insider risk and data misuse challenges
💼 A walkthrough of the refined business model
💬 Live Q&A with the product experts who built it
📅 Date: February 5, 2026 ⏰ Time: 10:00 – 11:00 AM PST
If you’re working with Microsoft Purview, Insider Risk, Data Loss Prevention, or security investigations, this is one you don’t want to miss.
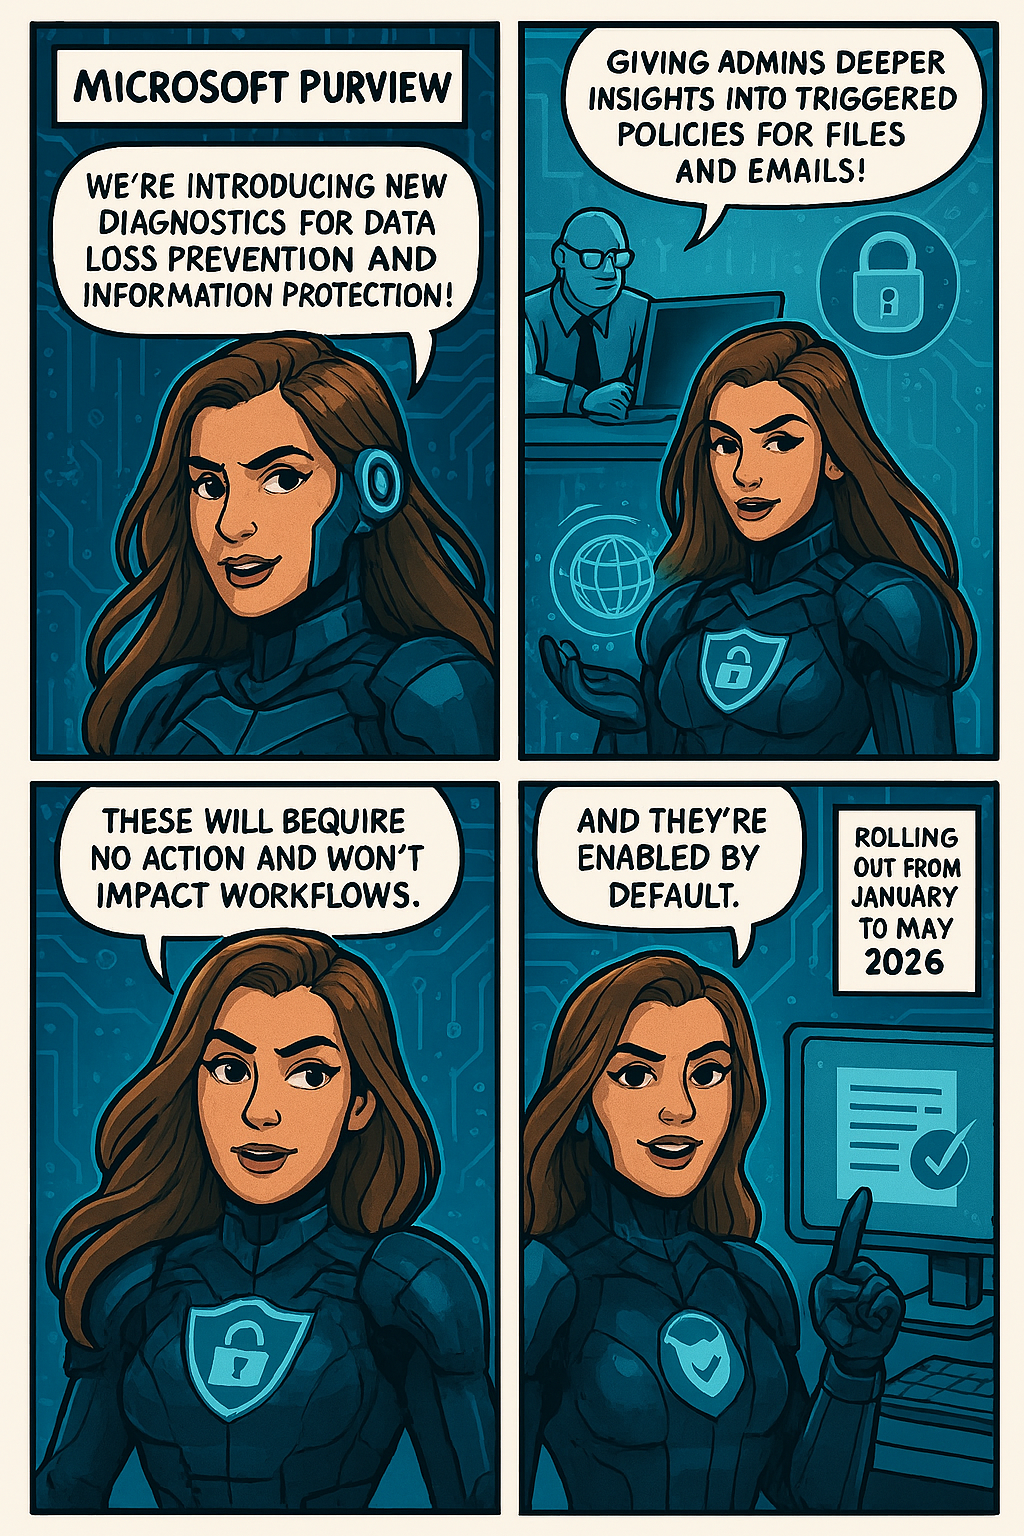
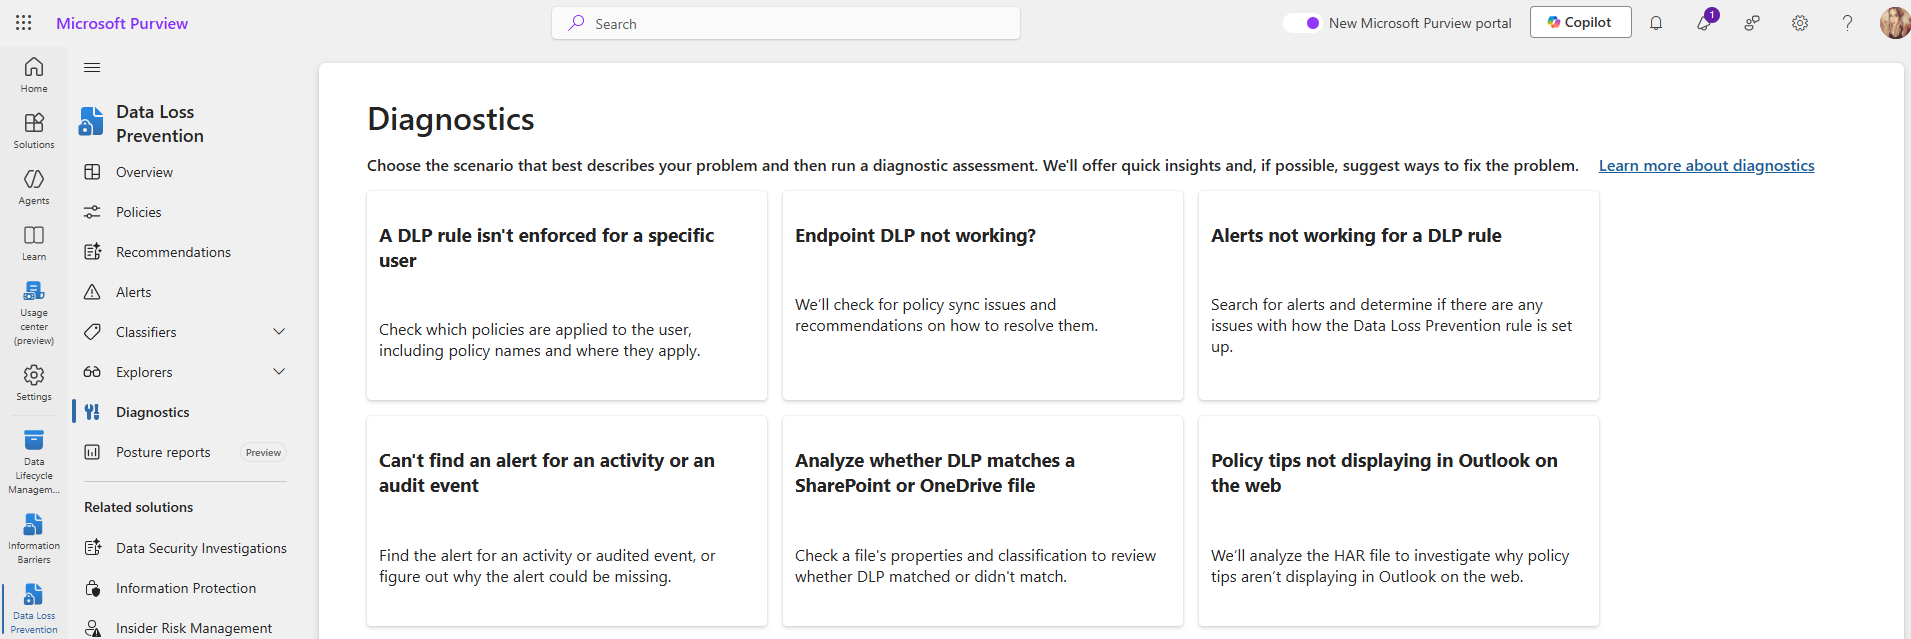
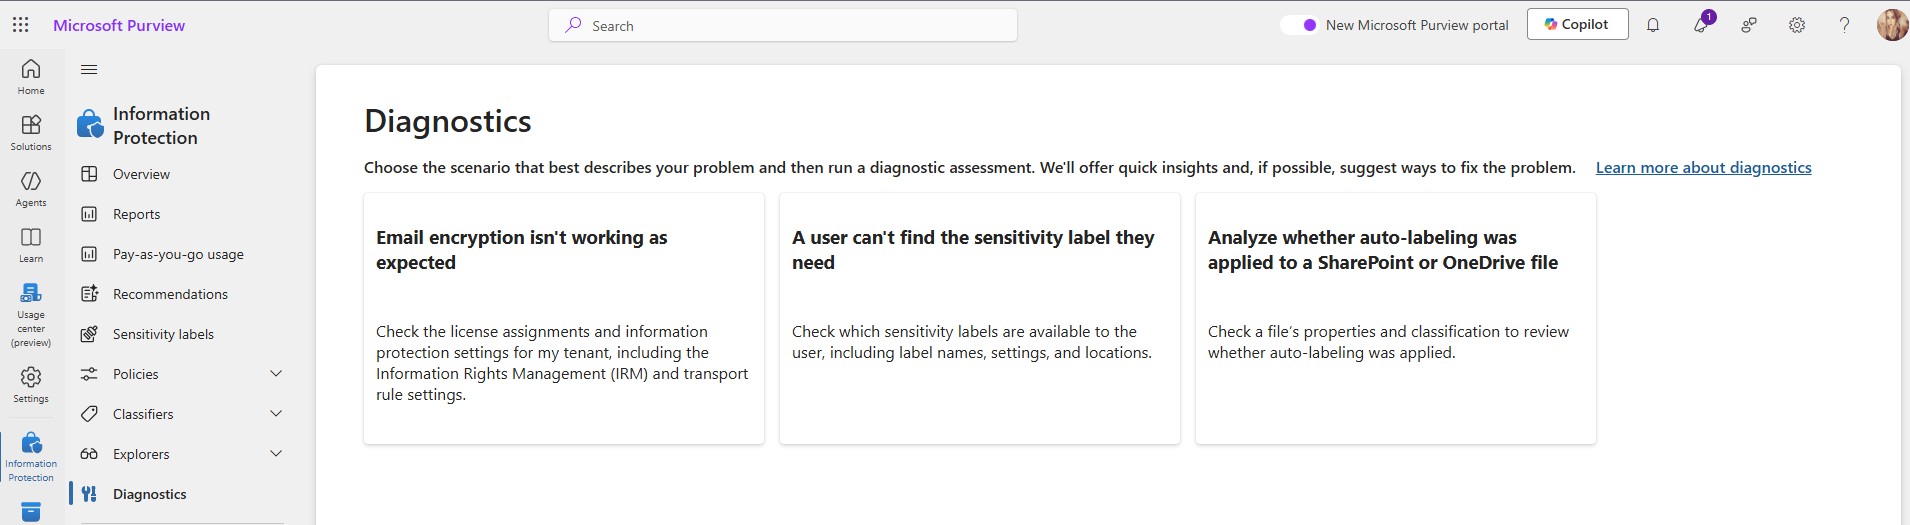
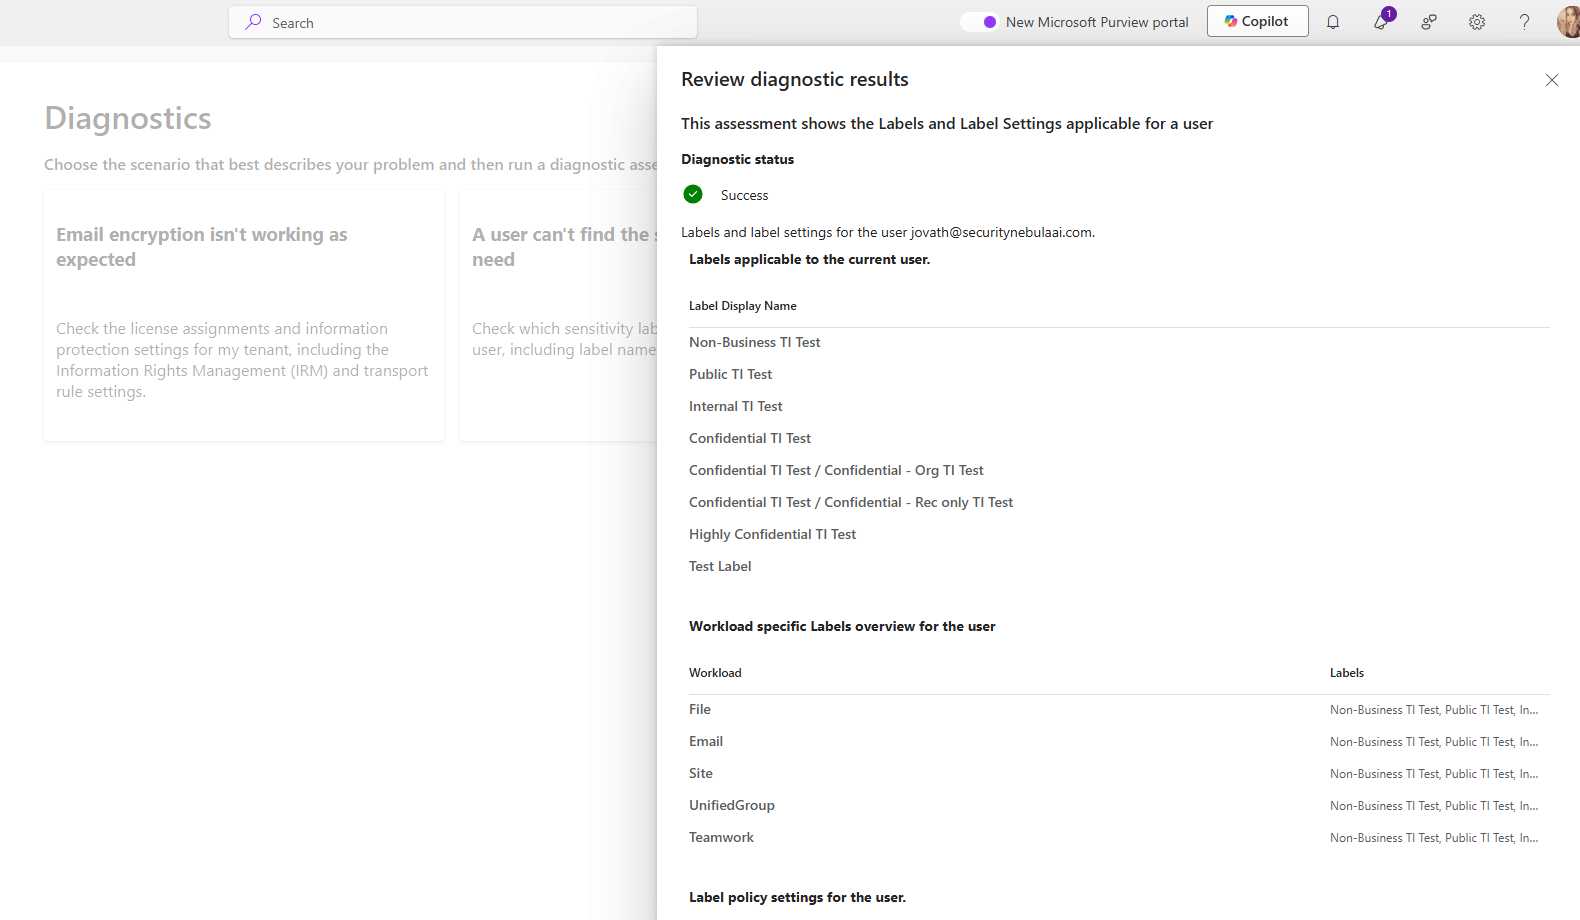
Microsoft Purview is introducing new diagnostics for Data Loss Prevention and Information Protection, providing admins deeper insights into triggered policies for files and emails. Rolling out from January to May 2026, these tools require no action, cause no workflow impact, and are enabled by default.
To help administrators troubleshoot Data Loss Prevention (DLP) and Information Protection scenarios more effectively, Microsoft Purview is introducing a new set of enhanced diagnostics. These improvements provide deeper visibility into why specific DLP rules or sensitivity labeling policies are triggered on files and emails, making investigation and policy tuning more efficient.
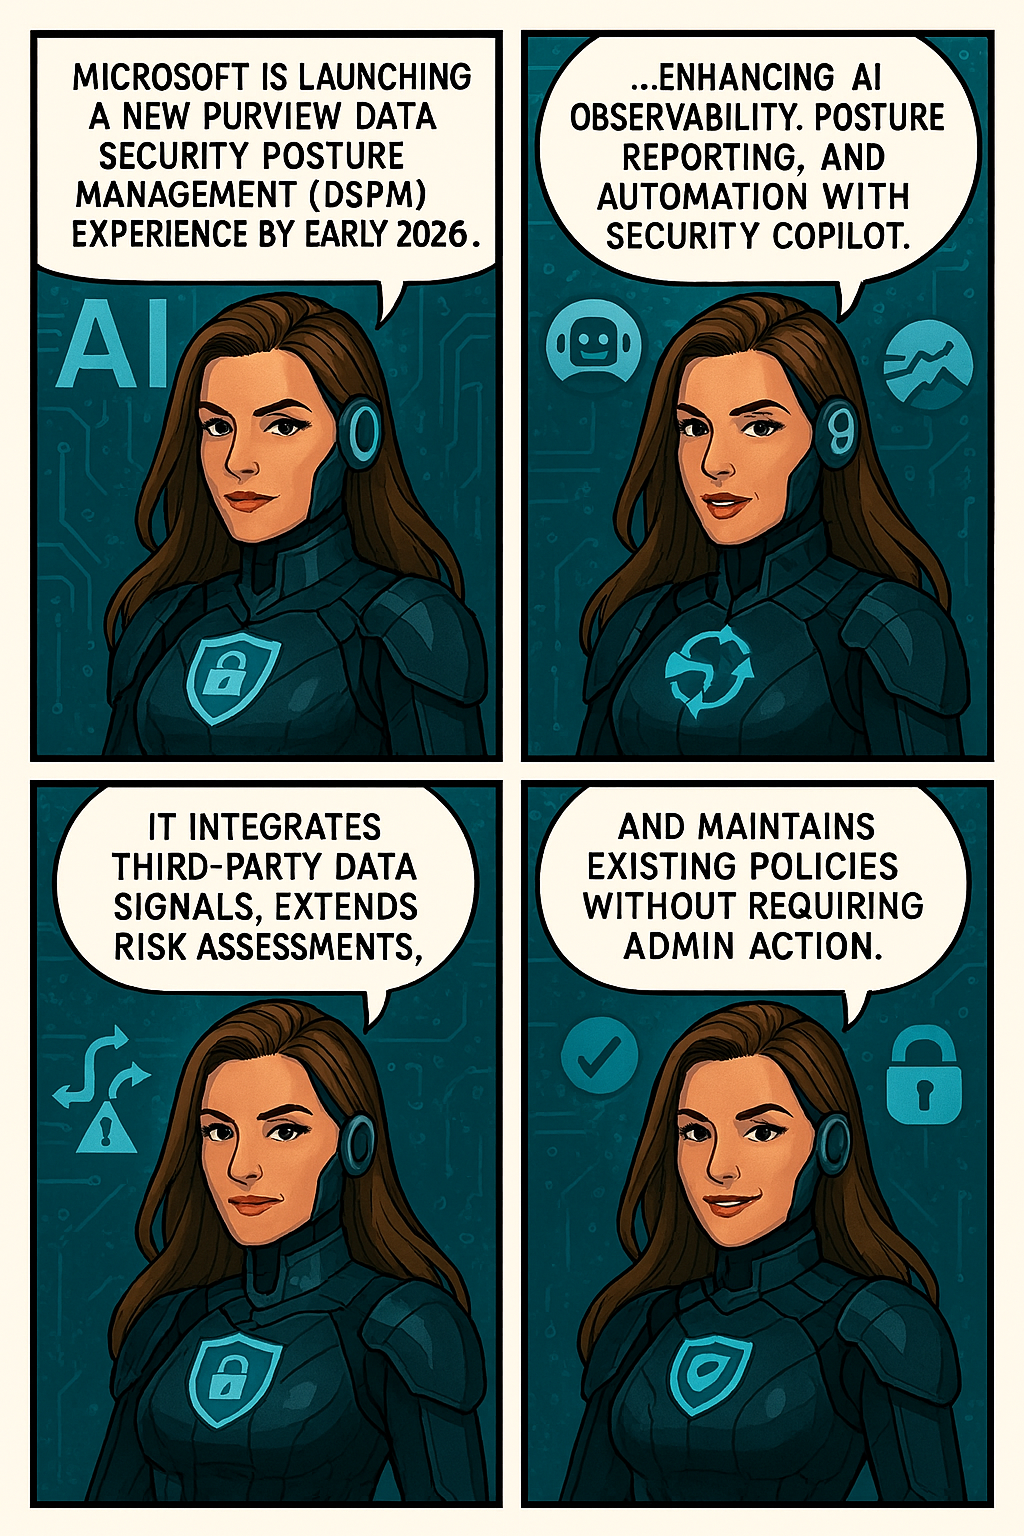
Microsoft is launching a new Purview Data Security Posture Management (DSPM) experience by early 2026, enhancing AI observability, posture reporting, and automation with Security Copilot.
Microsoft is introducing a major evolution of Purview Data Security Posture Management (DSPM) to help organizations strengthen data security and confidently embrace AI. The new DSPM experience unifies visibility and control across traditional data and AI-driven environments, delivering outcome-based guided workflows that turn insights into actionable steps—so teams can prioritize risks and remediate faster. It brings AI observability, enhanced posture reporting, and intelligent Security Copilot agents to automate tasks like triage and policy management.
Purview now also extends coverage beyond Microsoft data with third-party signals from partners like BigID, Cyera, OneTrust, and Varonis, giving security teams a single, streamlined view of sensitive data across clouds and platforms. Additionally, Data Risk Assessments are extended to Fabric and item-level analysis with new remediation actions like bulk disabling of overshared SharePoint links.
This message is associated with Microsoft 365 Roadmap ID532728.
When this will happen:
Public Preview (Worldwide): Rollout begins early December 2025 and completes by early April 2026.
General Availability (Worldwide): Rollout begins early April 2026 and completes by early May 2026.
Compliance considerations:
Compliance Area
Explanation
AI/ML capabilities interacting with customer data
Security Copilot agents automate triage and policy management.
Integration with 3rd party software
Adds signals from BigID, Cyera, OneTrust, and Varonis.
Admin reporting and monitoring
Enhanced posture reporting and remediation actions introduced.
In 2018, Microsoft announced that they’ll no longer making feature updates to Exchange Web Services (EWS) in Exchange Online, and advised developers to move to Microsoft Graph.
In 2023, Microsoft announced that on October 1, 2026, they will start blocking EWS requests to Exchange Online.
Today, in Microsoft ongoing commitment to enhance the security and control mechanisms of Exchange Web Services (EWS), Microsoft announcing a significant change in the behavior of the EWSEnabled tenant-wide switch in Exchange Online. This modification provides a more robust framework for managing EWS access within organizations, ensuring both flexibility and security, and is necessary as they continue to work in there plan to disable EWS starting October 2026.
Current Behavior
The EWSEnabled flag can be set at both the tenant (organization) level and the user (mailbox) level. Currently, when the flag is set to true at the user level, it takes precedence over the organization-level setting. If the setting is Null, it means the setting is not enforced at that level. If Org and user-level are both Null, the default behavior is to allow. This hierarchical structure means that if the organization-level flag is set to false, but the user-level flag is set to true, EWS requests from that user are still allowed. In other words:
Organization Level
User Level
EWS Requests
True or <null>
True or <null>
Allowed
True or <null>
False
Not Allowed
False
True
Allowed
False
False or <null>
Not Allowed
This approach has led to inconsistencies and security concerns. It can be challenging for administrators to ensure uniform policy enforcement across their organization, particularly in large and complex environments.
New Behavior
To address these issues, we are altering the behavior so that EWS will only be allowed if both the organization-level and user-level EWSEnabled flags are true. Here’s a simplified view of the new logic:
Organization Level
User Level
EWS Requests
True or <null>
True or <null>
Allowed
True or <null>
False
Not Allowed
False
True or <null>
Not Allowed
False
False
Not Allowed
In short, EWS will be permitted only if both the organization and user-level allow it. This change ensures that administrators have better control over EWS access and can enforce policies more consistently across their entire organization.
This change will rollout worldwide starting April 2025.
Tenant-level setting
The first thing to check is your tenant setting. To do this, simply run this command in Exchange Online PowerShell
If the EWSEnabled flag is empty (the default), or set to True – this change won’t affect you, but we still advise you read the per-user settings information below to make sure it matches your expected settings.
If your EWSEnabled flag is set to False, you might see some impact when we enforce this new logic change on your tenant unless you take action now. We encourage you to review the section below to ensure your per-user settings reflect your desired state for who can and cannot use EWS, and then proactively change the tenant wide switch to True to ensure uninterrupted access for users and apps.
User-level setting
As discussed earlier, even if your tenant-wide EWSEnabled switch has been set to False, it’s currently still possible to use EWS, if the per-user setting is set to True (default setting for every mailbox).
To check if EWS is Enabled or Disabled for a specific mailbox, you can run:
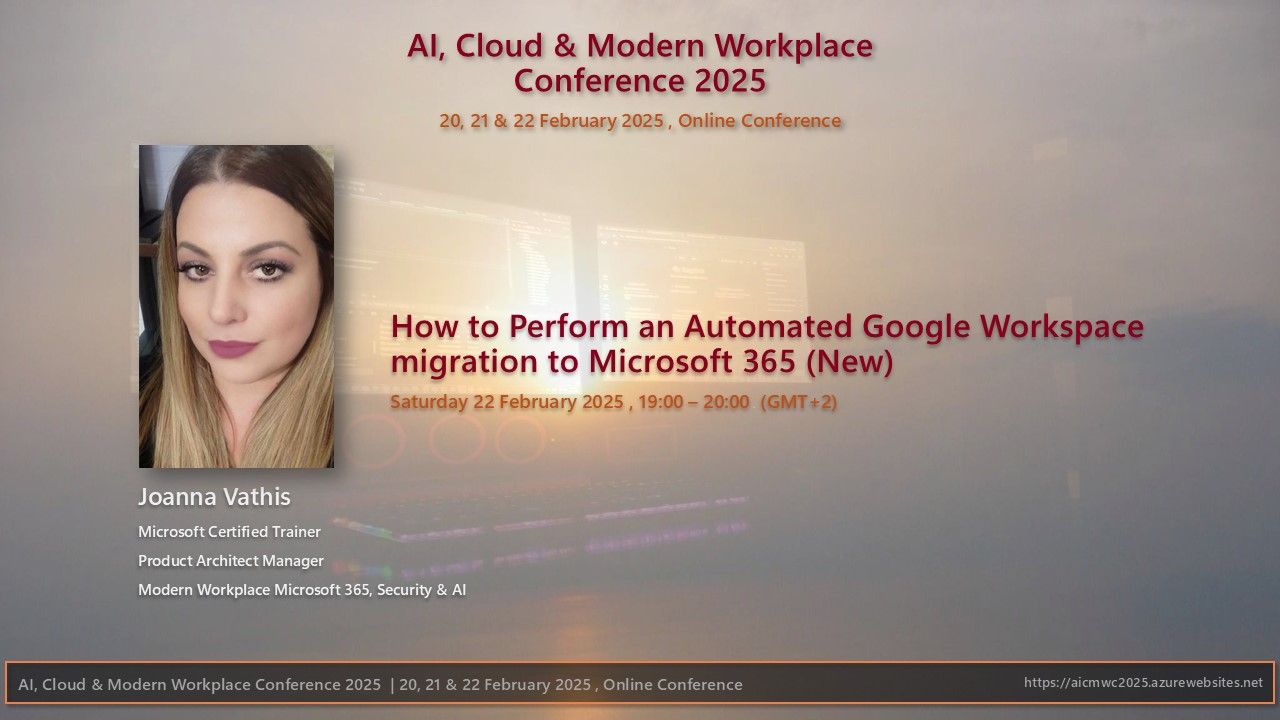
📌📖 Title of Presentation: How to Perform an Automated Google Workspace Migration to Microsoft 365 (New)
I’m excited to share some insights about the amazing features of How to Perform an Automated Google Workspace migration to Microsoft 365. Migrating from Google Workspace to Microsoft 365 can be quite a daunting task, particularly when dealing with mailboxes over 100 GB. But fear not! In our presentation, we will delve into the challenges and solutions for a successful migration, catering to both normal and large mailboxes. We will start by discussing the various challenges that come with such a migration. From there, we will move on to the importance of thorough planning to ensure a smooth transition. Next, we will introduce a new way of migrating from Google Workspace to Microsoft 365, detailing the methods to handle large mailboxes effectively. To make things even more engaging, we will have a live demo to showcase the process in action. And of course, we will wrap things up with a Q&A session to address any questions or concerns you may have.
Challenges
Planning
New way of migration from Google Workspace migration to Microsoft 365
Methods to migrate large mailboxes to Microsoft 365
Demo
Q & A
❤️ Join us on Saturday, 22 February 2025, from 19:00 to 20:00 (GMT+2) to gain invaluable insights from Joanna. We are honored to have her share her expertise at our conference! A big thank you to Joanna for her valuable help and selfless contribution to the community. We are truly grateful for her presence and look forward to learning from her expertise. Don’t miss this opportunity to learn from one of the best in the industry!
The Scareware Blocker is a New feature in Microsoft Edge designed to protect users from tech support scams, often referred to as scareware. These scams use aggressive web pages to trick users into thinking their system is infected with malware, pressuring them to call fake tech support numbers. Scareware blockers use a machine learning model to recognize the tell-tale signs of scareware scams and put users back in control of their computer.
Here’s how it works:
Machine Learning: It uses a machine learning model to detect and block scareware sites.
User Control: When a suspicious site is detected, Edge blocks it and shows a warning message, giving users the option to close the page or proceed if they believe it’s safe
“Scareware” scams are a particularly convincing type of tech support scam. They use aggressive web pages to convince victims into thinking their system is infected with malware, pressure them to call a fake tech support number, and try to gain access to the computer. Last year, Hollywood even made a blockbuster action movie with scareware scammers as the villains.
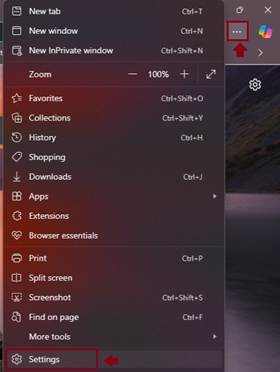
To enable Scareware Blocker in Microsoft Edge:
Open Edge and click on the three-dot menu in the toolbar.
Select Settings.
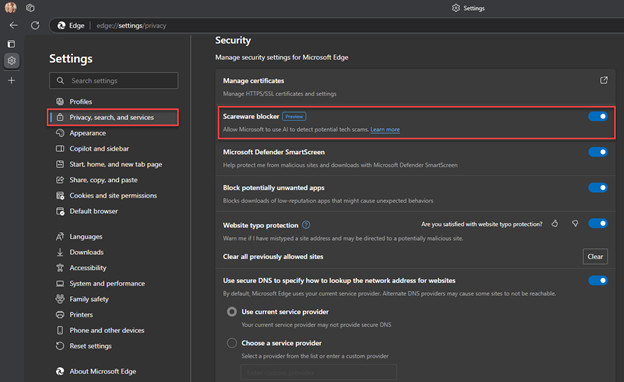
Navigate to Privacy, search, and services.
Find the Scareware Blocker option and toggle it on
When scareware blocker suspects a page is a scam, Edge will put users back in control by exiting full screen mode, stopping aggressive audio playback, warning the user, and showing a thumbnail of the page they were just viewing:
Scareware blocker fights tech scams – Video Tutorial
Microsoft 365 Copilot is a sophisticated processing and orchestration engine that provides AI-powered productivity capabilities by coordinating the following components:
Large language models (LLMs)
Content in Microsoft Graph, such as emails, chats, and documents that you have permission to access.
The Microsoft 365 productivity apps that you use every day, such as Word and PowerPoint.
How does Microsoft 365 Copilot use your proprietary organizational data?
Microsoft 365 Copilot provides value by connecting LLMs to your organizational data. Microsoft 365 Copilot accesses content and context through Microsoft Graph. It can generate responses anchored in your organizational data, such as user documents, emails, calendar, chats, meetings, and contacts. Microsoft 365 Copilot combines this content with the user’s working context, such as the meeting a user is in now, the email exchanges the user had on a topic, or the chat conversations the user had last week. Microsoft 365 Copilot uses this combination of content and context to help provide accurate, relevant, and contextual responses.
Microsoft 365 Copilot only surfaces organizational data to which individual users have at least view permissions. It’s important that you’re using the permission models available in Microsoft 365 services, such as SharePoint, to help ensure the right users or groups have the right access to the right content within your organization. This includes permissions you give to users outside your organization through inter-tenant collaboration solutions, such as shared channels in Microsoft Teams.
When you enter prompts using Microsoft 365 Copilot, the information contained within your prompts, the data they retrieve, and the generated responses remain within the Microsoft 365 service boundary, in keeping with our current privacy, security, and compliance commitments. Microsoft 365 Copilot uses Azure OpenAI services for processing, not OpenAI’s publicly available services. Azure OpenAI doesn’t cache customer content and Copilot modified prompts for Microsoft 365 Copilot.
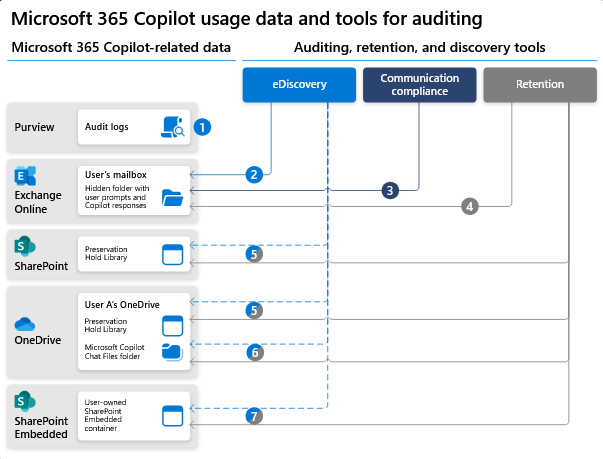
Data stored about user interactions with Microsoft 365 Copilot
When a user interacts with Microsoft 365 Copilot (using apps such as Word, PowerPoint, Excel, OneNote, Loop, or Whiteboard), we store data about these interactions. The stored data includes the user’s prompt and Copilot’s response, including citations to any information used to ground Copilot’s response. We refer to the user’s prompt and Copilot’s response to that prompt as the “content of interactions” and the record of those interactions is the user’s Copilot activity history. For example, this stored data provides users with Copilot activity history in Microsoft 365 Copilot Chat (previously named Business Chat) and meetings in Microsoft Teams. This data is processed and stored in alignment with contractual commitments with your organization’s other content in Microsoft 365. The data is encrypted while it’s stored and isn’t used to train foundation LLMs, including those used by Microsoft 365 Copilot.
To view and manage this stored data, admins can use Content search or Microsoft Purview. Admins can also use Microsoft Purview to set retention policies for the data related to chat interactions with Copilot. For Microsoft Teams chats with Copilot, admins can also use Microsoft Teams Export APIs to view the stored data.
Deleting the history of user interactions with Microsoft 365 Copilot
Microsoft 365 Copilot calls to the LLM are routed to the closest data centers in the region, but also can call into other regions where capacity is available during high utilization periods.
For European Union (EU) users, we have additional safeguards to comply with the EU Data Boundary. EU traffic stays within the EU Data Boundary while worldwide traffic can be sent to the EU and other countries or regions for LLM processing. The EU Data Boundary is a geographically defined boundary within which Microsoft has committed to store and process Customer Data and personal data for our Microsoft enterprise online services, including Azure, Dynamics 365, Power Platform, and Microsoft 365, subject to limited circumstances where Customer Data and personal data will continue to be transferred outside the EU Data Boundary.
How does Microsoft 365 Copilot protect organizational data?
The permissions model within your Microsoft 365 tenant can help ensure that data won’t unintentionally leak between users, groups, and tenants. Microsoft 365 Copilot presents only data that each individual can access using the same underlying controls for data access used in other Microsoft 365 services. Semantic Index honors the user identity-based access boundary so that the grounding process only accesses content that the current user is authorized to access.
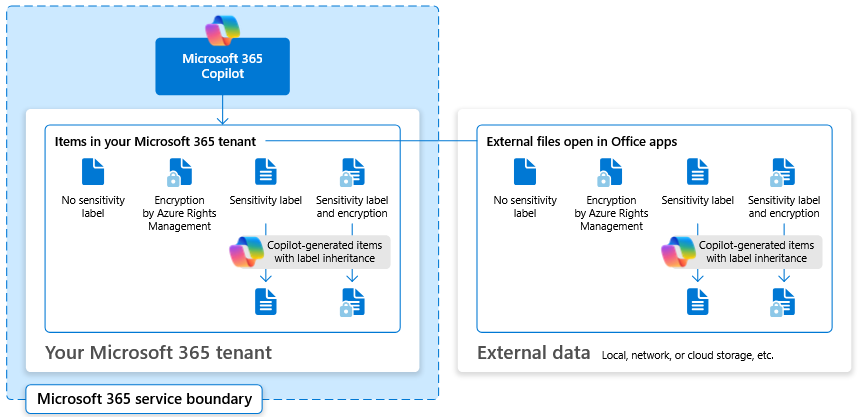
Copilot works together with your Microsoft Purviewsensitivity labels and encryption to provide an extra layer of protection. The following diagram provides a visual representation of how Copilot honors your information protection controls using sensitivity labels and encryption.
Copilot will only work with your M365 tenant data and won’t be able to access other companies’ data. Plus, your data doesn’t train the AI for other companies to leverage..
🔝I am excited to announce that I will be speaking at the “Διημερίδα Ψηφιακής Εξέλιξης in Corfu, taking place on February 7-8! @silicon_corfu
📆Title: Get started with Microsoft 365 Copilot in Excel 📝Description: I’m excited to share some insights about the amazing features of Microsoft 365 Copilot in Excel. This innovative tool is designed to help you work more efficiently with your data by providing intelligent suggestions and insights.
With Copilot in Excel, you can do much more with your data. It generates formula column suggestions, shows insights in charts and PivotTables, and highlights interesting data, making it easier for you to uncover valuable information.
In our upcoming presentation, we will explore these features in detail and see how they can enhance our productivity:
📍Formulas: Writing, explaining, and asking questions 📍More formula use cases 📍Working with text 📍Visualize: Charts and Color 📍Ask questions about Excel 📍Demo
🚀 I look forward to seeing you there! Don’t miss the opportunity to participate in this important event and enrich your knowledge of the latest Microsoft technologies. Register now for free and join us for discussions and learning!