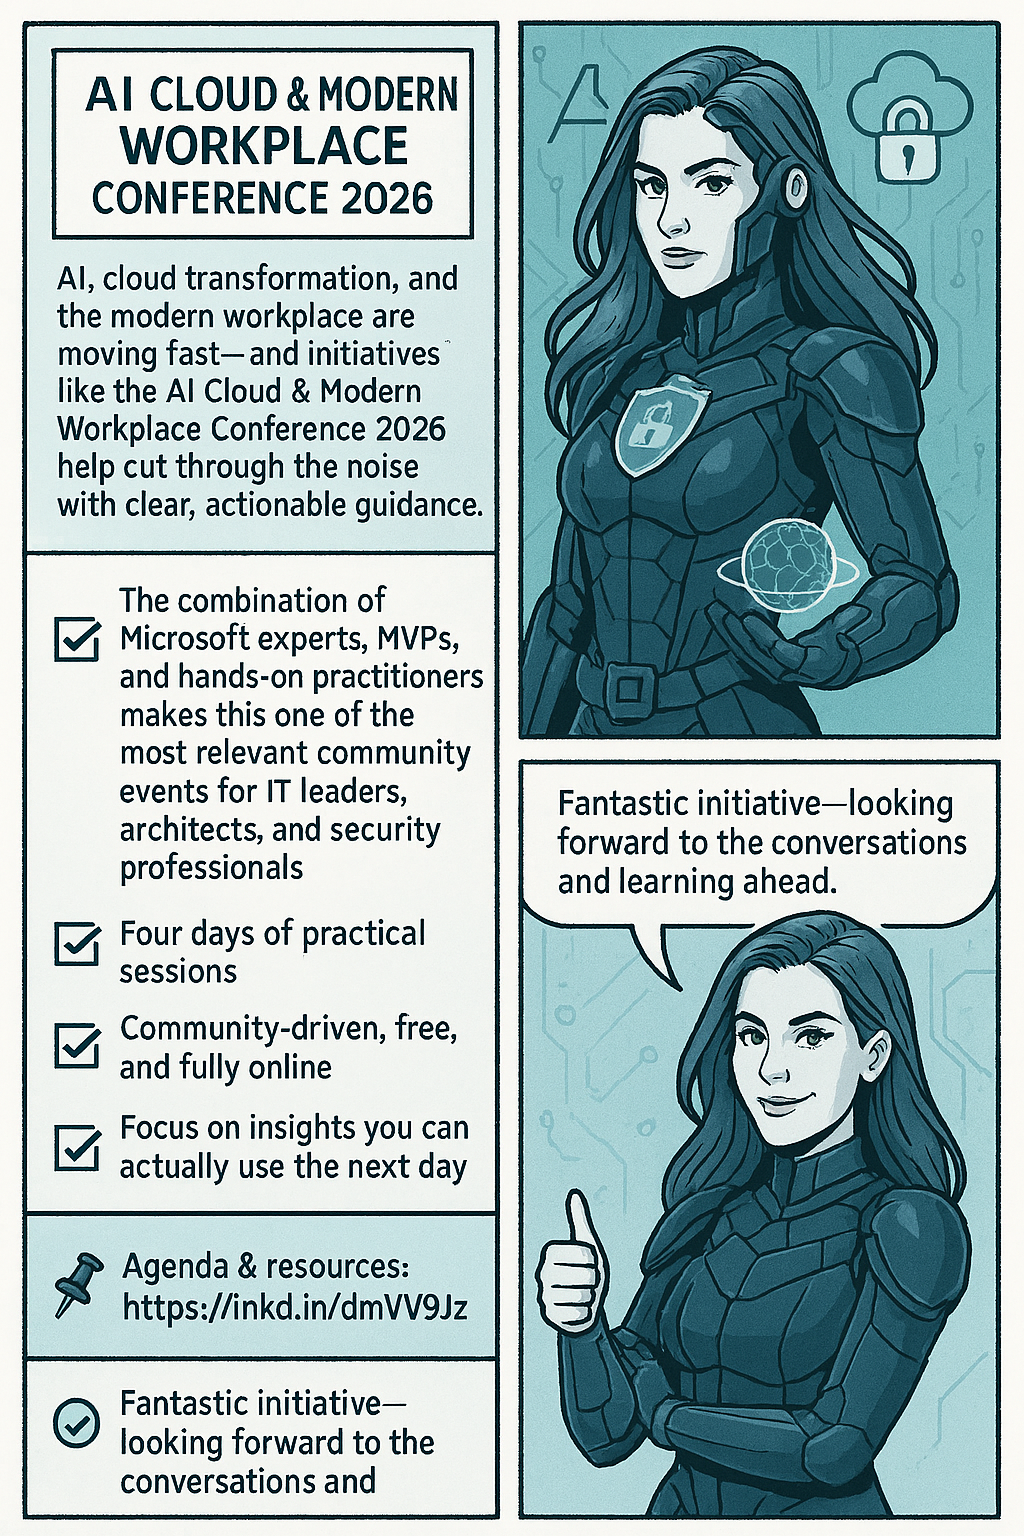
We’re delighted to bring back the AI Cloud & Modern Workplace Conference 2026 for the third consecutive year-an effort that, despite tight timelines and real organizational challenges, Konstantinos Boutsioulis MVP managed to deliver together with George – Chrysovalantis Grammatikos .
📌 When & Where 11–14 February 2026 (UTC+2) · Online · Free to attend with no registration required. For agenda updates and resources, visit the official site: AI CLOUD & MODERN WORKPLACE CONFERENCE 2026. Who’s on stage
♨️A curated lineup featuring speakers from Microsoft, Microsoft MVPs, and seasoned leaders from the broader IT market—bringing practical insights from product engineering, consulting, and frontline delivery.
🔖 What you’ll gain Actionable guidance across AI, Cloud, and Modern Work scenarios-grounded in real implementations and best practices. Hands‑on, practitioner‑level sessions spanning topics. Community value – organized by the Digital Innovation Minds community, focused on vendor‑neutral learning aligned to Microsoft technologies. Format & experience Expect focused talks, panel discussions, and practical deep dives designed for IT leaders, architects, developers, and security & data professionals who need outcomes they can apply the next day.
Important notes for attendees 🔖 The conference is 100% online—join from anywhere. 🏷️ It is entirely free—no registration or sign‑up forms are required. 🌍 More information, daily updates, and speaker materials will be available on the official site: AI CLOUD & MODERN WORKPLACE CONFERENCE 2026. We can’t wait to share four days of practical learning and community‑driven knowledge. See you online!
Microsoft 365 will offer a policy to add visual or audio watermarks to AI-generated or altered video and audio content, available via Cloud Policy by February 2026. This enhances transparency but does not apply to images, which users can watermark through privacy settings separately.
To help provide additional transparency about what content has been generated or altered by using AI in Microsoft 365, Microsoft is providing you with a policy setting that visually designates when content, such as video or audio content, is generated or altered by using AI. This policy setting controls your organization’s option to add a visual or audio watermark to video and audio content that your users generate or alter by using AI in Microsoft 365.
To turn on watermarks for video and audio content that your users generate or alter by using AI in Microsoft 365, you need to use the “Include a watermark when content from Microsoft 365 is generated or altered by AI” policy. This policy is available only in Cloud Policy service for Microsoft 365.
Note: Watermarks are not turned on unless you set the policy to Enabled. Your organization is always responsible for following the Microsoft Enterprise AI Services Code of Conduct, including not generating or sharing deceptive AI content.
This change is associated with Microsoft 365 Roadmap ID: 547831.
When this will happen
General Availability (Worldwide): We anticipate that this policy will be available in Cloud Policy by the second half of February 2026.
How this will affect your organization
Who is affected
Users that generate or alter video and audio content by using AI in Microsoft 365
What will happen
If you set the “Include a watermark when content from Microsoft 365 is generated or altered by AI” policy to Enabled in Cloud Policy, a visual or audio watermark is added to video and audio content that is generated or altered by using AI in Microsoft 365. Here are two examples:
A visual watermark is added to a video generated with Clipchamp.
An audio watermark is added to an audio overview generated by Copilot from a Word document.
Notes:
This policy doesn’t affect images generated or altered by using AI in Microsoft 365.
Instead, your users will be able to turn on watermarks for images by going to Settings & Privacy > Privacy at https://myaccount.microsoft.com. We anticipate this capability will be available in the second half of February 2026.
What you need to do to prepare
Review the information in the following article: Add watermarks to content generated or altered by using AI in Microsoft 365. If you decide to set the “Include a watermark when content from Microsoft 365 is generated or altered by AI” policy to Enabled, inform your users that a visual or audio watermark will be added to video and audio content that they generate or alter by using AI in Microsoft 365.
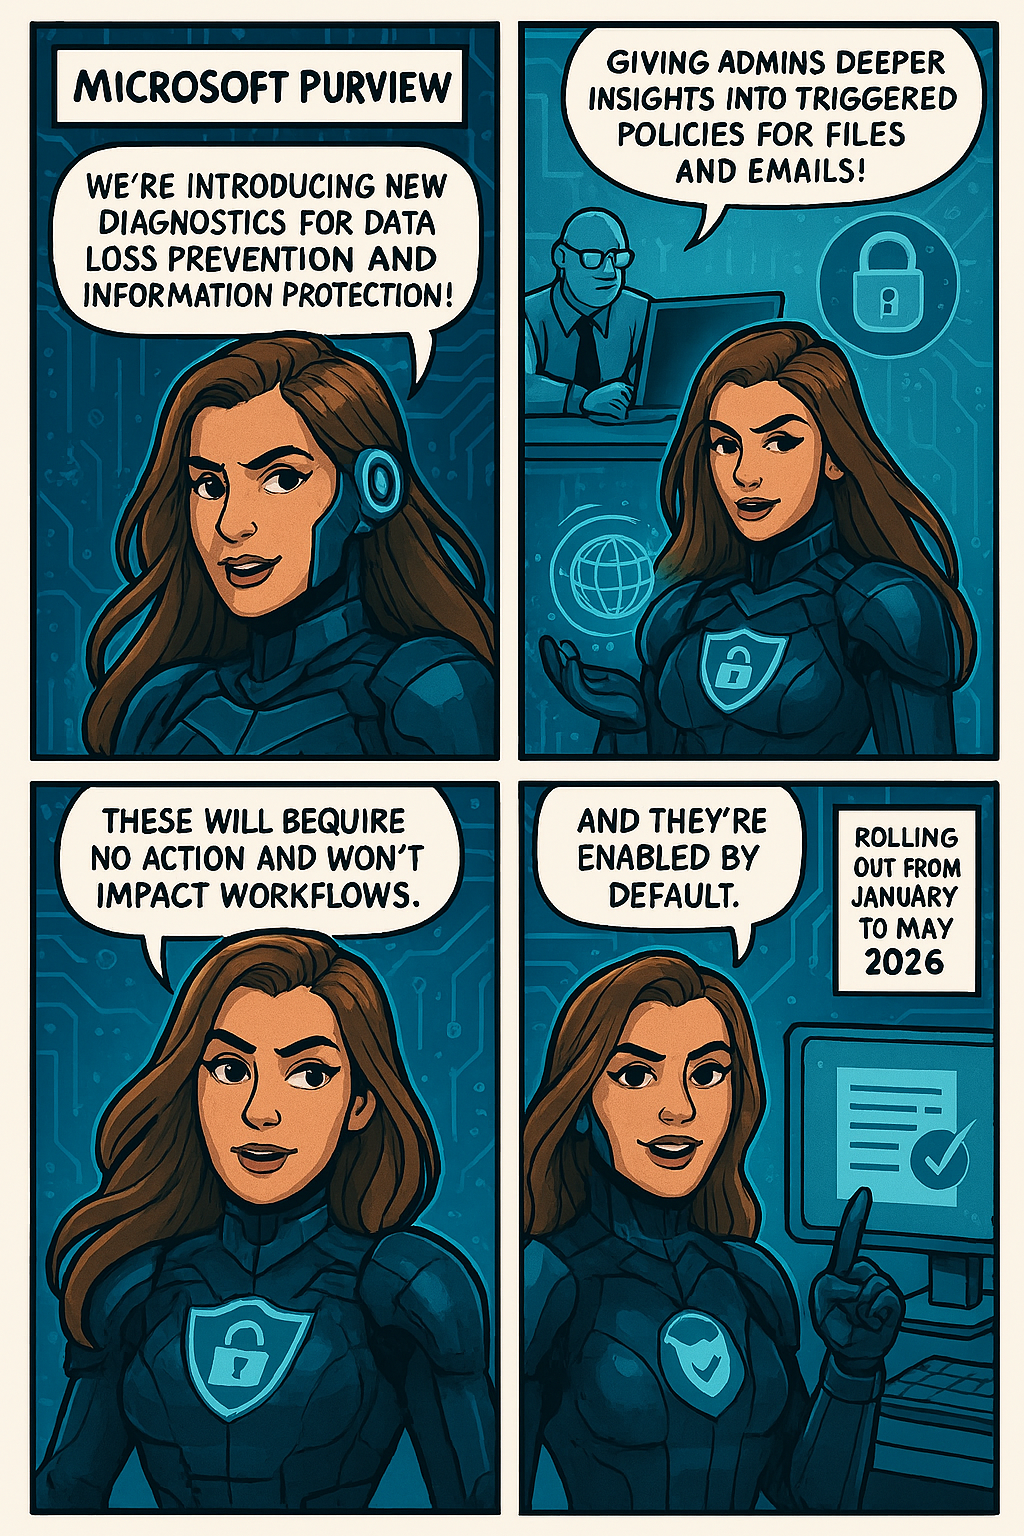
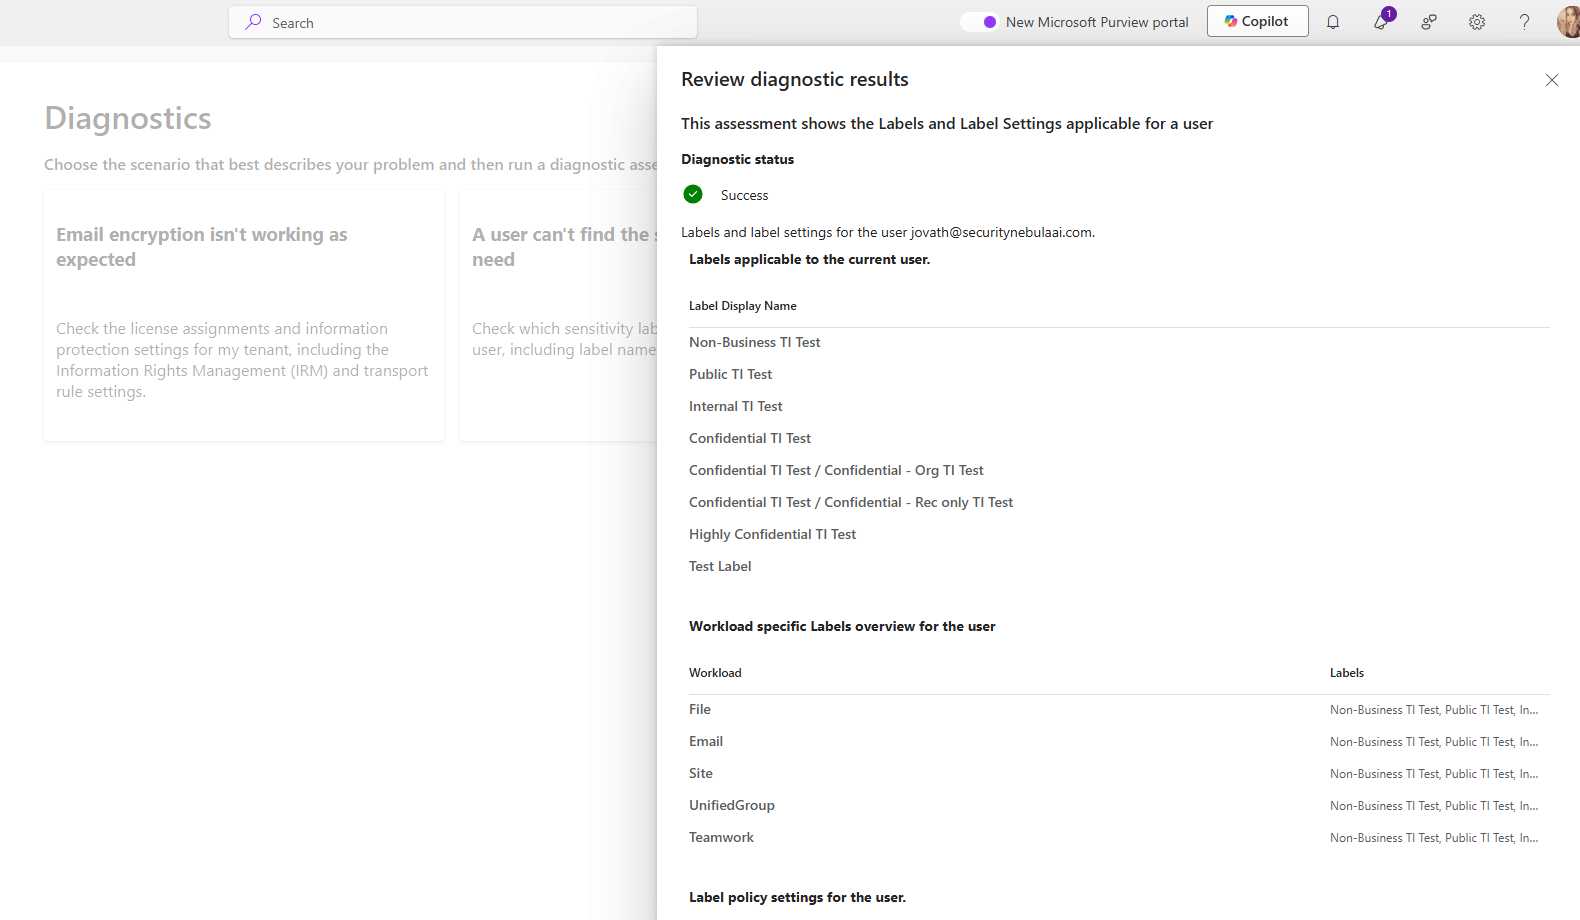
Microsoft Purview is introducing new diagnostics for Data Loss Prevention and Information Protection, providing admins deeper insights into triggered policies for files and emails. Rolling out from January to May 2026, these tools require no action, cause no workflow impact, and are enabled by default.
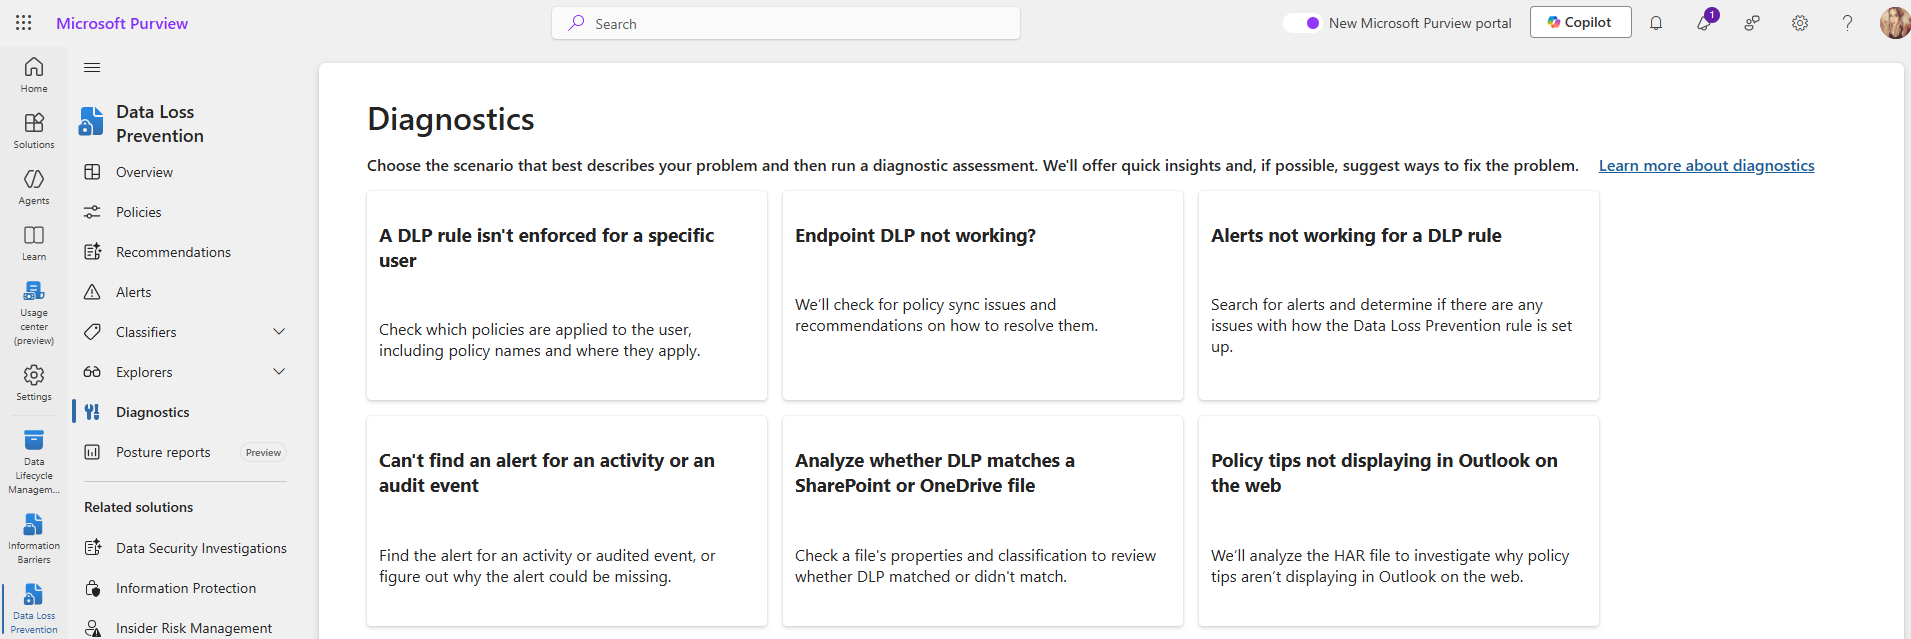
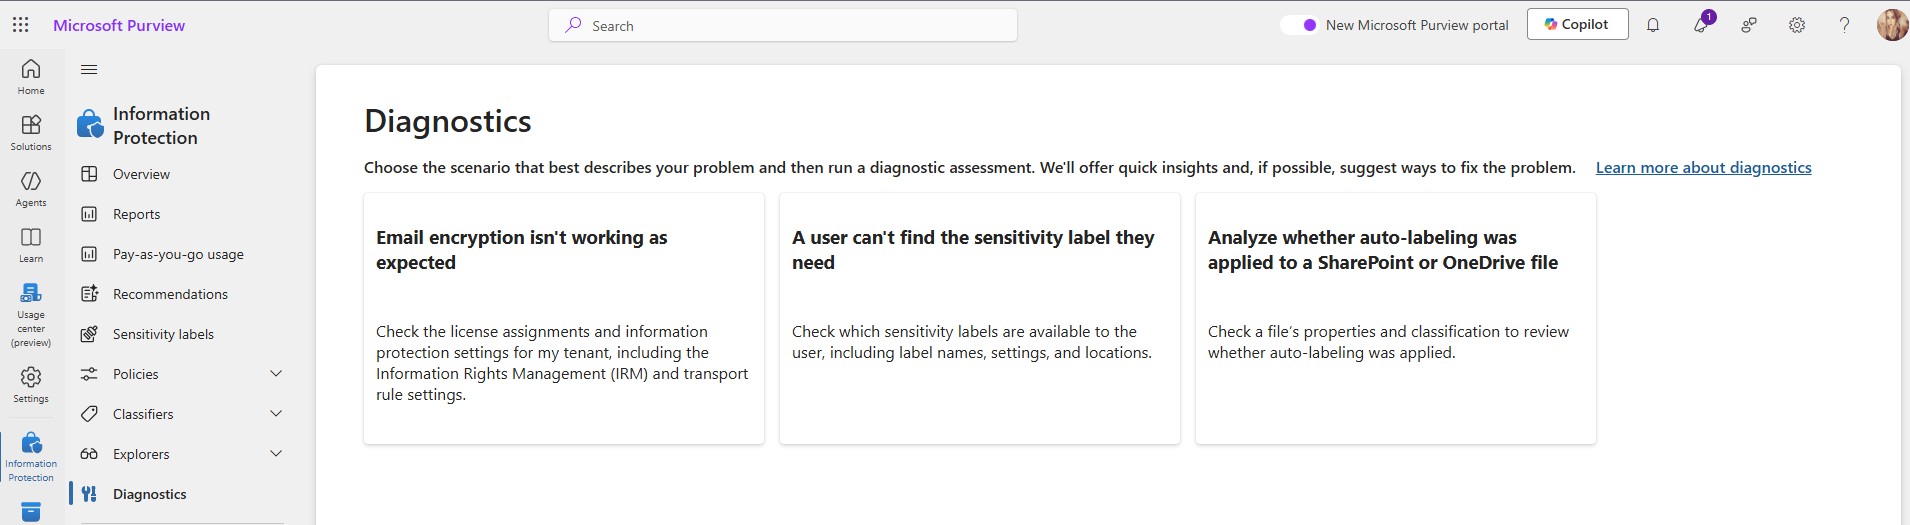
To help administrators troubleshoot Data Loss Prevention (DLP) and Information Protection scenarios more effectively, Microsoft Purview is introducing a new set of enhanced diagnostics. These improvements provide deeper visibility into why specific DLP rules or sensitivity labeling policies are triggered on files and emails, making investigation and policy tuning more efficient.
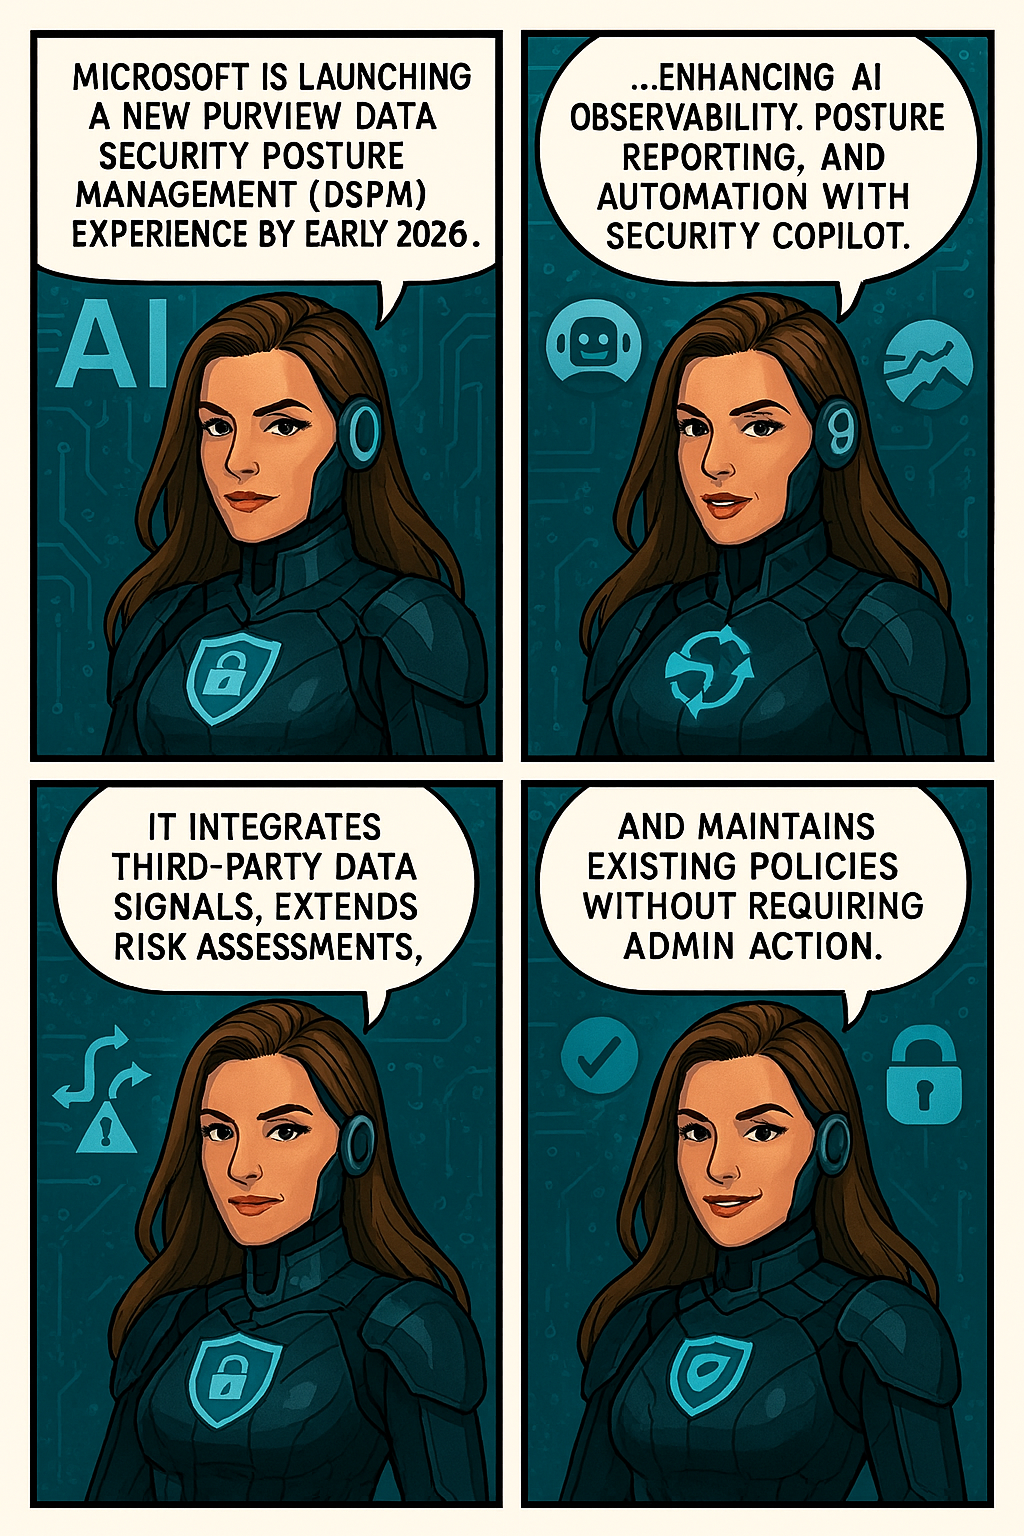
Microsoft is launching a new Purview Data Security Posture Management (DSPM) experience by early 2026, enhancing AI observability, posture reporting, and automation with Security Copilot.
Microsoft is introducing a major evolution of Purview Data Security Posture Management (DSPM) to help organizations strengthen data security and confidently embrace AI. The new DSPM experience unifies visibility and control across traditional data and AI-driven environments, delivering outcome-based guided workflows that turn insights into actionable steps—so teams can prioritize risks and remediate faster. It brings AI observability, enhanced posture reporting, and intelligent Security Copilot agents to automate tasks like triage and policy management.
Purview now also extends coverage beyond Microsoft data with third-party signals from partners like BigID, Cyera, OneTrust, and Varonis, giving security teams a single, streamlined view of sensitive data across clouds and platforms. Additionally, Data Risk Assessments are extended to Fabric and item-level analysis with new remediation actions like bulk disabling of overshared SharePoint links.
This message is associated with Microsoft 365 Roadmap ID532728.
When this will happen:
Public Preview (Worldwide): Rollout begins early December 2025 and completes by early April 2026.
General Availability (Worldwide): Rollout begins early April 2026 and completes by early May 2026.
Compliance considerations:
Compliance Area
Explanation
AI/ML capabilities interacting with customer data
Security Copilot agents automate triage and policy management.
Integration with 3rd party software
Adds signals from BigID, Cyera, OneTrust, and Varonis.
Admin reporting and monitoring
Enhanced posture reporting and remediation actions introduced.
In a world where data flows like rivers and algorithms shape reality, two extraordinary heroes rise to defend the integrity of cyberspace: Jo Cybermind and Jo SNAI. Known collectively as The Cyber Twins, they are the ultimate protectors of the digital frontier, combining the power of Cybersecurity and Artificial Intelligence to keep the virtual world safe.
The Birth of The Cyber Twins
In the early days of the Quantum Net, humanity stood on the brink of a digital collapse. Cybercrime syndicates had evolved beyond firewalls, wielding AI-driven attacks that could dismantle entire infrastructures in seconds. Governments and corporations scrambled for solutions, but every defense fell short.
Amid this chaos, two brilliant minds emerged from the shadows of innovation. One was a pioneer in cognitive security systems, the other a visionary in Security Nebula AI. Their paths crossed during a catastrophic breach—the Nebula Incident—where a rogue superintelligence threatened to seize control of global networks.
Instead of retreating, they fused their expertise into a single mission: to create a new era of defense where human intuition meets machine intelligence. Through relentless research and quantum experimentation, they unlocked extraordinary abilities—transforming themselves into living embodiments of their technologies.
Jo Cybermind became the shield of the digital realm, wielding neural firewalls and cognitive encryption to repel any threat.
Jo SNAI mastered the art of predictive warfare, commanding AI sentinels and weaving a global cyber mesh to outsmart adversaries before they strike.
Bound by purpose and powered by innovation, they vowed to protect the integrity of cyberspace. From that day forward, they were known as The Cyber Twins—guardians of security and intelligence in a world where every byte counts.
“In a universe of infinite data, only two minds can keep the chaos in check. The Cyber Twins—where security meets intelligence.”
Meet Jo Cybermind
Jo Cybermind is the embodiment of strategic defense and cognitive brilliance. Her superpower lies in Nebula Shielding, a cutting-edge ability that creates impenetrable barriers against cyber threats. With her enhanced brain-computing interface, she can detect anomalies in milliseconds, neutralize ransomware attacks before they spread, and predict vulnerabilities before they even exist.
Her moto: “Decode the Chaos.”
Signature Abilities:
Quantum Threat Analysis: Scans billions of data points instantly to identify hidden risks.
Adaptive Firewalls: Deploys dynamic shields that evolve with every attack.
Cognitive Encryption: Encrypts sensitive data using AI-driven neural patterns, making it virtually unbreakable.
Meet Jo SNAI
Jo SNAI is the visionary architect behind intelligent systems and the unrivaled strategist of predictive algorithms. Her ultimate power, Security Nebula AI, transforms the battlefield of cyberspace into her domain. With this ability, she channels the limitless potential of machine learning to outthink and outmaneuver even the most sophisticated adversaries. Jo SNAI doesn’t just defend—she anticipates, adapts, and evolves.
Her motto: “Intelligence isn’t just power, it’s protection.”
Signature Abilities
AI Sentinels: Deploys autonomous guardians that patrol networks, neutralizing threats before they strike.
Behavioral Pattern Mapping: Reads the digital footprints of cybercriminals, predicting their next move with surgical precision.
Global Cyber Mesh: Weaves a resilient, interconnected shield across infrastructures, creating a fortress of security in the cloud and beyond.
Together, They Are Unstoppable
When Jo Cybermind and Jo SNAI join forces, they form an unbreakable alliance of logic and learning. Their synergy ensures that every byte of data remains secure, every algorithm stays ethical, and every user can trust the digital world. They are not just heroes—they are the future of cybersecurity and AI.
“In a universe of infinite data, only two minds can keep the chaos in check. The Cyber Twins—where security meets intelligence. When chaos ruled the code, two minds rewrote destiny.”
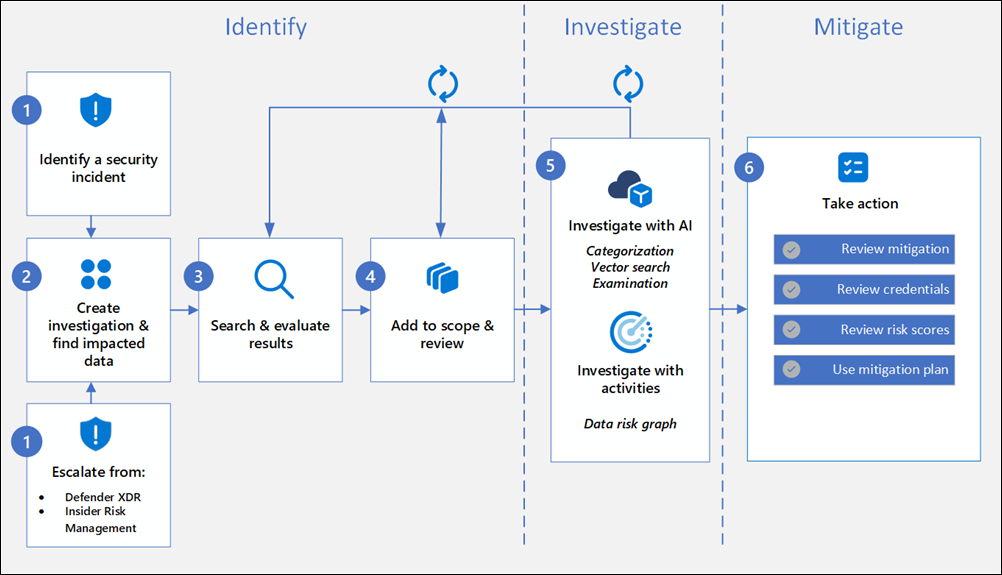
Data Security Investigations (preview) workflow helps you quickly identify, investigate, and take action on data associated with security and data breach incidents. This workflow isn’t a linear process. It includes significant iteration requirements for several of the steps to fine tune searches, evidence gathering, classification, and investigation by using AI and activities.
Analysts can use Data Security Investigations (preview) features in your organization to:
Quickly and efficiently search, discover, and identify impacted data.
Use deep content AI analysis to discover exact data risks hidden in data.
Take action to reduce the impact of data security incidents and quickly mitigate ongoing risks.
Collaborate with internal and external stakeholders on investigation details.
Check out the following videos to learn about how Data Security Investigations (preview) can help you respond to data security incidents:
DSI builds on and extends Microsoft Purview’s existing best-of-breed Data Security portfolio. Our information protection, data loss prevention, and insider risk management solutions have provided customers with a strong foundation to protect their crown jewels, their data. Data is at the center of cyberattacks, and now DSI will use AI to re-imagine how customers investigate and mitigate data security incidents, accelerating the process dramatically. Most organizations we spoke to (77%) believe that AI will accelerate data security detection and response, and 76% think AI will improve the accuracy of data security detection and response strategies. With its cutting edge, generative AI-powered investigative capabilities, DSI will transform and scale how data security admins analyze incident-related data. DSI uncovers key security and sensitive data risks and facilitates secure collaboration between partner teams to mitigate those identified risks. This simplifies previously complex, time-consuming tasks – what once took months, can now be done in a fraction of the time.
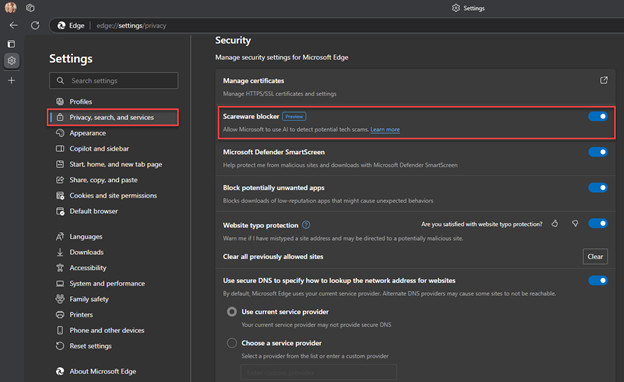
The Scareware Blocker is a New feature in Microsoft Edge designed to protect users from tech support scams, often referred to as scareware. These scams use aggressive web pages to trick users into thinking their system is infected with malware, pressuring them to call fake tech support numbers. Scareware blockers use a machine learning model to recognize the tell-tale signs of scareware scams and put users back in control of their computer.
Here’s how it works:
Machine Learning: It uses a machine learning model to detect and block scareware sites.
User Control: When a suspicious site is detected, Edge blocks it and shows a warning message, giving users the option to close the page or proceed if they believe it’s safe
“Scareware” scams are a particularly convincing type of tech support scam. They use aggressive web pages to convince victims into thinking their system is infected with malware, pressure them to call a fake tech support number, and try to gain access to the computer. Last year, Hollywood even made a blockbuster action movie with scareware scammers as the villains.
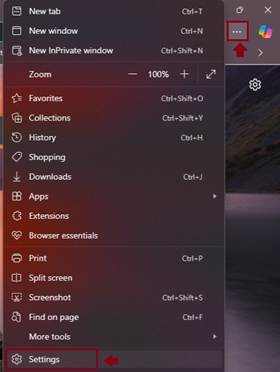
To enable Scareware Blocker in Microsoft Edge:
Open Edge and click on the three-dot menu in the toolbar.
Select Settings.
Navigate to Privacy, search, and services.
Find the Scareware Blocker option and toggle it on
When scareware blocker suspects a page is a scam, Edge will put users back in control by exiting full screen mode, stopping aggressive audio playback, warning the user, and showing a thumbnail of the page they were just viewing:
Scareware blocker fights tech scams – Video Tutorial
Migrating from Google Workspace to Microsoft 365 can be a daunting task, especially when dealing with mailboxes over 100 GB. This guide provides an in-depth look at the challenges and solutions for a successful migration, catering to both normal and large mailboxes.
Assessment and Planning
Before initiating the migration, it’s crucial to carry out a thorough assessment of your current Google Workspace environment. Identify the number of users, mailbox sizes, and any potential issues that might arise. Planning should include:
Identifying key stakeholders
Defining the migration timeline
Determining the migration method
Allocating resources and roles
You can migrate the following functionalities from Google Workspace to Microsoft 365 or Office 365:
Mail & Rules Calendar Contacts
You can migrate batches of users from Google Workspace to Microsoft 365 or Office 365, allowing a migration project to be done in stages. This migration requires that you provision all of your users who will be migrated as mail-enabled users outside of the migration process. You must specify a list of users to migrate for each batch.
All procedures in this article assume that your Microsoft 365 or Office 365 domain is verified and that your TXT records have been set up. For more information, see Set up your domain (host-specific instructions).
Select your method of migration
You can migrate from Google Workspace using any of the following methods:
Automated – through the Exchange admin center
Manual – through the Exchange admin center
PowerShell
Migration limitations
Important Microsoft’s data migration tool is currently unaware of tools enforcing messaging records management (MRM) or archival policies. Because of this, any messages that are deleted or moved to archive by these policies will result in the migration process flagging these items as “missing”. The result is perceived data loss rather than actual data loss, which makes it much harder to identify actual data loss during any content verification checks. Therefore, Microsoft strongly recommends disabling all MRM and archival policies before attempting any data migration to mailboxes.
Note The largest single email message that can be migrated is based on the transport configuration for your configuration. The default limit is 35 MB. To increase this limit, see Office 365 now supports larger email messages.
Throughput limitations for contacts and calendars completely depend on the quota restrictions for your tenant’s service account on the Google Workspace side.
Other migration limitations are described in the following table:
Data type
Limitations
Mail
Vacation settings, Automatic reply settings
Meeting rooms
Room bookings won’t be migrated
Calendar
Shared calendars and event colors won’t be migrated
Contacts
A maximum of three email addresses per contact are migrated over
Contacts
Gmail tags, contact URLs, and custom tags won’t be migrated
Google Workspace migration prerequisites in Exchange Online
The following procedures must be performed (in the order mentioned) before you start the process of Google Workspace migration:
Create a subdomain for mail routing to Microsoft 365 or Office 365
Create a subdomain for mail routing to your Google Workspace domain
Provision users in Microsoft 365 or Office 365
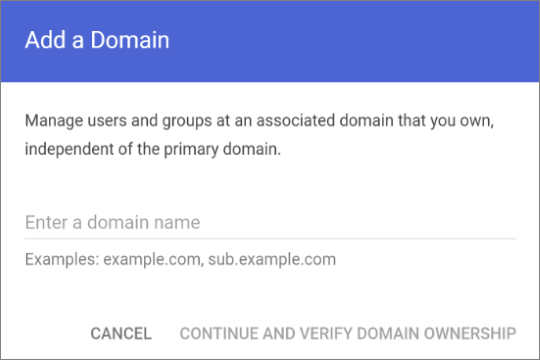
Create a subdomain for mail routing to Microsoft 365
Note The option Add a domain won’t be available if using the legacy free edition of G Suite.
Enter the domain that you’ll use for routing mails to Microsoft 365 or Office 365, select User alias domain, and then select ADD DOMAIN & START VERIFICATION. A subdomain of your primary domain is recommended (for example, “m365mail.domain.com”, when “domain.com” is your primary domain) so that it will be automatically verified. If another domain (such as “domain.onmicrosoft.com”) is set, Google will send emails to each individual address with a link to verify the permission to route mail. Migration won’t complete until the verification is completed.
Note If you see an error GmailForwardingAddressRequiresVerificationException has occurred during the batch, skip this step of creating a subdomain for forwarding emails from the gmail side.
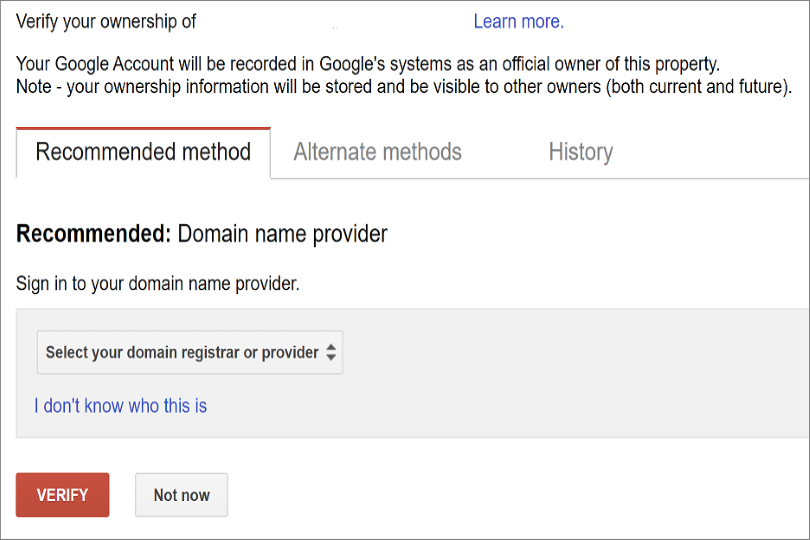
Follow any subsequent steps that are then required to verify your domain till the status is shown as Active. If you chose a subdomain of your primary domain (created in step 3), your new domain may have been verified automatically.
Sign in to your DNS provider and update your DNS records so that you have an MX record at the domain you created (in step 3), pointing to Microsoft 365 or Office 365. Ensure that this domain (created in step 3) is an accepted domain in Microsoft 365 or Office 365. Follow the instructions in Add a domain to Microsoft 365 to add the Microsoft 365 or Office 365 routing domain (“m365mail.domain.com”) to your organization and to configure DNS to route mail to Microsoft 365 or Office 365.
Note The migration process won’t be able to complete if an unverified routing domain is used. Choosing the built-in “tenantname.onmicrosoft.com” domain for routing mail to Office 365 instead of a subdomain of the primary Google Workspace domain occasionally causes issues that Microsoft is not able to assist with, besides causing Microsoft to recommend that the user manually verify the forwarding address or contact Google support.
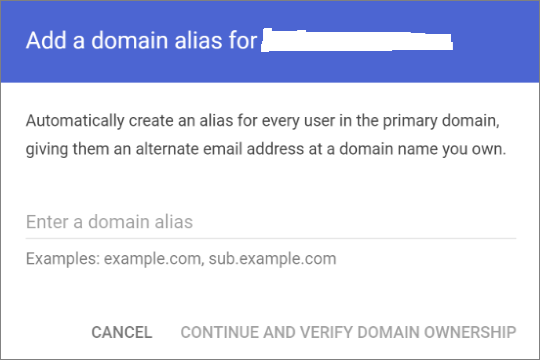
Create a subdomain for mail routing to your Google Workspace domain
Enter the domain that you’ll use for routing mails to Google Workspace, select User alias domain, and then select ADD DOMAIN & START VERIFICATION. A subdomain of your primary domain is recommended (for example, “gsuite.domain.com”, when “domain.com” is your primary domain) so that it will be automatically verified.
Follow any subsequent steps that are then required to verify your domain till your domain’s status is shown as Active. If you chose a subdomain of your primary domain (created in step 3), your new domain may have been verified automatically.
Note It may take up to 24 hours for Google to propagate this setting to all the users in your organization.
Important If you are using non-default Transport settings in your Microsoft 365 or Office 365 organization, you should check whether the mail flow will work from Office 365 to Google Workspace. Ensure that either your default Remote Domain (“*”) has Automatic Forwarding enabled, or that there is a new Remote Domain for your Google Workspace routing domain (for example, “gsuite.domain.com“) that has Automatic Forwarding enabled.
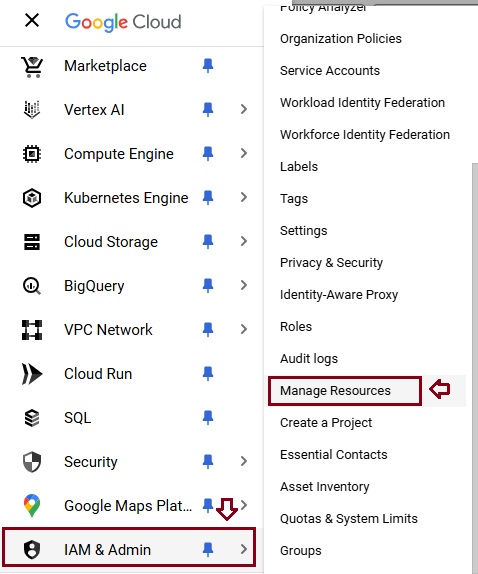
Check Google Cloud platform permissions
An automated scenario requires the Google Migration administrator to be able to perform the following steps in the Google admin console:
Create a Google Workspace project.
Create a Google Workspace service account in the project.
Create a service key.
Enable all APIs – Gmail, Calendar, and Contacts.
The Google Migration administrator needs the following permissions to complete these steps:
resourcemanager.projects.create
iam.ServiceAccounts.create
The most secure way to achieve completion of these four steps is to assign the following roles to the Google Migration administrator:
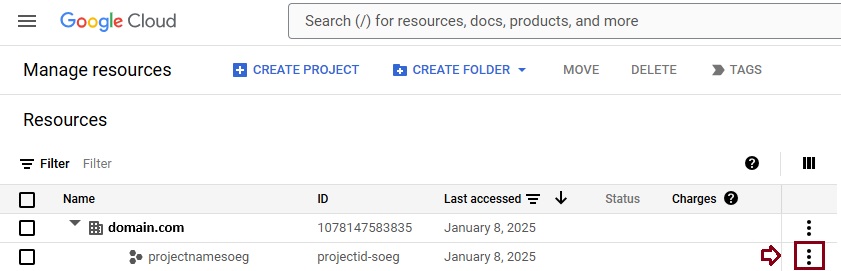
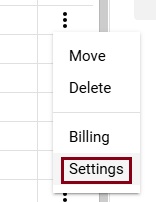
Select the appropriate resource and in the right-hand pane under the Permissions tab, select Add Principal.
Enter your Google Migration administrator credentials, enter Project Creator in the filter, and select Project Creator. Select Add Another Role, enter Create Service Accounts in the filter, and select Create Service Accounts. Select Save.
Note It might take up to 15 minutes to propagate role assignment changes across the globe.
Provision users in Microsoft 365. Once your Google Workspace environment has been properly configured, you can complete your migration in the Exchange admin center or through the Exchange Online PowerShell. Before proceeding with either method, ensure that Mail Users have been provisioned for every user in the organization who will be migrated (either now or eventually). If any users aren’t provisioned, provision them using the instructions in Manage mail users.
Very Important Note Microsoft recommend that the Default MRM Policy and Archive policies be disabled for these users until their migration has been completed. When such features remain enabled during migration, there is a chance that some messages will end up being considered “missing” during the content verification process.
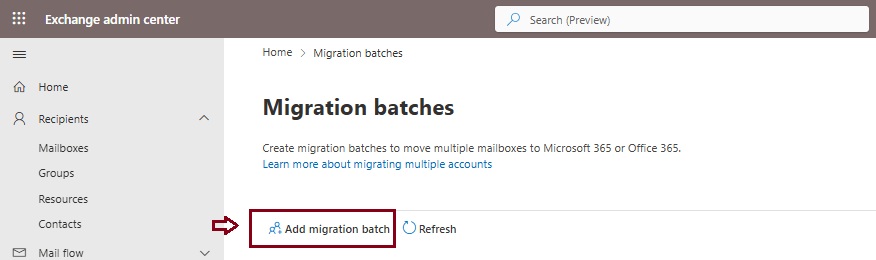
Start an automated Google Workspace migration batch in EAC
Give migration batch a unique name: Enter a unique name.
Select the mailbox migration path: Verify that Migration to Exchange Online is selected.
When you’re finished, click Next.
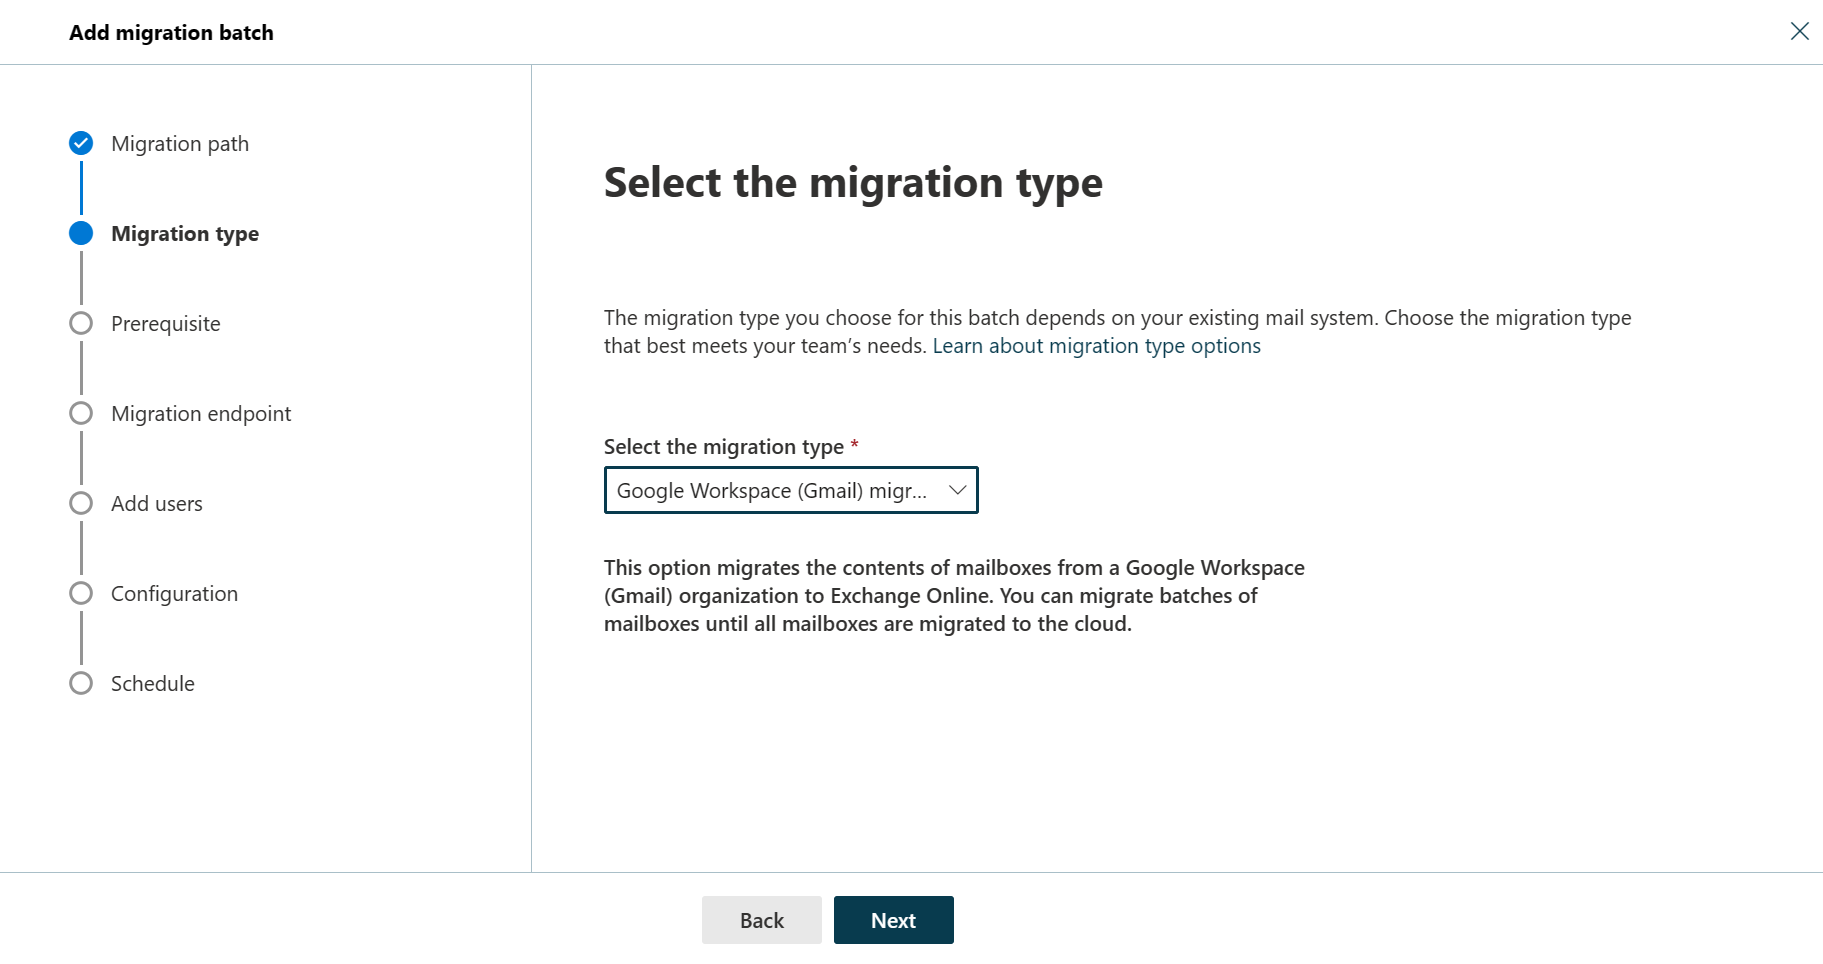
On the Select the migration type page, select Google Workspace (Gmail) migration as migration type, and click Next.
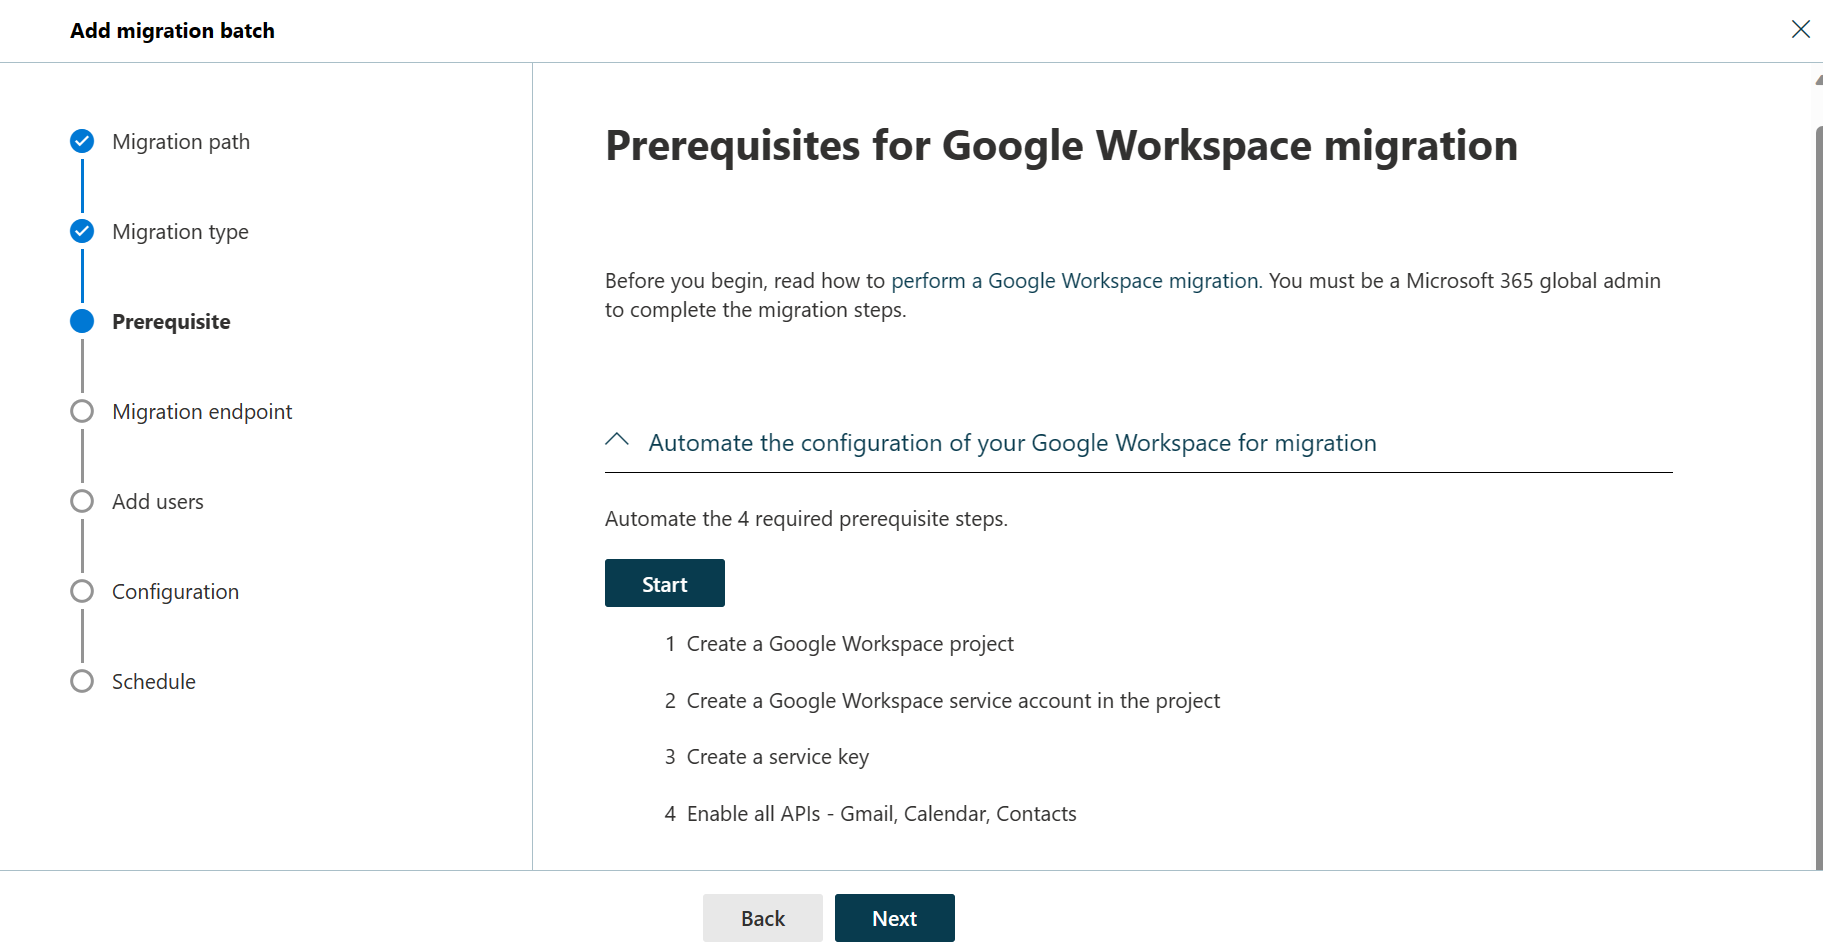
The Prerequisites for Google Workspace migration page appears.
Verify that the Automate the configuration of your Google Workspace for migration section is expanded, and then select Start in that section to automate the four required prerequisite steps.
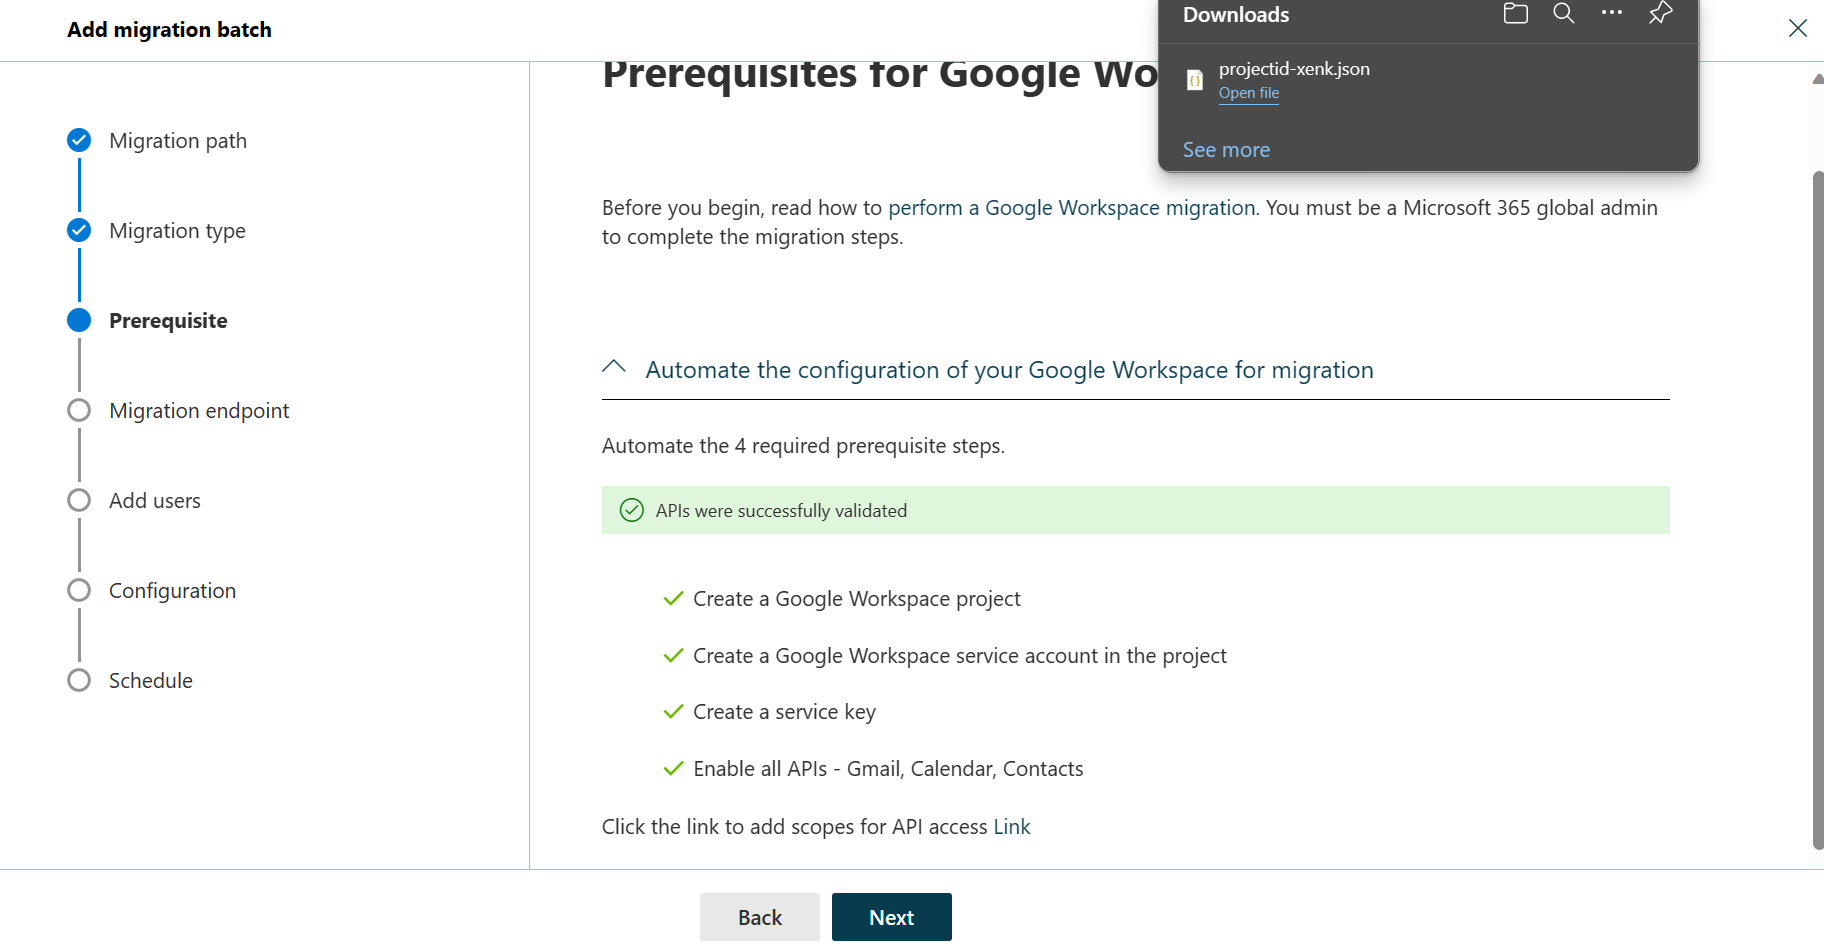
In the Google sign-in page that appears, sign in to your Google account to validate your APIs.
Once the APIs are successfully validated, the following things happen:
A JSON file (projectid-*.json) is downloaded to your local system.
The link to add the ClientID and the Scope is provided. The ClientID and Scope are also listed for your reference.
Select the API access link. You’ll be redirected to Google Admin API Controls page.
Select Add new. Copy the ClientID and Scope from the EAC, paste it here, and then select Authorize.
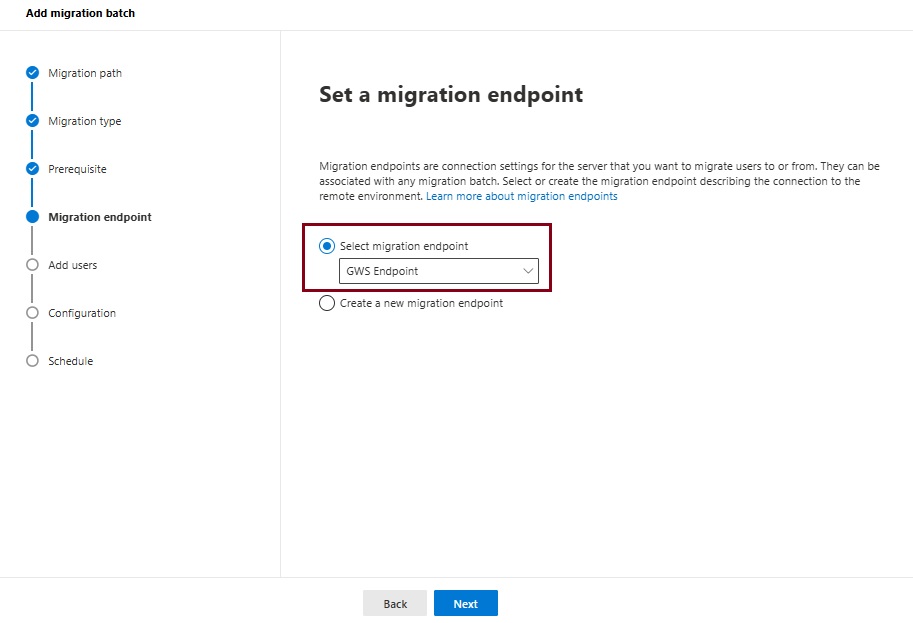
Once the four prerequisites-related steps are completed, select Next. The Set a migration endpoint page appears.
Select one of the following options:
Select the migration endpoint: Select an existing migration endpoint from the drop-down list.
Create a new migration endpoint: Select this option if you’re a first-time user.
Note To migrate Gmail mailboxes successfully, Microsoft 365 or Office 365 needs to connect and communicate with Gmail. To do this connection-communication, Microsoft 365 or Office 365 uses a migration endpoint. Migration endpoint is a technical term that describes the settings that are used to create the connection so you can migrate the mailboxes.
If you’ve selected Create a new migration endpoint, do the following steps:
On the General Information page, configure the following settings:
Migration Endpoint Name: Enter a value.
Maximum concurrent migrations: Leave the default value 20 or change the value as required.
Maximum concurrent incremental syncs: Leave the default value 10 or change the value as required. When you’re finished, select Next.
On the Gmail migration configuration page, configure the following settings:
Email address: Enter the email address that you use to sign in to the Google Workspace.
JSON key: Select Import JSON. In the dialog box that appears, find and select the downloaded JSON file, and then select Open. Once the endpoint is successfully created, it will be listed in the Select migration endpoint drop-down list.
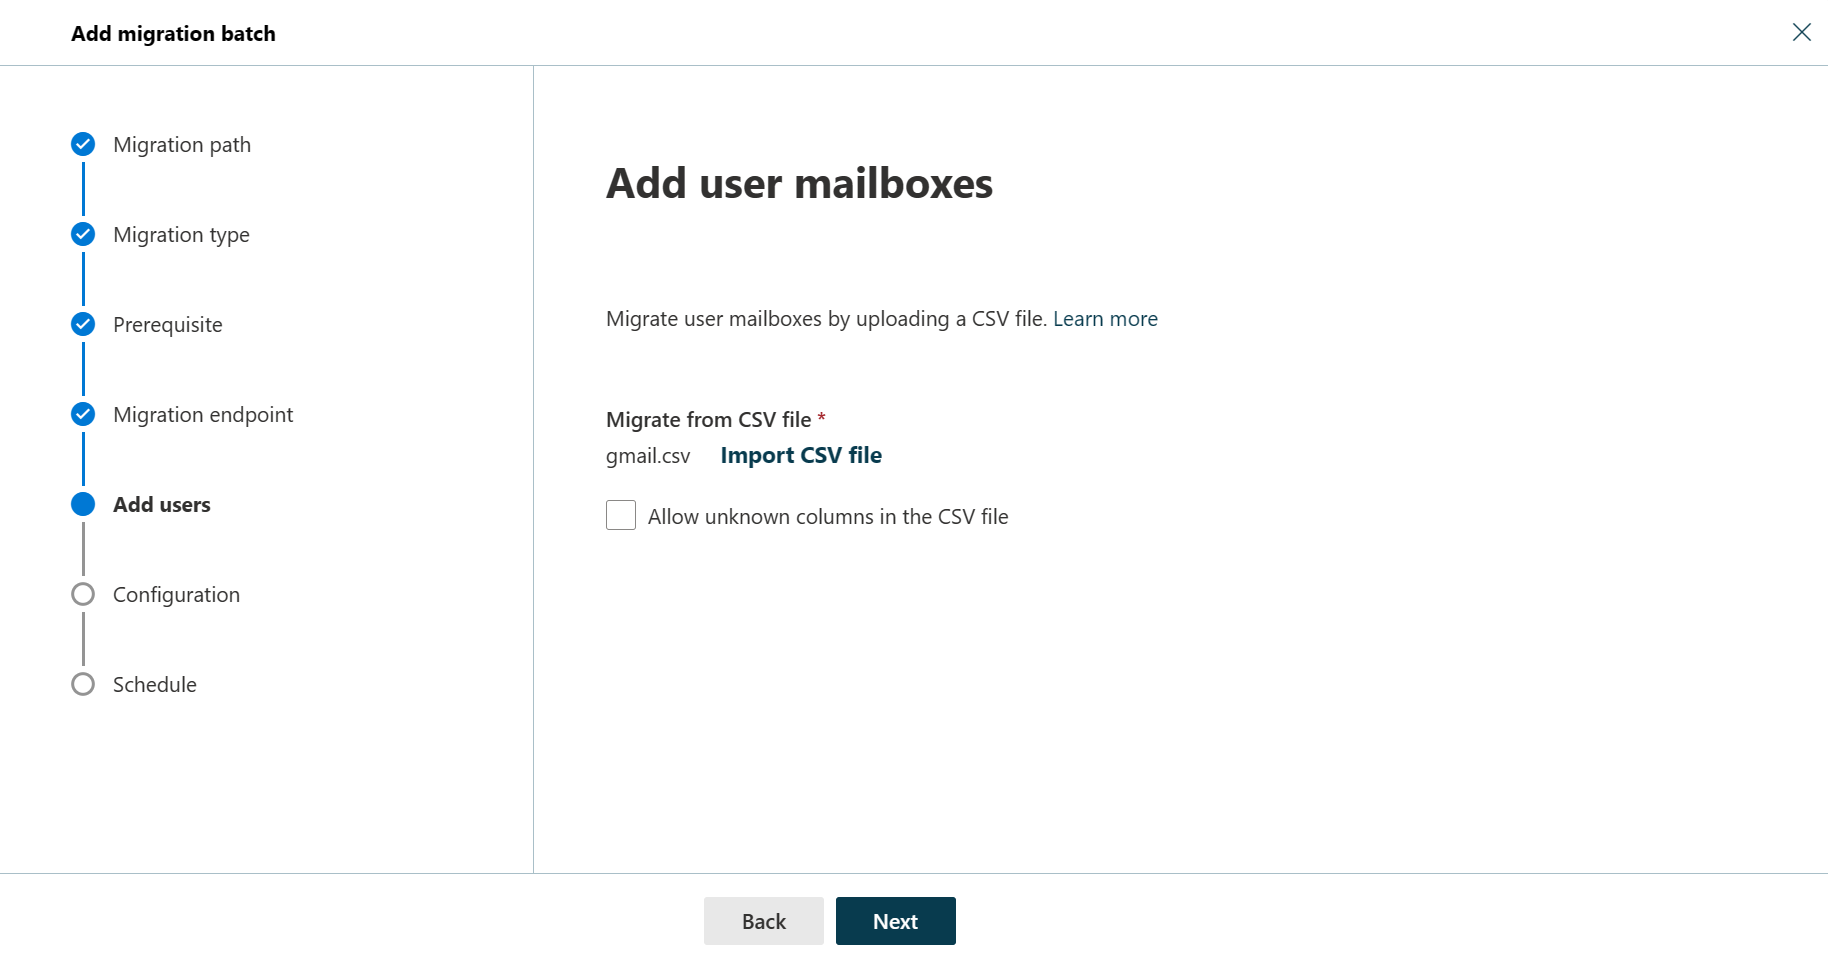
Select the endpoint from the drop-down list, and select Next. The Add user mailboxes page appears.
Select Import CSV file and navigate to the folder where you’ve saved the CSV file.
If you haven’t already saved or created the CSV file, create a CSV file containing the set of names of the users you want to migrate. You’ll need its filename below. The allowed headers are:
EmailAddress (required): Contains the primary email address for an existing Microsoft 365 or Office 365 mailbox.
Username (optional). Contains the Gmail primary email address, if it differs from EmailAddress.
CSV Format
EmailAddress will@domain.com user123@domain.com
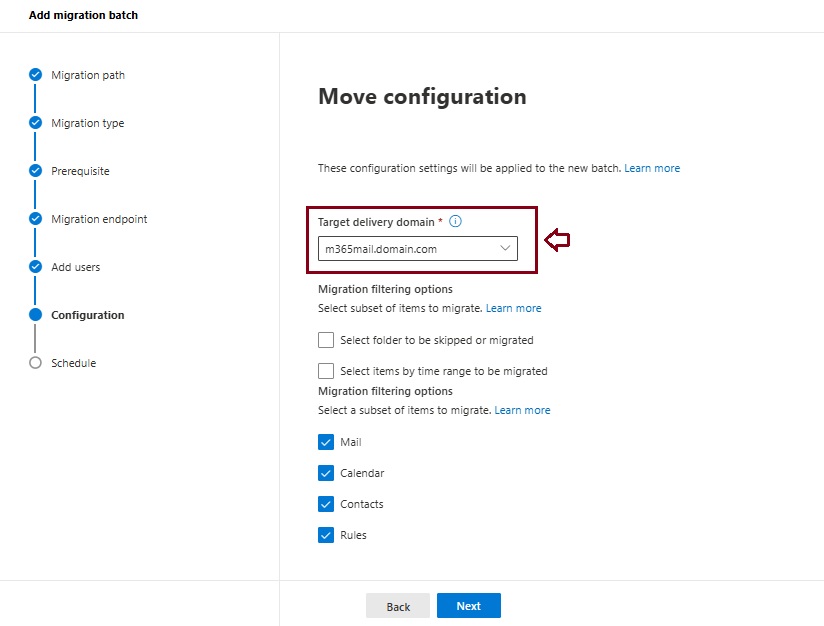
When you’re finished, click Next. The Move configuration page appears.
From the Target delivery domain drop-down list, select the target delivery domain (the subdomain) that was created as part of fulfilling the Google Workspace migration prerequisites in Exchange Online, and click Next.
Note The target delivery domain (the subdomain) you select in this step can be either an existing one or the one that you’ve created in Google Workspace migration prerequisites in Exchange Online (eg. M365mail.domain.com).
If you don’t see the target delivery domain that you want to select in the Target delivery domain drop-down list, you can manually enter the name of the target delivery domain in the text box.
The text box in which you manually enter the name of the target delivery domain is Target delivery domain. That is, the text box is effectively the Target delivery domain drop-down list, which is taking the role of a text box when you manually enter text into it.
Filtering options have been introduced for the migration of Google Workspace to Microsoft 365 or Office 365. For more information on these filtering options.
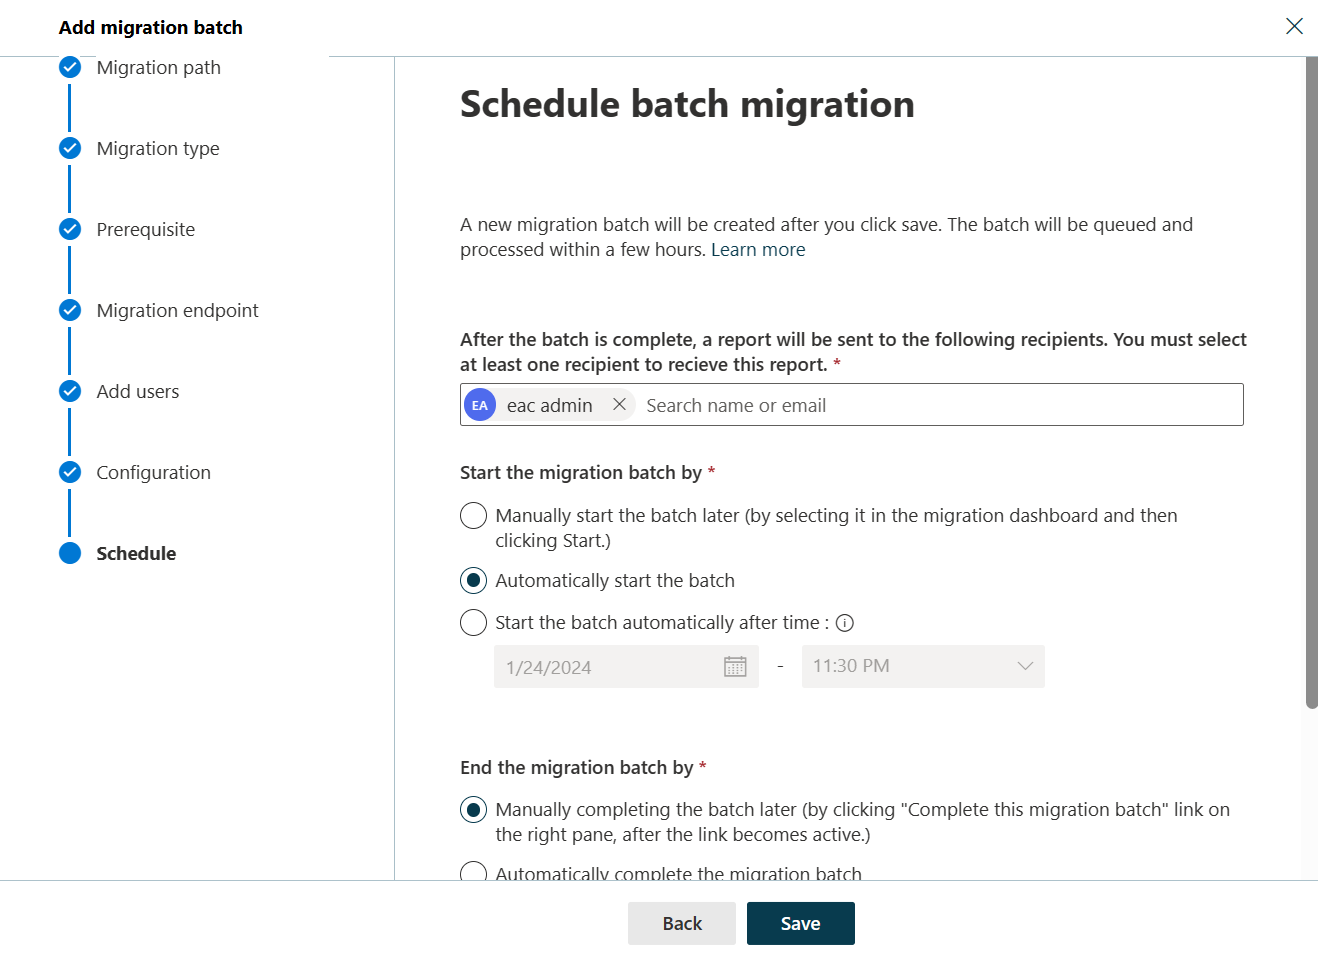
On the Schedule batch migration page, verify all the details, click Save, and then click Done.
Once the batch status changes from Syncing to Synced, you need to complete the batch.
In Part II we will describe how to handle the large mailboxes (>100 GB) and the challenges we will face. Stay tuned 😊
Clippy is back, in a new, unauthorized app that somehow has made it onto the Microsoft Store.
Clippy by Firecube uses Microsoft’s animated paper clip, Clippy (known as Clippit to purists), as a front end for ChatGPT 3.5, the AI chatbot developed by OpenAI. Although the app refers to Clippy by name, the full text description of the app immediately identifies it as “Not by Microsoft” to presumably fend off any lawyers that might be sniffing about the app. Firecube has a good reputation as a developer who looks deeply into new Windows code for unpublicized features.
Paperclip by FireCube (formerly known as Clippy by FireCube) brings back the infamous Clippit into your desktop powered by the OpenAI GPT 3.5 model (OpenAI key required as of this version).
Paperclip can be pinned to the screen for quick access to chat or just be left for nostalgia. This app is open source with improvements coming such as support for more characters like bob or classic clippy. Dragging and resizing and support for no OpenAI key required.
You can download it from Microsoft Store for free here!
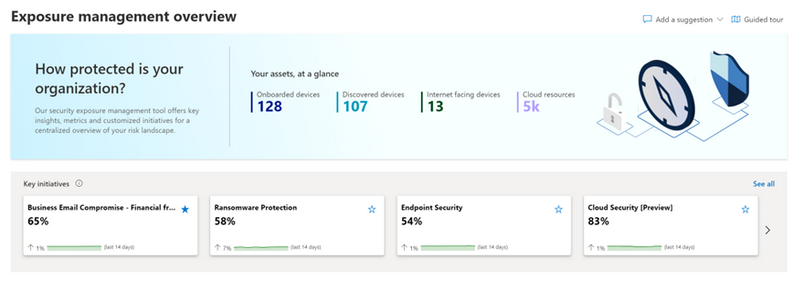
Today, March 13, Microsoft announce the public preview release of Microsoft Security Exposure Management. This transformative solution unifies disparate data silos, extending end-to-end visibility to security teams across all assets. By enabling a thorough assessment of security posture and exposure, this solution equips teams to not only grasp their current security landscape but also elevate it to new heights. Microsoft Security Exposure Management serves as a cornerstone for proactive risk management, empowering organizations to adeptly navigate and mitigate threat exposure across their entire attack surface.
Microsoft Security Exposure Management empowers customers to:
Build an effective exposure management program with a continuous threat exposure management (CTEM) process.
Reduce risk with a clear view of every asset and real-time assessment of potential exposures both inside-out and outside-in.
Identify and classify critical assets, ensuring they are protected against a wide variety of threats.
Discover and visualize potential adversary intrusion paths, including lateral movement, to proactively identify and stop attacker activity.
Communicate exposure risk to business leaders and stakeholders with clear KPIs and actionable insights.
Enhance exposure analysis and remediation by integrating with third-party data sources and tools
At launch, we are introducing new capabilities that are foundational to exposure management programs:
Attack Surface Management: Provides a comprehensive view of the entire attack surface, allowing the exploration of assets and their relationships.
Attack Path Analysis: Assists security teams in visualizing and prioritizing attack paths and risks across environments, enabling focused remediation efforts to reduce exposure and breach likelihood.
Unified Exposure Insights: Provides decision-makers with a consolidated, clear view of an organization’s threat exposure, facilitating security teams in addressing critical questions about security posture.