Multi-tenant organization capabilities now available in Microsoft 365


On the 25th of April, Microsoft announced a robust set of multi-tenant organization (MTO) capabilities within Microsoft 365, now generally available to enhance any organization’s collaboration, communication, and administration across multiple tenants. These capabilities span Microsoft 365 People Search, Microsoft Teams, Viva Engage and Microsoft Defender XDR, which can be enabled via the Microsoft 365 admin center or Microsoft Entra admin center.   

This segmentation can cause frustration when users need to communicate and collaborate across tenant boundaries, whilst IT admins need to perform the same set of administrative tasks per tenant to maintain their organization.  

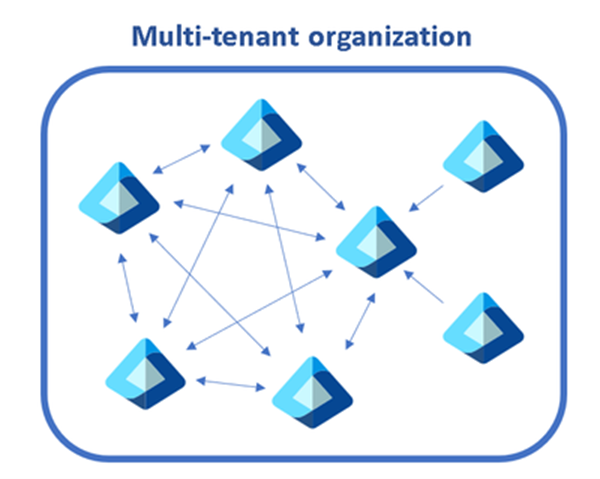
A diagram showing multiple tenants within a single organization.

The capabilities we discuss below help multi-tenant organizations address these complexities, while staying compliant and secure:   

  • Find people across organizations easily: Search for and communicate with colleagues in a unified manner with improved people search. Every search now returns a single, accurate result, simplifying how you connect with the right colleague. 
  • Streamlined workforce collaboration: Engage in calls, chats, and meetings across tenants without the barriers of meeting lobbies. Enjoy immediate access to meeting content and collaborative tools in real time.  
  • Unlock new ways for employees and leaders to connect: We’ve broadened the capabilities in Viva Engage, facilitating cross-tenant announcements and enabling community interaction and campaign participation that extend beyond tenant boundaries.   
  • Manage incidents across tenants: Microsoft Defender XDR provides a single, unified view of all tenants your organization manages, allowing for swift incident investigation and advanced threat hunting without the need to switch between tenant views.   
  • Simplify multi-tenant management: The newly defined multi-tenant organization boundary in Microsoft Entra ID P1 simplifies the enablement, configuration and management of the capabilities above. Whether through Microsoft Graph APIs or the Microsoft 365 Admin Center, setting up is intuitive and straightforward.   

 Find people across organizations easily with People Search 

The multi-tenant organization (MTO) People Search is a collaboration feature that enables search and discovery of people across multiple tenants. A tenant admin can enable cross-tenant synchronization that allows users to be synced to another tenant and be discoverable in its global address list. Once enabled, users can search and discover synced user profiles from the other tenant and view their corresponding people cards. 

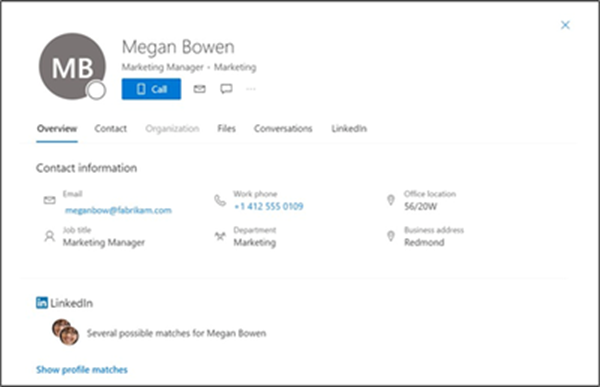
An image showing a synchronized user profile from another tenant in Microsoft 365

Streamline workforce collaboration with Microsoft Teams 

Once administrators form a multi-tenant organization in the Entra ID platform organizations with the new Teams desktop client will automatically receive the Teams MTO features with no additional configuration.  
Users can now join a meeting, chat, call, or collaborate in a channel hosted by another tenant, and simultaneously compose chat messages in their own tenant. Users can receive cross-tenant notifications for all accounts and tenants added to the Teams client, no matter which one is currently in focus. 
People’s search is also improved. Searches for coworkers in a multi-tenant organization could often return multiple results for the same person. With the new MTO capabilities in the new Teams client, searching for a coworker in an MTO will return a single result, helping you to identify the correct colleague and keep your conversations in one place. 

The new Teams desktop client showing improved people search capability on the right hand side
Users that join a meeting in another tenant can now bypass the meeting lobby, have access to all in-meeting content and resources and can collaborate in real time.  

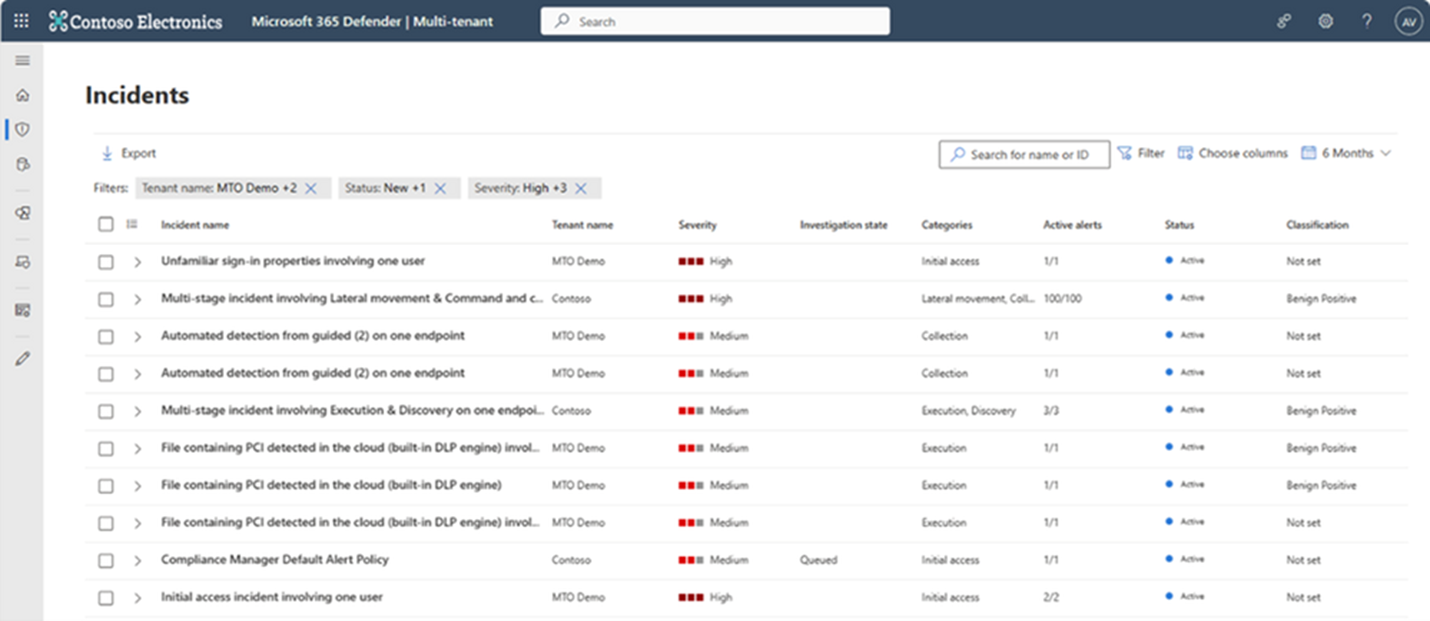
Manage incidents across tenants with Microsoft Defender XDR 

Security operations teams that work with multiple tenants need a reliable and comprehensive security solution that can keep up with modern threats and provide unified and connected experience to enhance their security operations. Microsoft Defender XDR now delivers unified investigation and response experience for multi-tenant organizations alongside native protection across endpoints, identities, email, collaboration tools, cloud apps, and data. 

With multi-tenant management in Microsoft Defender XDR, security operations teams can quickly investigate incidents and perform advanced hunting across data from multiple tenants, removing the need for administrators to log in and out of each individual tenant.

Enable Microsoft 365 multi-tenant capabilities with Microsoft Entra ID 

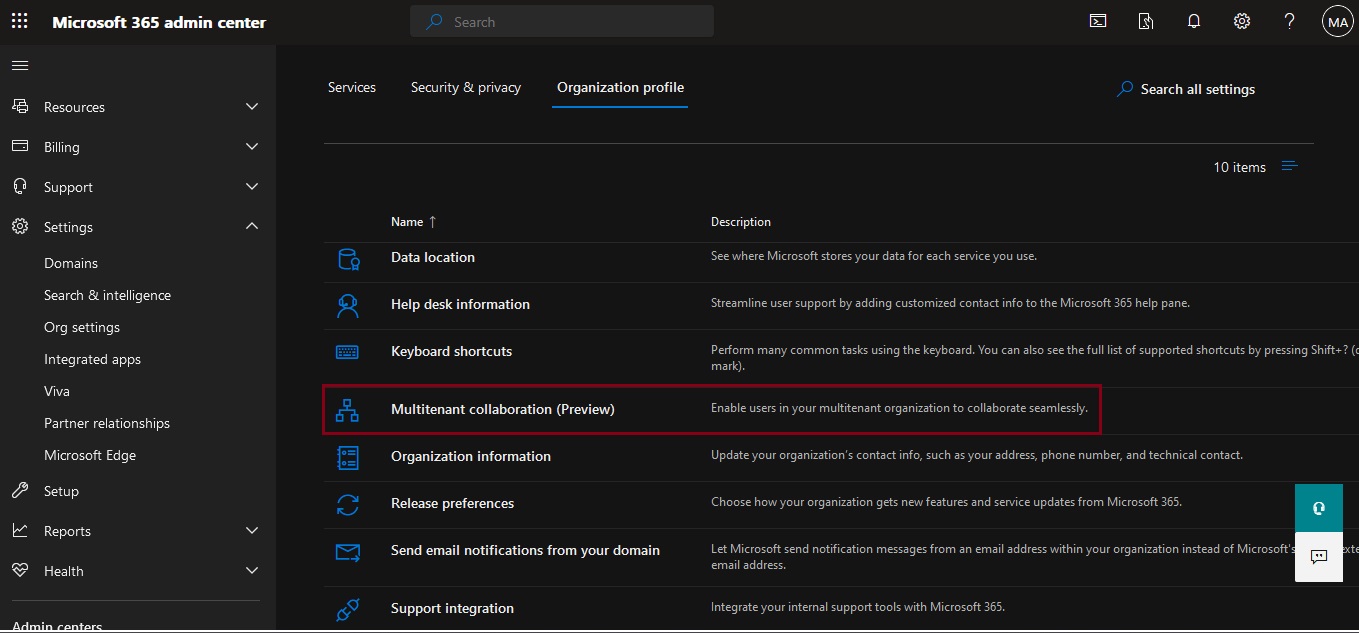
Multi-tenant organization platform capabilities are now rolling out to standard production tenants in Microsoft 365. To deliver the above capabilities, administrators can enable multi-tenant capabilities in the Microsoft 365 admin center and configure which users in the organization can take advantage of multi-tenant capabilities using either Microsoft 365 admin center or Microsoft Entra admin center.  

This approach allows you to define a boundary around the Entra ID tenants that your organization owns, facilitated by an invite-and-accept flow between tenant administrators. Learn more about the process in the Microsoft 365 admin center here and using Microsoft Graph API’s here. We recommend the use of the Microsoft 365 admin center to simplify the setup experience and to view your newly created MTO: 

Snapshot of a multitenant organization collaboration with three tenants.

Following the formation of the multi-tenant organization, Microsoft offers two methods to provision employees into neighboring multi-tenant organization tenants at scale. 

  • For a simplified experience, stay in the Microsoft 365 admin center to sync users into multiple tenants in your multi-tenant organization. Microsoft recommend this method for smaller multi-tenant organizations who plan on all employees receiving access to all multi-tenant organization tenants. 
  • For a customizable sync experience, head over to Entra ID cross-tenant synchronization. Cross-tenant synchronization is highly configurable and allows the provisioning of any multi-hub multi-spoke identity landscape. We recommend this method for enterprise organizations of complex identity landscapes. Either method works. Choose the one that works best for your specific organization! 

Stay Tune…..

Microsoft Copilot for Security generally available worldwide on April 1, 2024


Today, Microsoft announce that Microsoft Copilot for Security will be generally available worldwide on April 1, 2024. The industry’s first generative AI solution will help security and IT professionals catch what others miss, move faster, and strengthen team expertise. Copilot is informed by large-scale data and threat intelligence, including more than 78 trillion security signals processed by Microsoft each day, and coupled with large language models to deliver tailored insights and guide next steps. With Copilot, you can protect at the speed and scale of AI and transform your security operations.

Copilot for Security economic study, which shows that experienced security professionals are faster and more accurate when using Copilot, and they overwhelmingly want to continue using Copilot. The gains are truly amazing:

* Experienced security analysts were 22% faster with Copilot.
* They were 7% more accurate across all tasks when using Copilot.
* And, most notably, 97% said they want to use Copilot the next time they do the same task.

This new study focuses on experienced security professionals and expands the randomized controlled trial we published last November, which focused on new-in-career security professionals. Both studies measured the effects on productivity when analysts performed security tasks using Copilot for Security compared to a control group that did not. The combined results of both studies demonstrate that everyone—across all levels of experience and types of expertise—can make gains in security with Copilot. When we put Copilot in the hands of security teams, we can break down barriers to entry and advancement, and improve the work experience for everyone. Copilot enables security for all.

Microsoft Security Exposure Management – Public preview release


Today, March 13, Microsoft announce the public preview release of Microsoft Security Exposure Management. This transformative solution unifies disparate data silos, extending end-to-end visibility to security teams across all assets. By enabling a thorough assessment of security posture and exposure, this solution equips teams to not only grasp their current security landscape but also elevate it to new heights. Microsoft Security Exposure Management serves as a cornerstone for proactive risk management, empowering organizations to adeptly navigate and mitigate threat exposure across their entire attack surface.

Microsoft Security Exposure Management empowers customers to:

  • Build an effective exposure management program with a continuous threat exposure management (CTEM) process.
  • Reduce risk with a clear view of every asset and real-time assessment of potential exposures both inside-out and outside-in.
  • Identify and classify critical assets, ensuring they are protected against a wide variety of threats.
  • Discover and visualize potential adversary intrusion paths, including lateral movement, to proactively identify and stop attacker activity.
  • Communicate exposure risk to business leaders and stakeholders with clear KPIs and actionable insights.
  • Enhance exposure analysis and remediation by integrating with third-party data sources and tools

At launch, we are introducing new capabilities that are foundational to exposure management programs:

  • Attack Surface Management: Provides a comprehensive view of the entire attack surface, allowing the exploration of assets and their relationships.
  • Attack Path Analysis: Assists security teams in visualizing and prioritizing attack paths and risks across environments, enabling focused remediation efforts to reduce exposure and breach likelihood.
  • Unified Exposure Insights: Provides decision-makers with a consolidated, clear view of an organization’s threat exposure, facilitating security teams in addressing critical questions about security posture.

More Information you can find here

Microsoft 365 Backup is now in Preview


Microsoft 365 Backup is currently in preview and will begin rolling out to organizations in early 2024. You can set up billing for the product as described in Set up Microsoft 365 Backup. Once Microsoft 365 Backup has been deployed and is available for use in your tenant, you’ll see it in the Microsoft 365 admin center page under Settings.

During the preview period, performance and speed of web interfaces, initial configuration, and restores might be slower than expected as we scale up our infrastructure to remove undesirable latency from our system.

Business continuity assurance is a top-of-mind concern for many companies. Microsoft 365 Backup delivers business continuity peace of mind by providing performance and reliable restore confidence. When evaluating a backup and restore offering, what really matters isn’t solely the backup, but the ability to restore your data to a healthy state quickly when you need to do so. Recovering large volumes of content is difficult when copying data at a scale from a remote, air-gapped location requiring weeks or even months to get your business back up and running.

In cases of a ransomware attack that encrypts large swaths of your data, or instances of an internal accidental or malicious data deletion or overwrite event, you need to be able to get your business back to a healthy state as soon as possible. This is what the Microsoft 365 Backup product offers, both through the Microsoft 365 admin center, as well as via third-party applications built on the Microsoft 365 Backup Storage platform.

To summarize, applications built on top of the Microsoft 365 Backup Storage platform deliver the following benefits regardless of the size or scale of the protected tenant:

  • Fast backup within hours
  • Fast restore within hours (see performance targets later in this article)
  • Full SharePoint site and OneDrive account restore fidelity, meaning the site and OneDrive are restored to their exact state at specific prior points in time via a rollback operation
  • In the future, roll forward granular file-level restores in OneDrive and SharePoint
  • Full Exchange mailbox item restores or granular item restores using search
  • Consolidated security and compliance domain management

Walkthrough an overview of Microsoft 365 Backup here

Architecture

Microsoft 365 Backup provides ultra-fast backup and restore capabilities by creating backups within the protected services’ data boundaries.

Microsoft 365 Backup not only provides uniquely fast recovery from common business continuity and disaster recovery (BCDR) scenarios like ransomware or accidental/malicious employee content overwrite/deletion. Additional BCDR scenario protections are also built directly into the service. For example, OneDrive, SharePoint, and Exchange Online provide replicated copies of your data across geographically disparate datacenters to automatically protect against physical disasters and automatically failover to live active copies seamlessly without the need for end customer intervention.

Our backups are protected from malicious overwrites because OneDrive, SharePoint, and Exchange use Append-Only storage. This means that SharePoint can only add new content blobs and can never change old ones until they’re permanently deleted. The Exchange items are backed up in an immutable manner and can’t be accessed by a client process (such as Outlook, OWA, or MFCMAPI). This process ensures that items can’t be changed or corrupted after an initial save, protecting against attackers that try to corrupt old versions. For More information about the built-in service and data resiliency, see SharePoint and OneDrive data resiliency in Microsoft 365 and Exchange Online data resiliency in Microsoft 365.

Key architectural takeaways:

  • Data never leaves the Microsoft 365 data trust boundary or the geographic locations of your current data residency.
  • The backups are immutable unless expressly deleted by the Backup tool admin via product offboarding.
  • OneDrive, SharePoint, and Exchange have multiple physically redundant copies of your data to protect against physical disasters.

Overview of Microsoft 365 Multi-Tenant Organizations (Preview)


Microsoft has multi-tenant organizations, a new Entra ID solution that’s available in Preview.

The multitenant organization capability is designed for organizations that own multiple Microsoft Entra tenants and want to streamline intra-organization cross-tenant collaboration in Microsoft 365. It’s built on the premise of reciprocal provisioning of B2B member users across multitenant organization tenants.

Collaboration in Microsoft 365 is built on the premise of reciprocal provisioning of B2B identities across multitenant organization tenants.

Members Not Guests

When Entra ID synchronizes accounts from a source tenant to a target tenant, it creates the entries in the target tenant as member accounts, not guest accounts. If you examine the properties of a synchronized account, you can see that the user principal name looks like a guest account but the user type is the same as a regular user account:

Side-by-side multitasking and cross-tenant notifications

With the new Teams client, users can now work across multiple tenants and accounts in side-by-side windows. They can join a meeting or collaborate in a channel hosted in another tenant, and simultaneously compose chat messages in their own tenant. Users can receive cross-tenant notifications for all accounts and tenants added to the Teams client, no matter which one is currently in focus.

Limitations for multitenant organizations in Microsoft 365 preview

The following are limitations of the multitenant organizations in Microsoft 365 preview:

  • A maximum of five tenants in the multitenant organization is supported.
  • A maximum of 100,000 users per tenant is supported.
  • Teams on the web, Microsoft Teams Rooms (MTR), and VDI/AVD aren’t supported.
  • The ability to grant or revoke permission to receive notifications from other tenants and to switch between tenants isn’t supported on mobile.
  • People in your organization links may not work for users from another tenant if their account had originally been a guest and they had previously accessed SharePoint resources.
  • It might take up to seven days for a user to appear in search once they’ve been synchronized. Contact Microsoft support if users aren’t searchable after seven days.
  • Support for a guest UserType of member in Power BI is currently in preview. For more information, see Distribute Power BI content to external guest users with Microsoft Entra B2B.

If you want to add more than five tenants or 100,000 users per tenant, contact Microsoft support.

Cross-tenant synchronization in Microsoft Teams:

  • Cross-tenant synchronization is a one-way process. This means that users from the source tenant are synchronized to the target tenant, but not the other way around.
  • Synchronized users have their own account in the target tenant. This means that they have their own profile, mailbox, and Teams chat history.
  • Synchronized users can access Teams in the target tenant. They can chat with other users, join teams, and participate in meetings.
  • Synchronized users cannot access other Microsoft 365 services in the target tenant. This is because they are not considered to be full members of the target tenant.

The basic issue here is that the original cross-tenant synchronization mechanism wasn’t tailored to support Microsoft 365 apps. The MTO (Multi-Tenant Organization) is explicitly engineered to support Microsoft 365, so it looks (from initial tests) that the use objects synchronized to another tenant a) appear in the GAL and b) are routable because their SMTP mail address is valid.

In the next post we will go deeper on how to configure MTO step by step. Stay tune for more goodies …

Microsoft Copilot App


Microsoft’s Copilot App has recently become available for Android and iOS and it brings many nice features.

  • With just one tap you can use the advanced GPT-4 model.
  • Generate pictures effortlessly with the integrated DALL-E 3, both from your gallery and directly from your smartphone camera.
  • Voice typing with Bing just got easier, and receiving spoken feedback feels more natural than ever before.
  • An AI-powered productivity tool that provides intelligent assistance so users can improve their creativity, productivity, and skills on Microsoft 365 apps like Word, Excel, PowerPoint, Outlook, Teams, and others.

Android

iOS

Enjoy Copilot–Your AI-Powered Chat Assistant on your mobile…

Next-generation AI to work, introducing to you Microsoft 365 Copilot…


Copilot is integrated into Microsoft 365 in two ways. It works alongside you, embedded in the Microsoft 365 apps you use every day like Word, Excel, PowerPoint, Outlook, Teams, and more, to unleash creativity, unlock productivity, and uplevel skills. TMicrosoft also announcing an entirely new experience: Business Chat. Business Chat works across the LLM, the Microsoft 365 apps, and your data—your calendar, emails, chats, documents, meetings, and contacts—to do things you’ve never been able to do before. You can give it natural language prompts like “tell my team how we updated the product strategy” and it will generate a status update based on the morning’s meetings, emails, and chat threads.

Recent GitHub data shows that among developers who have used GitHub Copilot, 88 percent say they are more productive, 77 percent say the tool helps them spend less time searching for information, and 74 percent say they can focus their efforts on more satisfying work.

Copilot will only query accessible data based on the controls you set up in your organization. If your organization already has the right information, access controls, and policies set up, then you’re already a step ahead!

Permissions within your Microsoft 365 tenant prevent data leakage among users, groups, and tenants. Microsoft 365 Copilot uses your existing permissions and policies to deliver the most relevant data, so obtaining good content management practices at the beginning is important. 

Be Copilot ready

Before you can access Copilot for Microsoft 365, you must meet the following requirements:

  • Microsoft 365 E3 or E5 are licensing prerequisites (For SMB Customers, Microsoft 365 Business Standard or Business Premium will be eligible base licenses).
  • a Microsoft Entra ID-based account is required
  • OneDrive Account You need to have a OneDrive account for several features within Copilot, such as saving and sharing your files. Deploy a OneDrive account.
  • New Outlook (for Windows and Mac) For seamless integration of Copilot with Outlook, you’re required to use the new Outlook (for Windows and Mac), currently in preview. You can switch to the new Outlook by selecting “Try the new Outlook” in your existing Outlook client. For more information, see Getting started with the new Outlook for Windows.
  • Microsoft Teams To use Copilot with Microsoft Teams, you must use the Teams desktop client or web client. Both current and new versions of Teams are supported. Mobile-only users have limited functionality.
  • Microsoft Loop To use Copilot in Microsoft Loop, you must have Loop enabled for your tenant. For more information on enabling Loop, see Get started with Microsoft Loop.

Protect your Copilot for Microsoft 365 data with Microsoft 365 security tools

Microsoft recommends the “just enough access” approach to addressing this situation. In this approach, each user can access only the specific information required for their job. This approach entails tightly controlling permissions so users can’t access documents, sites, or data they shouldn’t see.

Microsoft tools for securing data

Microsoft 365, Copilot for Microsoft 365, and connected services all use the policies and settings that administrators define to tighten permissions and implement “just enough access.” They do so through plugins and Microsoft Graph connectors to prevent data oversharing. The following list provides a brief summary of some of the tools that administrators can use to define these policies and settings:

  • Microsoft Purview Information Protection. Classify and optionally encrypt documents and emails based on sensitivity. You can create policies to restrict access to only authorized users.
  • Microsoft Purview sensitivity labels. Classify and label SharePoint sites, documents, and emails with sensitivity tags like “Confidential” or “Internal use only.” You can create policies to limit access to assets with specific sensitivity tags.
  • Microsoft Entra conditional access policies. Grant or restrict access to Microsoft 365 information and services, including SharePoint, based on conditions like user location, device, or network. These policies are useful for limiting access when the system detects risks or user credentials become compromised.
  • Microsoft Entra Privileged Identity Management (PIM). Provide just-in-time admin access, enforce the principle of least privilege, and limit permanent standing privileges by only granting a user the permissions they need when needed.
  • SharePoint site access reviews. Require and automate access reviews of site owners, members, and access requests, to revoke permissions that users don’t need or no longer require. Access reviews ensure users only retain the access they need for their role.
  • Microsoft Graph connectors and plugins. Limit access to connected external data using Microsoft Graph connectors or plugins.

There 18 Microsoft 365 Copilot versions, we will go in deep later on on this series….To be continue, stay tune

External sender callouts on email in Outlook


It is important to provide mechanisms for users to help them identify potential phishing emails. One way to do this is by giving users a way to distinguish emails from senders outside the organisation. Typically, this is accomplished by using a Exchange transport rules to prepend subject line or insert the message body to show the email is from external senders. This can cause several issues, including multiple tags in the subject, broken conversation threads, lack of localisation, and the handling of S/MIME-encrypted or ‑signed emails. Instead, Exchange Online can tag emails from external senders so that the Outlook client will display the [External] tag in the message list and a warning in the info bar when reading a message.

To set this up

  1. Exchange Online tenant admin will need to run the cmdlet Set-ExternalInOutlook to enable the new user interface for the whole tenant (this is available now); adding certain emails and domains to the allow list via the cmdlet is also possible.
  2. Outlook on the web already supports this. Outlook Mobile (iOS & Android) and Outlook for Mac are rolling out this feature. Specific versions:
    • Outlook on the web: available now
    • Outlook for Windows: Update 10/6/23: This feature is now available in Semi-Annual Enterprise Channel (Preview) too. External Tag view in Outlook for Windows (matching other clients) released to production for Current Channel and Monthly Enterprise Channel in Version 2211 for builds 15831.20190 and higher. We anticipate the External tag to reach Semi-Annual Preview Channel with Version 2308 on the September 12th 2023 public update and reach Semi-Annual Enterprise Channel with Version 2308 with the January 9th 2024 public update.  If any of the versions or dates change we will update this topic. See Update history for Microsoft 365 Apps (listed by date) to see release status of versions.
    • Outlook mobile (iOS & Android): version 4.2111.0 and higher
    • New Outlook for Mac: version 16.47 and higher

If you are using the prepend subject line transport rules currently to add an [EXTERNAL] tag in external email subject line: the new Outlook native callouts are adding a new MAPI property called IsExternalSender to the email item. Once all the (above listed) client versions you require have this functionality, to avoid emails being marked ‘External’ twice (once by new native functionality and once by the transport rule), please turn off the transport rule first before turning on Outlook native external sender callouts.

Microsoft tracked this feature in Microsoft 365 Roadmap ID 70595. This feature can be enabled on the tenant level now.

Enable tagging of emails from external senders by running the follow command:
# Connect to Exchange Online
Connect-ExchangeOnline

# Use the Set-ExternalInOutlook cmdlet to modify the configuration of external sender identification
Set-ExternalInOutlook -Enabled $true

# This example prevents the specified email addresses from receiving the External icon in the area of the subject line in supported versions of Outlook.
Set-ExternalInOutlook -AllowList admin@fabrikam.com,admin@fourthcoffee.com

# This example adds and removes the specified email addresses from the exception list without affecting other existing entries.

Set-ExternalInOutlook -AllowList @{Add=“admin@cohovineyard.com”;Remove=“admin@fourthcoffee.com”}

Outlook Desktop

Outlook Mobile

Once this feature is enabled via PowerShell, it might take 24-48 hours for your users to start seeing the External sender tag in email messages received from external sources (outside of your organization), providing their Outlook version supports it. If enabling this, you might want to notify your users about the new feature and update your training and documentation, as appropriate.

Meet Exchange Server 2016


Meet Exchange Server 2016

Get a first look at Exchange Server 2016, the on-premises release that we plan to ship in the second half of this year. Come learn about the innovation in Exchange Server 2016 that will help you keep up with evolving requirements for user productivity and information protection. This session will give you the starting point who want to know what’s coming from on-premises Exchange.

Meet Exchange Server 2016
http://channel9.msdn.com/Events/Ignite/2015/FND2204

How to create Transport Rules in Exchange Online and Outlook Rules and the difference


Using Transport rules, you can look for specific conditions in messages that pass through your organization and take action on them. Transport rules let you apply messaging policies to email messages, secure messages, protect messaging systems, and prevent information leakage.

Many organizations today are required by law, regulatory requirements, or company policies to apply messaging policies that limit the interaction between recipients and senders, both inside and outside the organization. In addition to limiting interactions among individuals, departmental groups inside the organization, and entities outside the organization, some organizations are also subject to the following messaging policy requirements:

  • Preventing inappropriate content from entering or leaving the organization

  • Filtering confidential organization information

  • Tracking or archiving copying messages that are sent to or received from specific individuals

  • Redirecting inbound and outbound messages for inspection before delivery

  • Applying disclaimers to messages as they pass through the organization

Overview of Transport rules
Transport rules are similar to the Inbox rules that are available in many email clients. The main difference between Transport rules and rules you would set up in a client application such as Outlook is that Transport rules take action on messages while they’re in transit as opposed to after the message is delivered. Transport rules also contain a richer set of conditions, exceptions, and actions, which provides you with the flexibility to create a customized rule. You can create up to 100 Transport rules in order to implement your business-rule compliance.

The following list summarizes the basic workflow for Transport rules:

  1. You create Transport rules to meet your business needs.

  2. As messages go through your organization, the Transport rules agent is invoked. The Transport rules agent is a special component that checks messages against the Transport rules you create.

  3. The Transport rules agent scans the message, and if the message fits the conditions you specify in a Transport rule, it takes the specified action on that message.

Transport rule components

Transport rules consist of the following components:

  • Conditions   Use Transport rule conditions to specify the characteristics of messages to which you want to apply a Transport rule action. Conditions consist of one or more predicates that specify the parts of a message that should be examined. Some predicates examine message fields or headers, such as the To, From, or Cc fields. Other predicates examine message characteristics such as message subject, body, attachments, message size, and message classification. Most predicates require that you specify a comparison operator, such as equals, doesn’t equal, or contains, and a value to match.

  • Exceptions Exceptions are based on the same predicates used to build Transport rule conditions. However, unlike conditions, exceptions identify messages to which Transport rule actions shouldn’t be applied. Exceptions override conditions and prevent actions from being applied to an email message, even if the message matches all configured conditions.

  • Actions Actions are applied to messages that match the conditions and don’t match any exceptions defined in the Transport rule. Transport rules have many actions available, such as rejecting, deleting, or redirecting messages, adding additional recipients, adding prefixes in the message subject, or inserting disclaimers in the message body.

For a complete list of Transport rule predicates, see Transport Rule Predicates. The list of predicates is also available in the Transport rule dialog in the EAC. If you use the Shell, you can retrieve the list of predicates by using the Get-TransportRulePredicate cmdlet.

For a complete list of Transport rule actions available, see Transport Rule Actions. The list of actions is also available in the Transport rule dialog box in the EAC. If you use the Shell, you can retrieve the list of actions by using the Get-TransportRuleAction cmdlet.

To create Transport Rules in Office 365, first must log into Office 365portal https://portal.microsoftonline.com/default.aspx and go to the following location:

  1. Go to Admin and choose Exchange

Image_1

2.  Navigate to Mail Flow (from the left site) and choose Rules

clip_image002

This is where any and all transport rules can be created and applied

Once you are in the rules area of the O365 portal, you perform the following:

1. Press the + sign and then select Create a new rule

Image_2

2. Choose a name for this rule and choose the rule for your condition (depends what you want to achieve)
3. Choose the option that apply for your condition and after you finished click on Save

Image_3

4. Now, this rule is ready to be applied to all emails coming through your Office 365 tenant.

For comprehensive information on Transport Rules as a whole, refer to the following link: http://technet.microsoft.com/en-us/library/dd351127(v=exchg.150).aspx

Outlook Rules
A rule is an action that Microsoft Outlook runs automatically on incoming or outgoing messages, based on conditions that you have specified.

Rules help reduce manually filing or taking the same action when a similar message arrives. Unlike Quick Steps, rules typically are always on and run automatically. For example, when a message is received from a specified person, it’s automatically moved to the folder that you designate.

The Rules Wizard helps you design rules to manage messages. Rules fall into one of two categories — organization and notification.

ZA104018600

The Rules Wizard includes templates for the most frequently used rules, which include the following:

Stay Organized    These rules help you file and follow up on messages. For example, you can create a rule for messages from a specific sender, such as Anne Weiler, with the word “sales” in the Subject line, to be flagged for follow-up, categorized as Sales, and moved to a folder named Anne’s Sales.

Stay Up to Date    These rules notify you in some way when you receive a particular message. For example, you can create a rule that automatically sends a message to a mobile device when you receive a message from a family member.

Start from a blank rule    These are rules that you create without the aid of a rule template and that you can completely customize.

Create a rule

Outlook includes rule templates for common scenarios. Use these rule templates, or create design your own custom rules.

1. Click the File tab, click Manage Rules & Alerts

Image_4

2. In the Rules and Alerts dialog box, on the E-mail Rules tab, click New Rule
3. Follow the wizard and at the end click Finish

Image_5

Additional Information:
Manage email messages by using rules
http://office.microsoft.com/en-us/outlook-help/manage-email-messages-by-using-rules-HA102749402.aspx